Raspberry Pi for Gaming – The Light Weight Retro Console
For those of you looking for a cheap dedicated arcade/console PC consider the Raspberry Pi for gaming. It is a credit card sized integrated PC board that has USB port, LAN connection, and SD card port. You can get an entire setup for around $80 that includes all the accessories plus a couple gamepads. It will handle many emulators and has a considerably good looking frontend interface for arcade games. I would go bigger if you are doing a full size arcade machine as I discuss in my “How to Build an Arcade blog“. If you want essentially a small footprint console machine that can play a majority of the late 80s, early 90s console games on some gamepads than this may be your ticket.
Video Preview
We also just released our first CNC Bartop Arcade Kit if you need a cabinet. It goes together via camlock system with just a philips screwdriver. You can even get custom graphics!

Where can I get it?
Like anything, I have found Amazon has the best price and shipping with accessory kit.
This kit will get you everything you need to get started on this awesome project. The B+ version simply has 4 USB ports and uses a micro sd card instead of the older B version that had 2 USB ports and utilized a full size SD card.
The newly released pi 2 has a quad core with 1gb memory. I would suggest this model.
The SD card size needed depends on how many emulators you plan to run. The operating system takes up 4 gb. Nes, SNES, and Sega Genesis will take up another 4gb. If you plan to run more than that I would consider a larger card based on your needs.
Shop MicroSD cards at Amazon
What can it do?
The system can support emulators for the following systems:
- Amiga (UAE4ALL)
- Apple II (LinApple)
- Atari 800 (Atari800)
- Atari 2600 (RetroArch/Stella)
- Atari ST/STE/TT/Falcon (Hatari)
- Apple Macintosh (Basilisk II)
- C64 (VICE)
- Amstrad CPC (#CPC4Rpi)
- Final Burn Alpha (RetroArch/PiFBA, RetroArch/FBA)
- Game Boy (RetroArch/Gambatte)
- Game Boy Advance (GpSP)
- Game Boy Color (RetroArch/Gambatte)
- Sega Game Gear (Osmose)
- Intellivision (jzIntv)
- MAME (RetroArch/mame4all-pi, RetroArch/mame4all)
- MSX (openMSX)
- PC – x86 (rpix86)
- NeoGeo (PiFBA, GnGeo)
- Nintendo Entertainment System (RetroArch/FCEUmm)
- Nintendo 64 (Mupen64Plus-RPi)
- TurboGrafx 16 – PC Engine (RetroArch/Mednafen/pce_fast)
- Ports
– CaveStory (RetroArch/NXEngine)
– Doom (RetroArch/PrBoom)
– Duke Nukem 3D (eDuke) - ScummVM
- Sega Master System / Mark III (RetroArch/Picodrive, Osmose, DGen)
- Sega Mega Drive / Genesis (RetroArch/Picodrive, DGen)
- Sega Mega-CD / CD (RetroArch/Picodrive, DGen)
- Sega 32X (RetroArch/Picodrive, DGen)
- Playstation 1 (RetroArch/PCSX ReARMed)
- Super Nintendo Entertainment System (RetroArch/Pocket SNES, snes9x-rpi)
- Sinclair ZX Spectrum (Fuse, FBZX)
It also supports the frontend known as Emulation Station. You can learn more about different parts of how arcade software pieces work together in our “How to Build an Arcade blog”
A couple things to consider. What are the main systems you want to play? Nintendo, Sega, etc. What type of controls do you want?
For Arcade Style Gaming check out our ready to go control panel bundles!
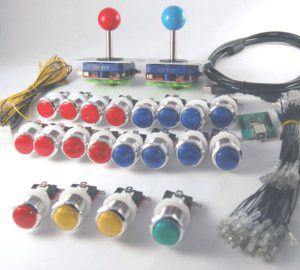
Some options for a Console Type Gaming
These are a great option if you want to have a similar feel to the actual console.
Setup
I set this up a couple years ago and it was a real pain in the ass. They have greatly automated and improved it, but there are still a few steps. This process will be the quickest way to get it going. I still have found most other blogs and posts are severely out of date with the older manual way to set this up. Hopefully this helps you get playing quick.
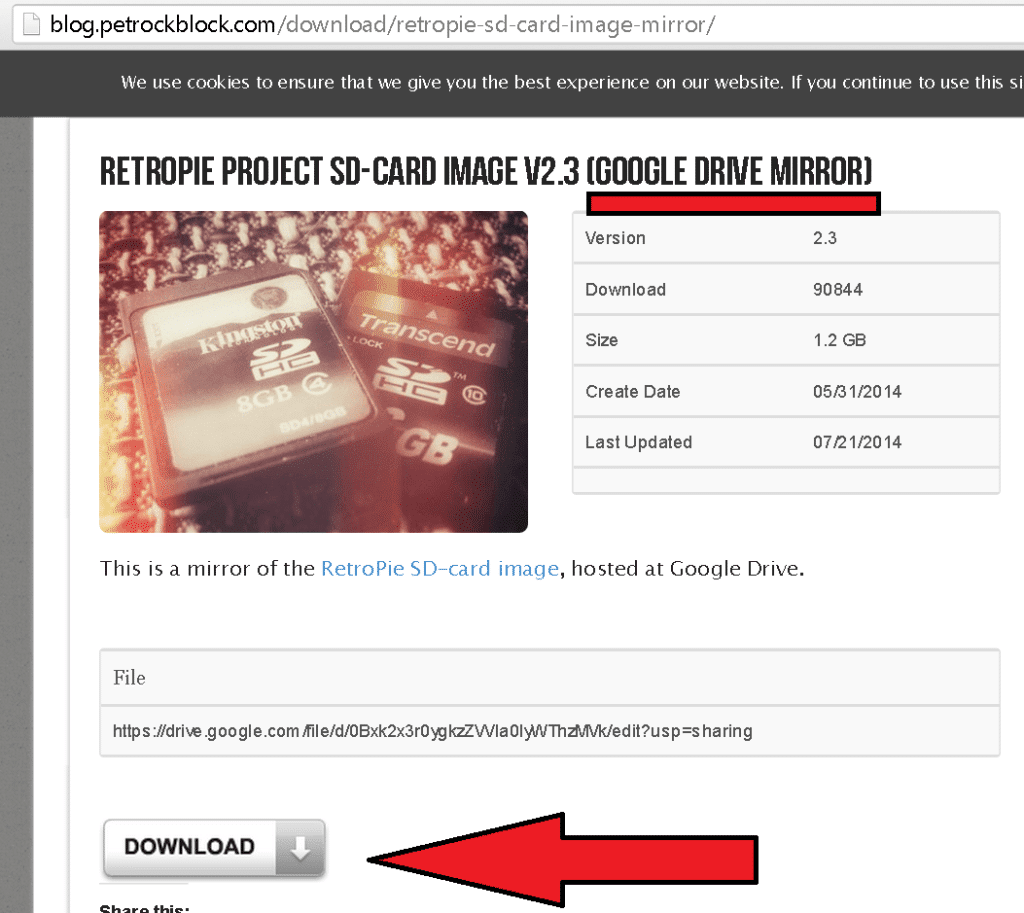
RetroPie Image File
RetroPie is essentially an image file you can put on your sd card that comes ready to go. It has all the emulators listed above pre-installed along with the frontend Emulation Station. It will save you a ton of time. So grab that image here.
I found the Google drive mirror in that link downloads the fasts. The file is 1.2gb compressed and like 3.4gb uncompressed.
Go ahead and extract the image file so you have the iso file ready.
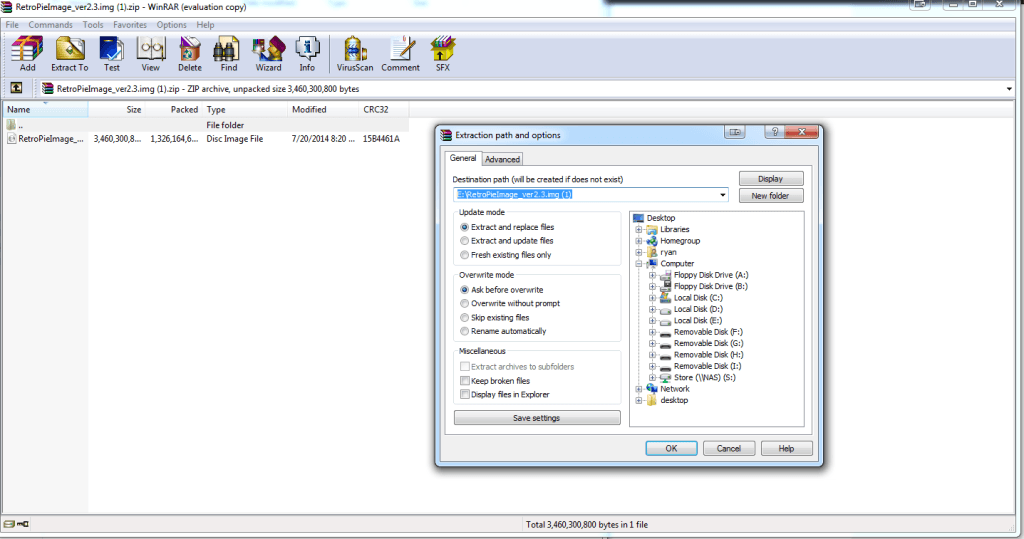
Here is what the iso file will look like

Now we need to image the sd card using a free program called Win32 Disk Imager. Install the program, insert you SD card into your PC, and then open the program.
You will need to push the folder icon and select the iso image you extracted. Then select the drive letter of your SD card.

Press Write and it will take a few minutes for the program to image the device. Once it is done remove the SD card from the computer.
Raspberry Pi Setup
Don’t get overwhelmed here if you are not familiar with Linux or command line. There is very little and this guide will walk you through step by step.
Insert the SD card into the raspberry pi along with your keyboard (wired or wireless is fine as long as it is USB). You need network for this so please connect the Ethernet as well. Power it up.
The initial boot will go ahead and boot Emulation Station all the way. This is fine, but we have some things to do first before we start playing. Once it is fully booted press “F4” on your keyboard to exit out of Emulation Station and to the command line.

Let’s go ahead and update the raspberry pi firmware if it is available.
Type “sudo rpi-update” without the quotes and press enter
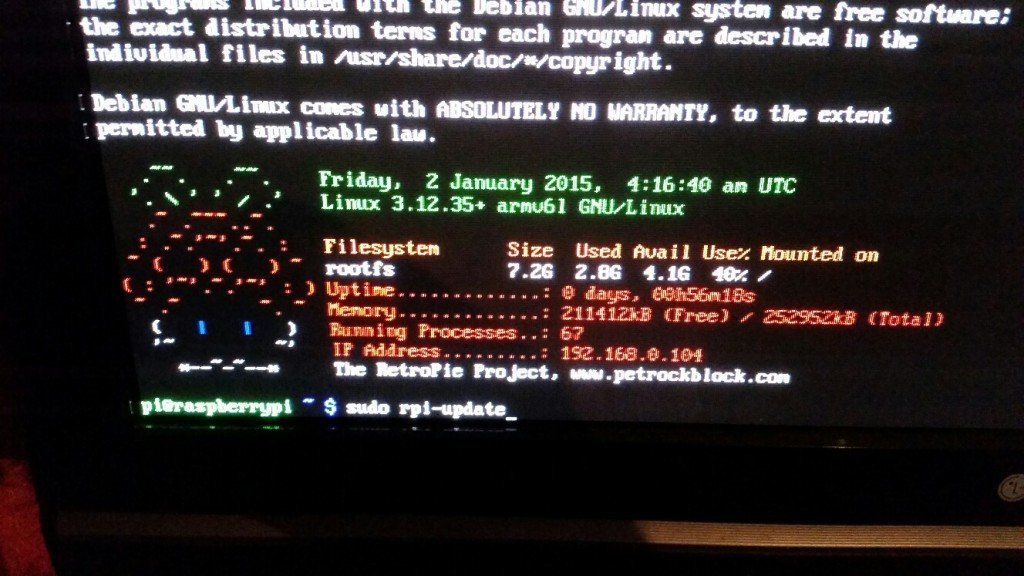
It will update or tell you if you are on the newest version
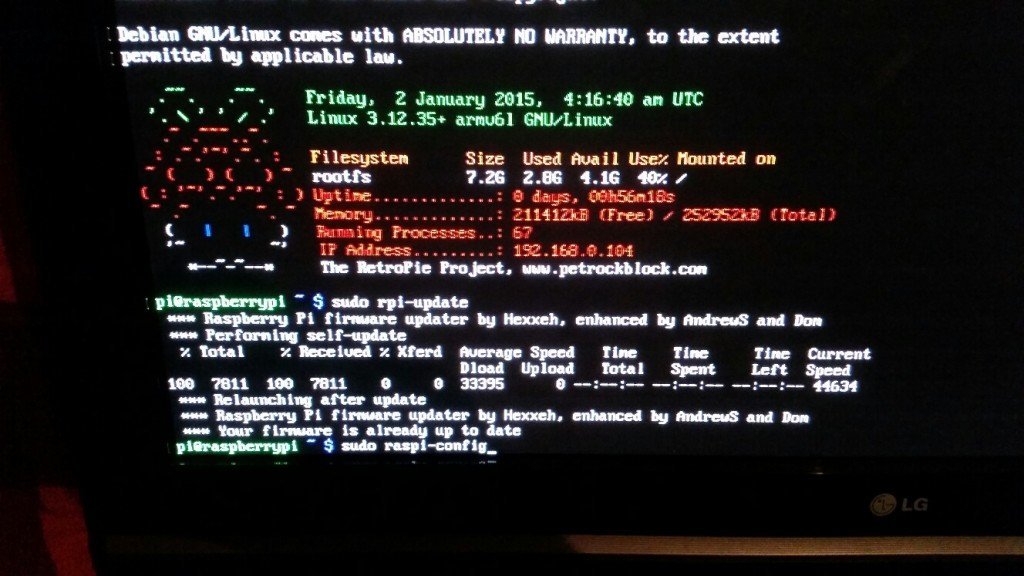
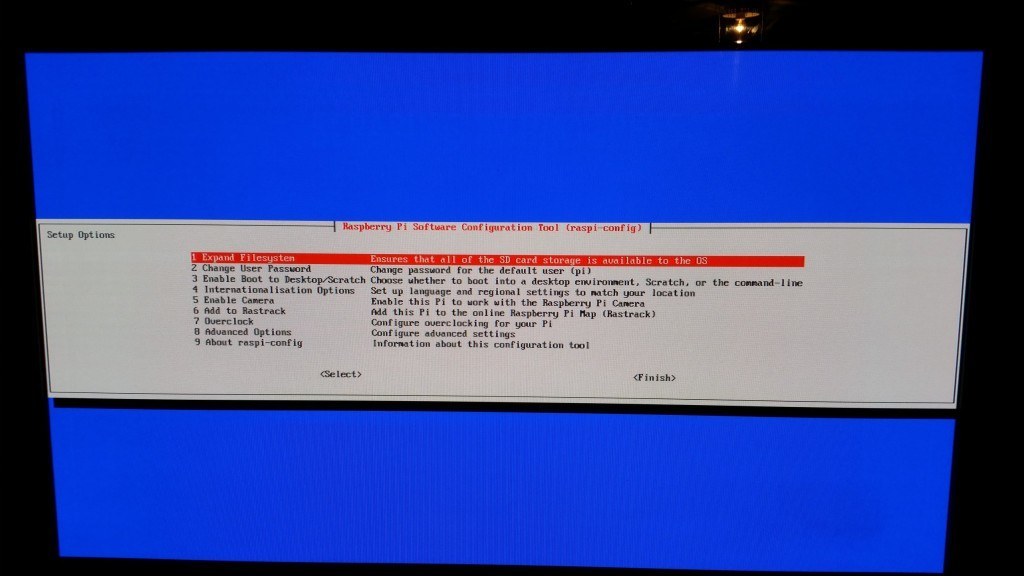
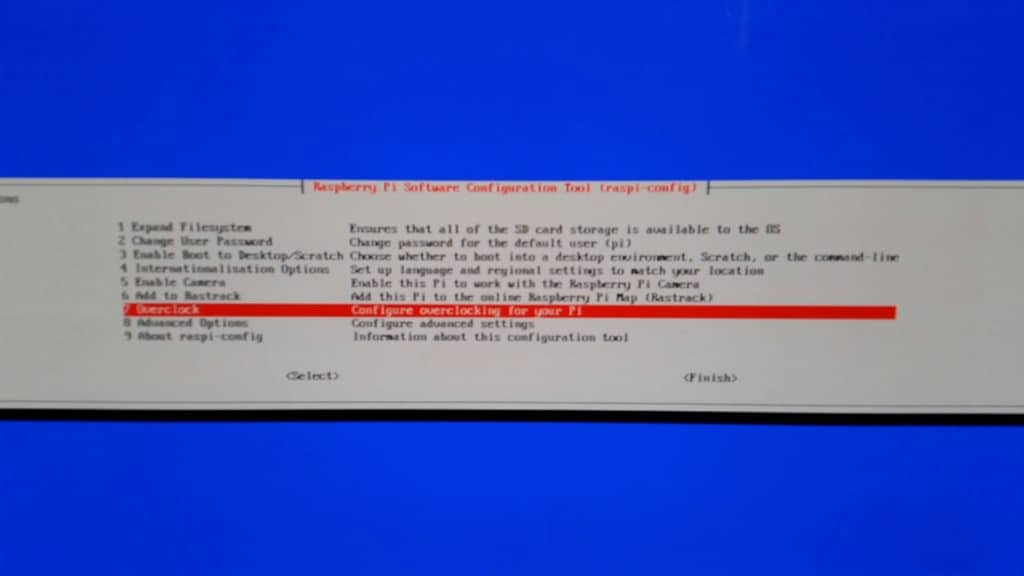
Now let’s go into the retropie configuration by typing in “sudo raspi-config” without the quotes and press enter

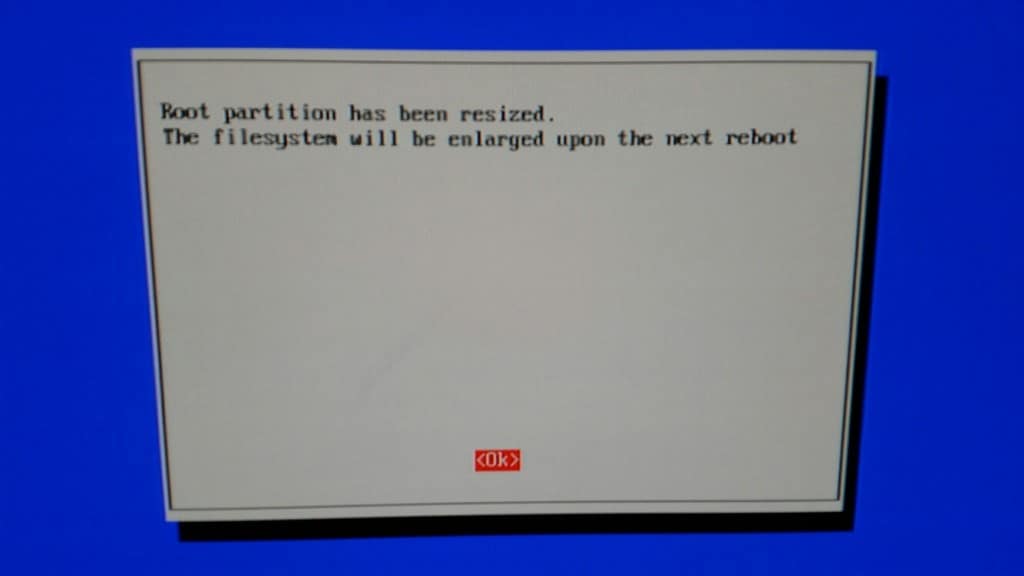
Here is what the configuration screen looks like. Hit enter on option 1 to Expand the File System. This will ensure you get all the space available on your SD card. This is a very important step.
It will show success
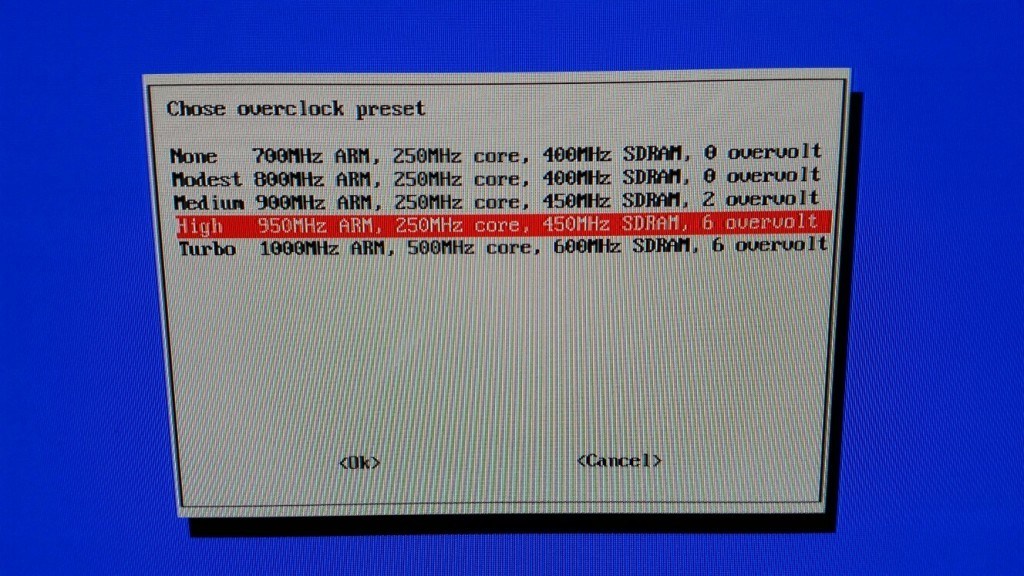
Next go to option 7 for overclock so we can speed up the pie
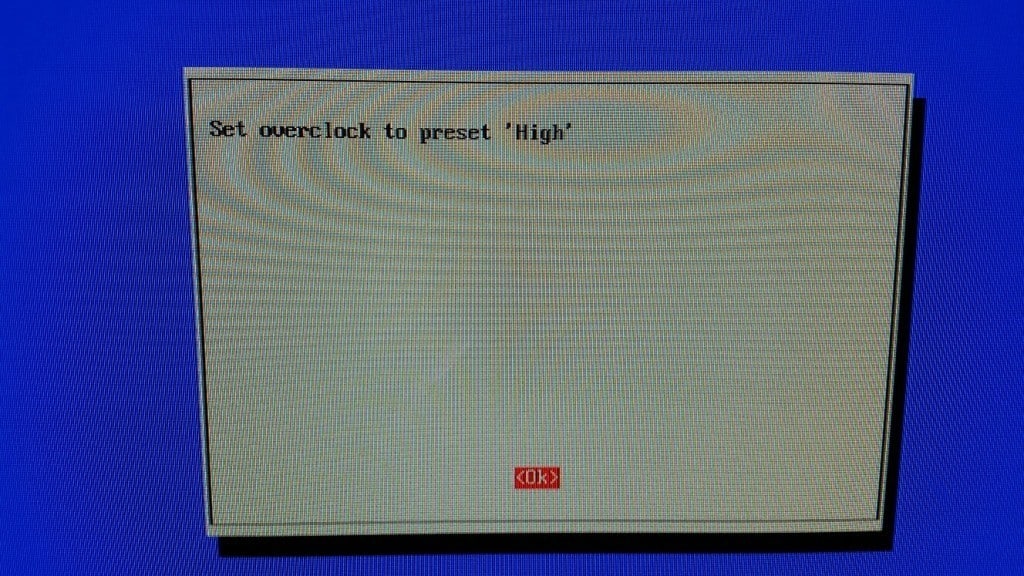
I set it to high and press enter.
It will show you success.
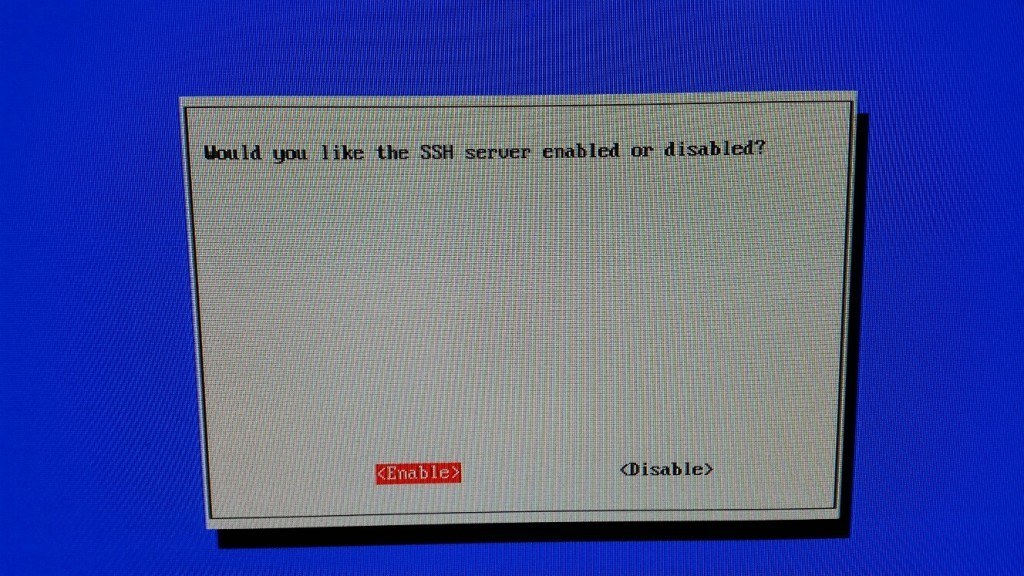
Next go to option 8 for advanced options then to option A4 for SSH
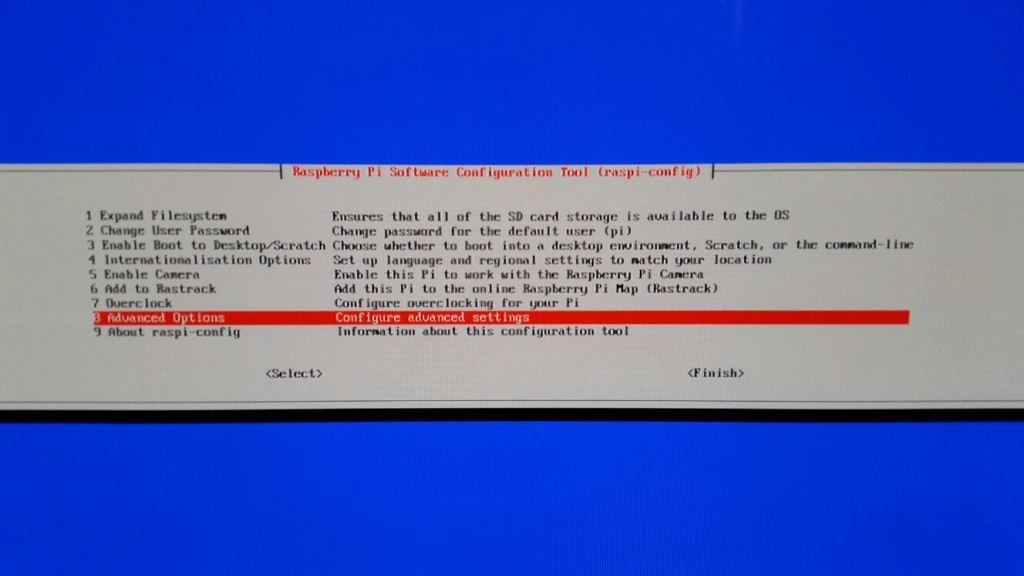
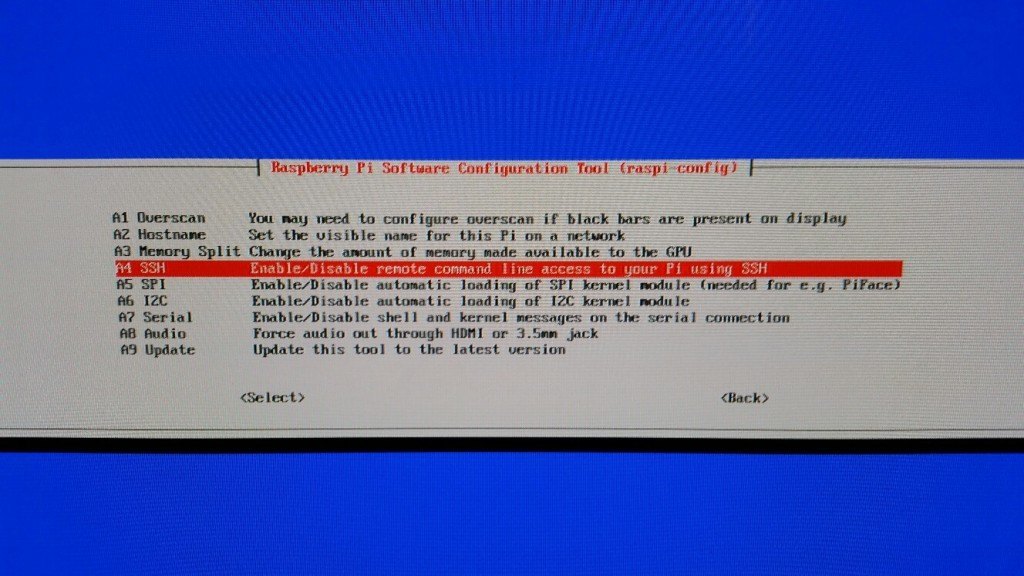
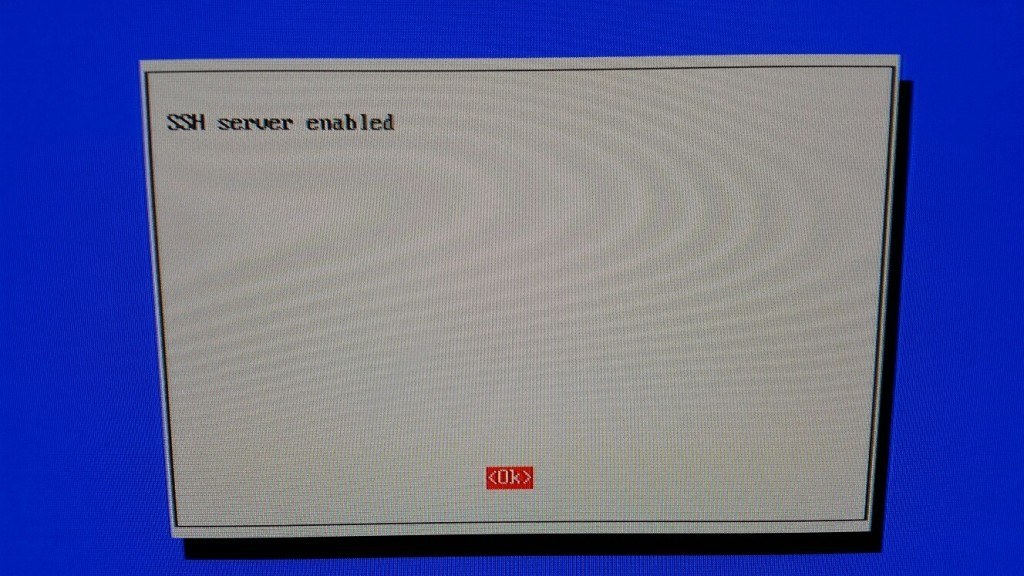
Enable SSH as that will allow us to copy games to our system later
Success
On the Audio Settings highlight HDMI and press enter

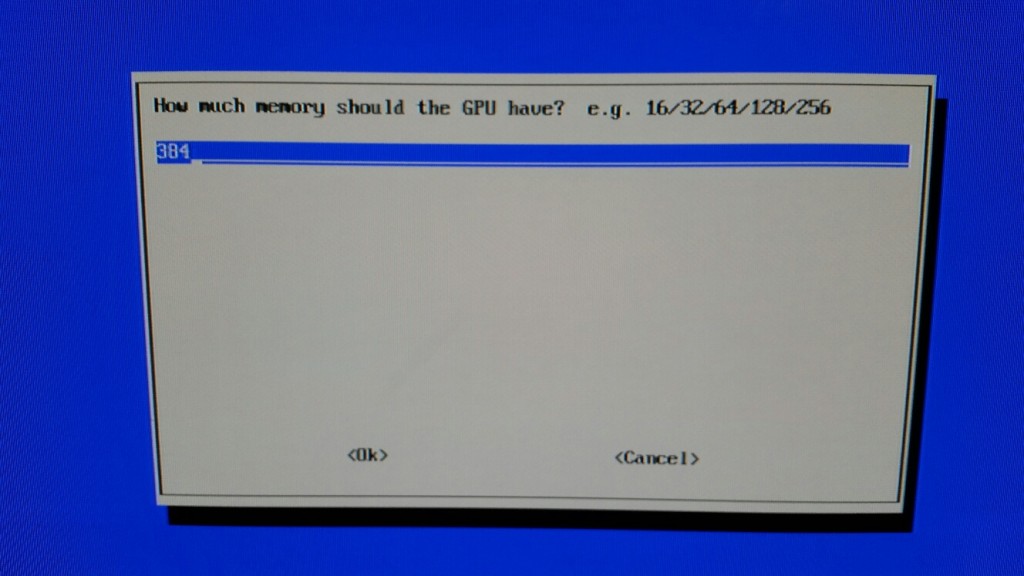
Memory Split change the number to 384
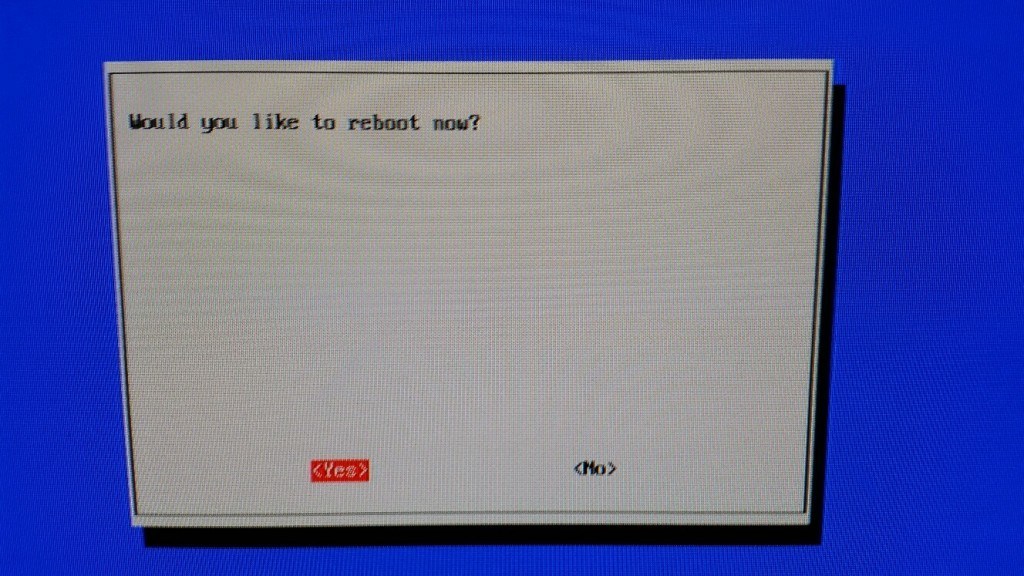
We are done with the CMD line and configuration for now. Hit finish and reboot.
Copying Games to Emulation Station
The system is playable, but too bad you don’t have anything play yet. Let’s get your games “rom files” transferred over to your raspberry pi. We will use WinSCP to transfer the game files. You can use CyberDuck for Mac.
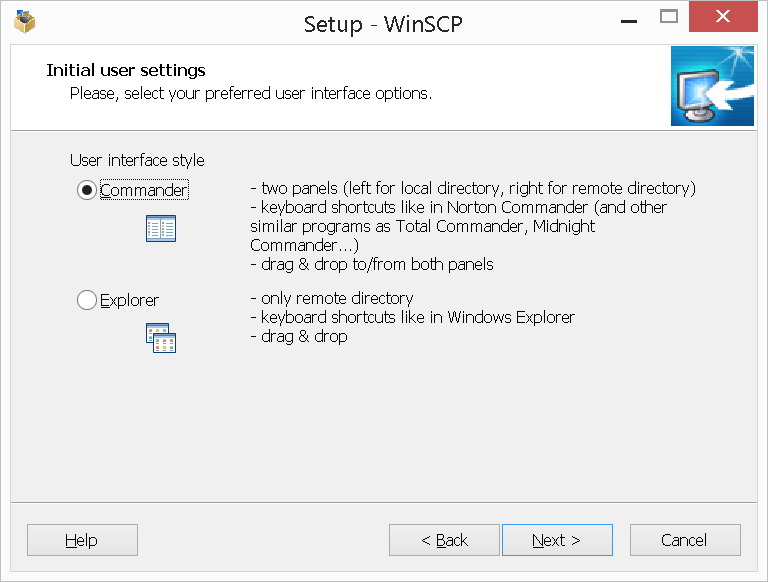
Just do the basic installation. I would do the Commander view when it asks you for that in the installation.
Go ahead and launch upon installation finish or after it installs.
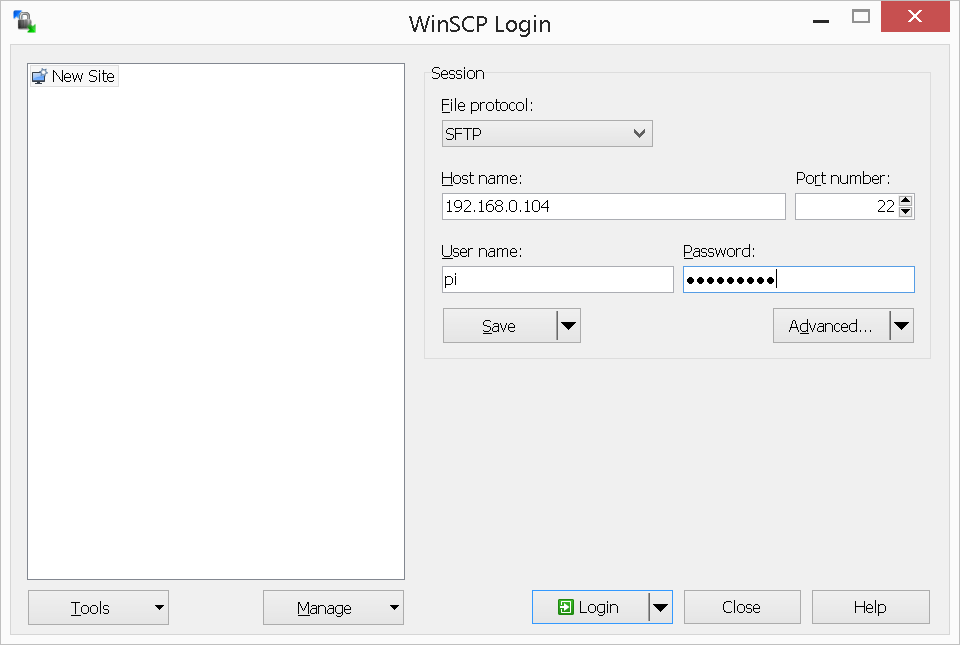
- Enter the ip address of your raspberry pi (press “F4” on the raspberry pi and the cmdline welcome screen will give the ip address to you)
- Username is “pi” without quotes
- Password is “raspberry” without quotes
- SFTP for connection type is fine
- Click log in and yes to any prompts
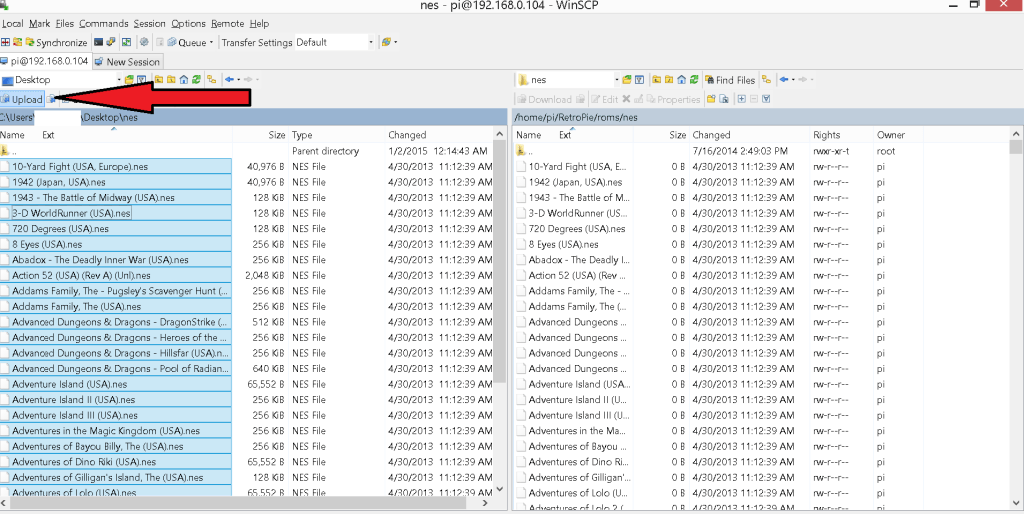
Now you are ready to transfer or upload game files to the raspberry pi. On the right is your raspberry pi setup. Navigate by clicking on the folders RetroPie -> roms. You will see the available systems.

Choose the folder of the system you want to transfer the games to.
NOTE: THE SYSTEM WILL NOT SHOW UP IN EMULATION STATION UNLESS THERE IS AT LEAST 1 ROM IN THE SYSTEM’S ROM FOLDER
For this example we will do nes games, but the process is the same.
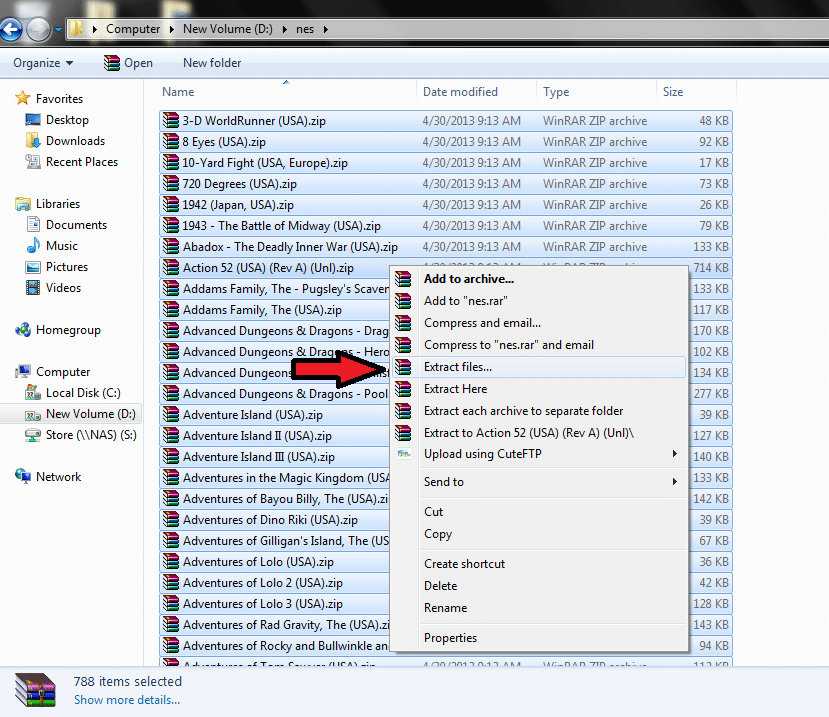
Find you local folder that contains the nes “game” rom files. NOTE: THE ROM FILES CANNOT BE ZIPPED. Other frontends are fine with zip files, but they will not be recognized in emulation station. If you want to unzip all in 1 action. Ctrl A to select all of them and right click. With Winrar installed you can press “Extract Files”. All will extract in one folder.
Here is the output of .nes rom files.

Select that folder on the left side of WinSCP and press upload making sure you are in the nes folder (in this example) to transfer the games.
You will repeat this process for all the system you want to add to emulation station.
Controller Setup
Here is a video on how to setup a wired Xbox 360 Controller and it works for the afterglow as well. If you want to setup a XinMo USB encoder for actual arcade controls like in our control panel bundles, please read the steps below as it is a little bit different process.
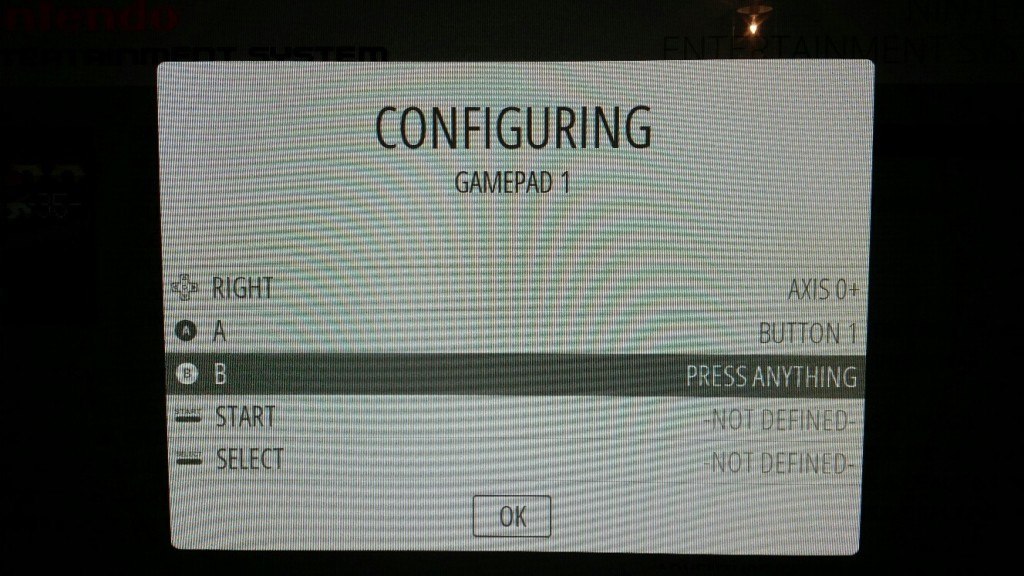
Go ahead and plug in the USBs on your controllers and boot the raspberry pi. When it boots it will recognize your gamepads and help you automatically configure them for the frontend. Simply follow the prompts of holding down a button on player 1. Then press on the gamepad what the prompts as you (up, down, left, right, a, b, select, start, etc). Do the same thing for player two. You can also reconfigure gamepads at any time by going into the main menu and controller input.

Unfortunately above only configures the frontend controls, not the emulators. What this means is you can navigate the menus, but will not be able to play any games yet. We have some work to do to get the controls setup.
Note: For the XinMo USB encoders only. You need to do a custom kernel update to correct an autofire setting and so both players show up. Download the 100mb Kernel file here. Using WinSCP as you did above for adding games you need to copy the kernel file to your raspberry pi.
Once it is copied over, let’s install it by F4 to terminal on your pi and entering the following commands.
- cd into the folder your copied the kernel into then,
- tar -xf custom_kernel_1.20150317-1.tar.gz
- cd custom_kernel_1.20150317-1
- sudo ./install.sh
You can test that everything is working by entering the following commands
- sudo apt-get install joystick
- jstest /dev/input/js0
This will let you press buttons and joysticks and make sure they are what you expect.
Once it installs you are all set to continue below. If you have any issues FeederChain is the man that so graciously created this kernel and you can see the most up to date forum post here.
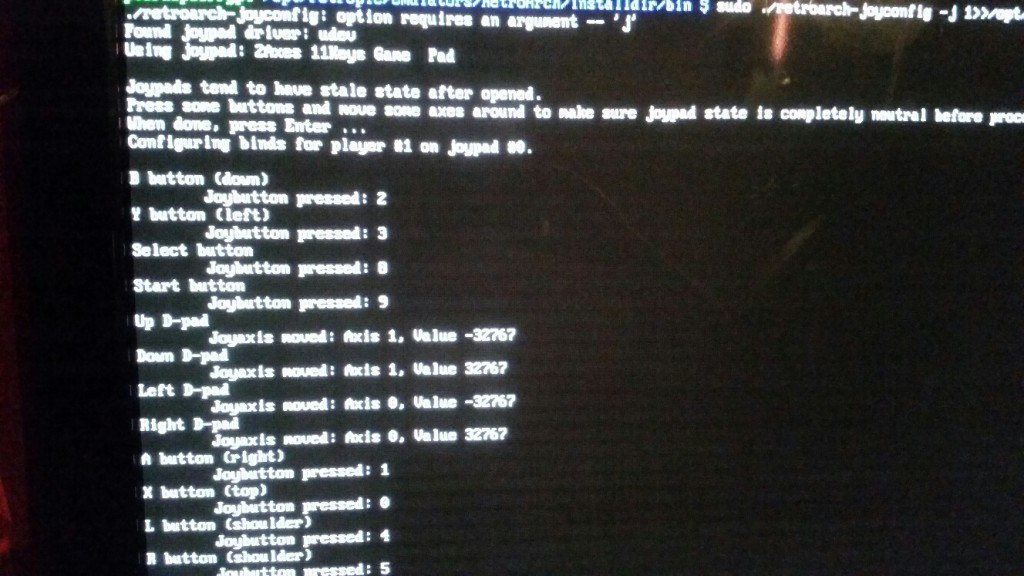
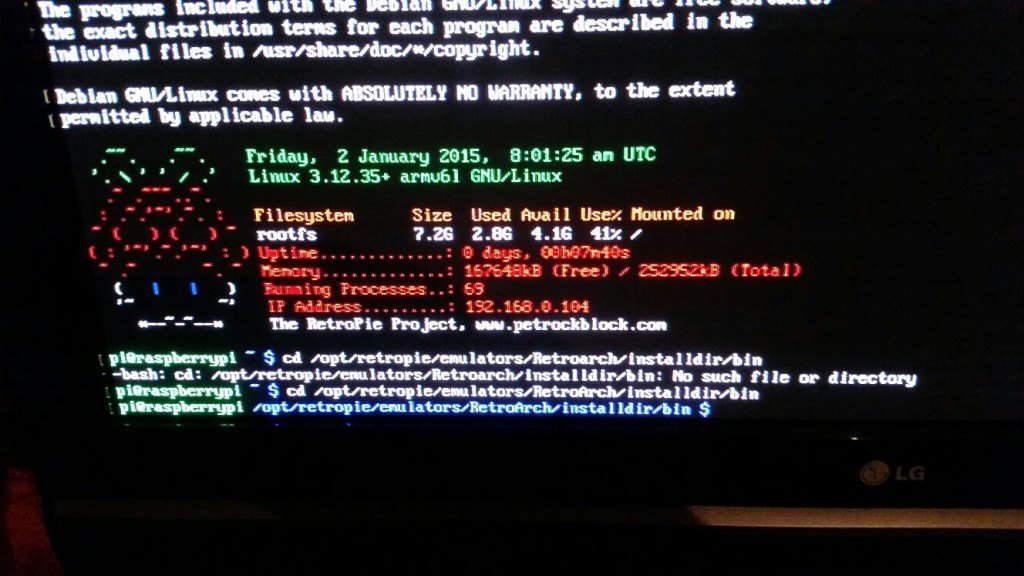
First thing we have to do is setup the 1 player controller on the raspberry pi. On the raspberry pie press “F4” key to get back to the command prompt. The text below is a sample of the snes USB controller. Watch the video for the xbox 360 controller setup.
SNES USB
Type in the following 2 lines one by one pressing enter after each one.
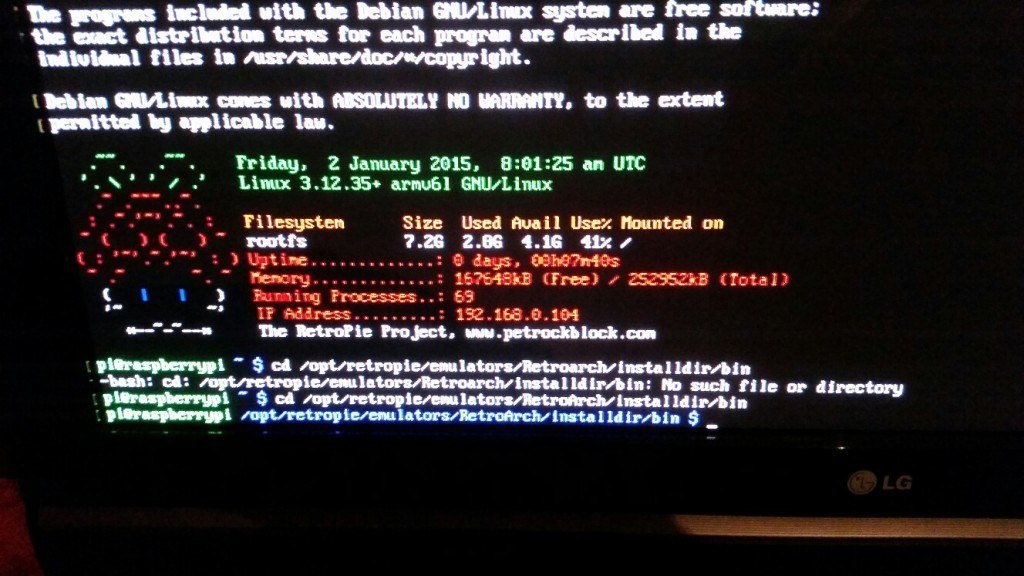
cd /opt/retropie/emulators/RetroArch/installdir/bin
sudo ./retroarch-joyconfig -j 0 >> /opt/retropie/configs/all/retroarch.cfg
FYI the -j 0 is a zero not the letter o
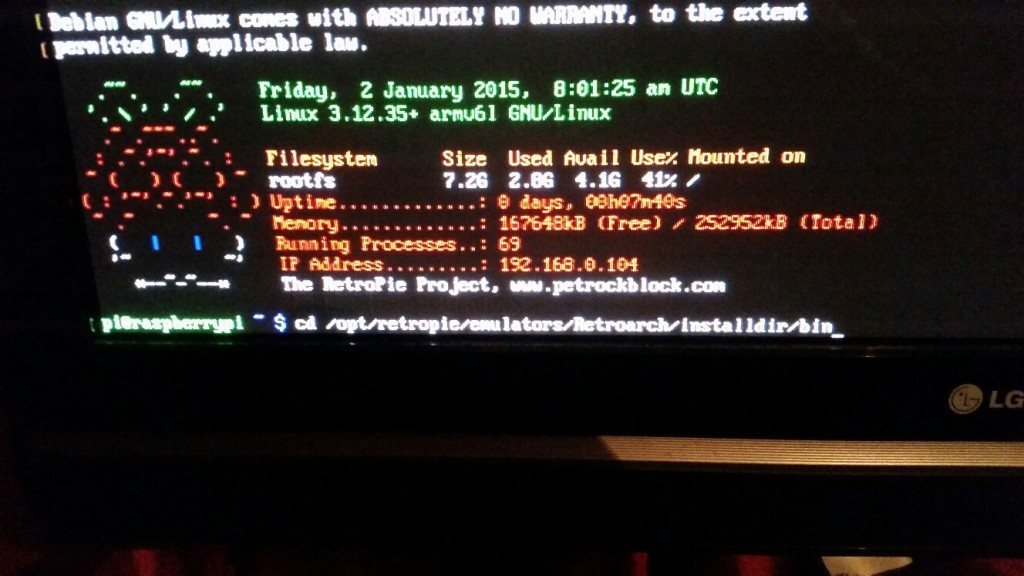 Capitalization and spacing does count.
It will prompt you to press enter on the keyboard and configure your controller. Like we did in emulation station press enter and then the corresponding controls on your gamepad as it prompts you.
Congrats. You can now play games in the emulators. Our victory is sweet, but short. There are a few more steps to finish off the controls.
We need to go back to our pc and again open WINSCP. Connect to the raspberry pi as before. Once connected you will need to change to the “root” directory in at the top. Then follow the folders to /opt/retropie/configs/all/
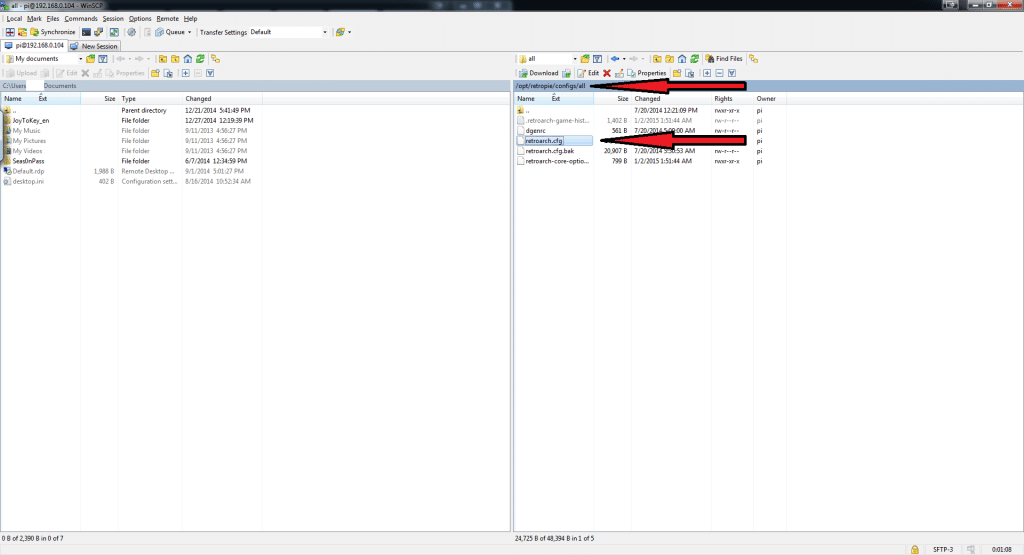
In that folder you will see a file called retroarch.cfg. Download that to your PC as we have to make some modifications and additions.
The easiest way to modify this file is with a program called Notepad++. Do not use normal notepad as it will be too jumbled (yes, even with word wrap turned on). Once you have installed NotePad++ launch it and open the retroarch.cfg file you downloaded to your machine.
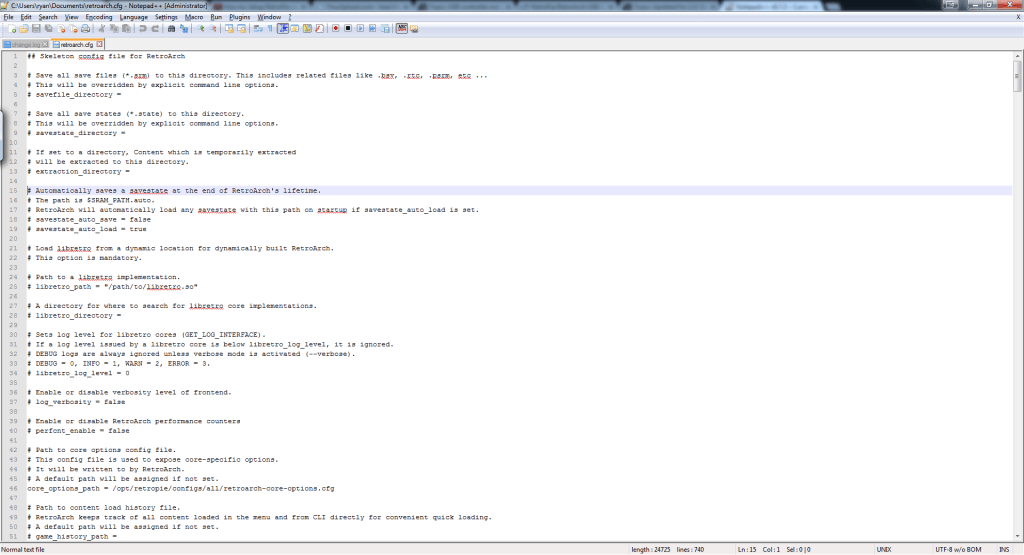
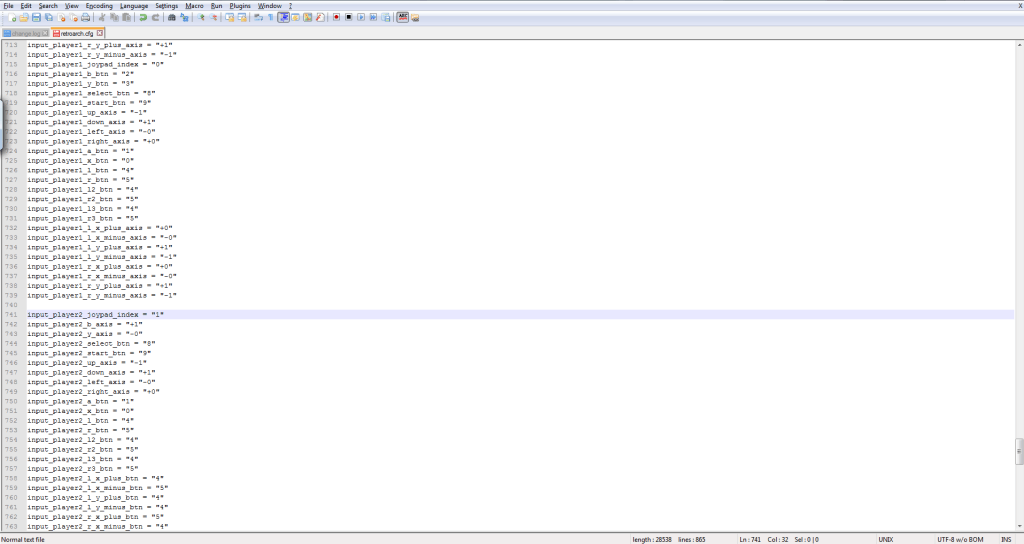
Once in there at the bottom you will find a long section with a bunch of entries that begin with “input_player1_”. Copy that entire section and paste a copy below that section.
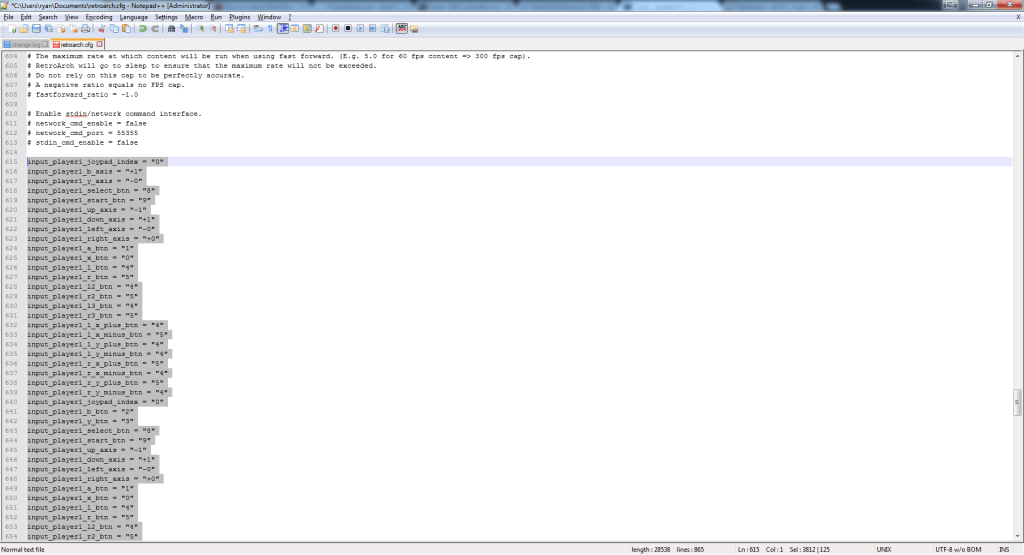
We are going to modify the newly copied section ONLY by changing the “input_player1” to “input_player2_” The easiest way to do this is to press ctrl f to bring up the find window. Click the replace tab and put the “input_player1” in the find and “input_player2_” in the replace. DO NOT REPLACE ALL. Hit find next and stop when you get to the first entry of the copied section you did. Start replacing them one by one until you are at the bottom of the file.

Go to the top of the section you just did and change the “input_player_joypad_index” to 1 (this should allow us for 2 players)
Almost there!
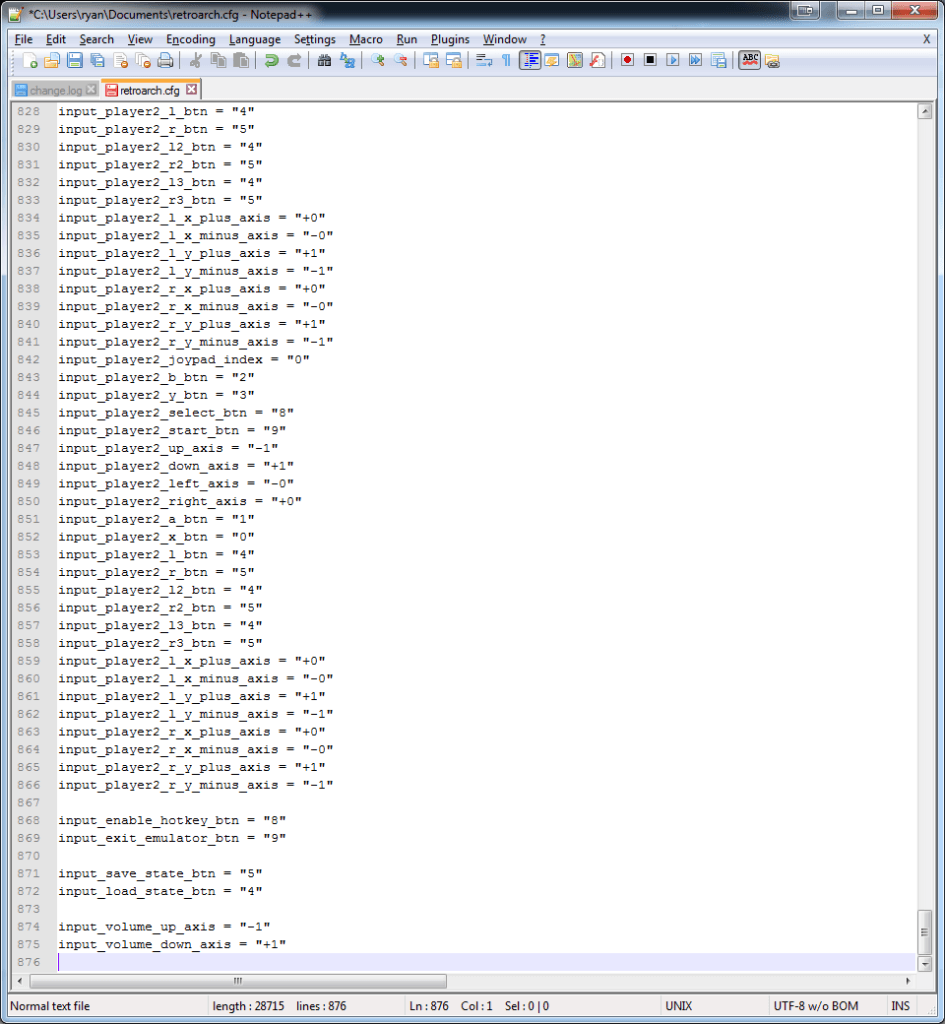
We want to add a few lines to make life better when playing games. Add the following to the end of the file.
input_enable_hotkey_btn = “8”
input_exit_emulator_btn = “9”
input_save_state_btn = “5”
input_load_state_btn = “4”
input_volume_up_axis = “-1”
input_volume_down_axis = “+1”
And save the file.
What those last lines will do
- Allow you to exit the game by holding down select button then pressing start
- Allow you to save the game by holding down select button then pressing right paddle
- Allow you to load the game by holding down select button then pressing left paddle
- Allow you to turn up the volume by holding down select button then pressing up on the directional pad
- Allow you to turn down the volume by holding down select button then pressing down on the directional pad
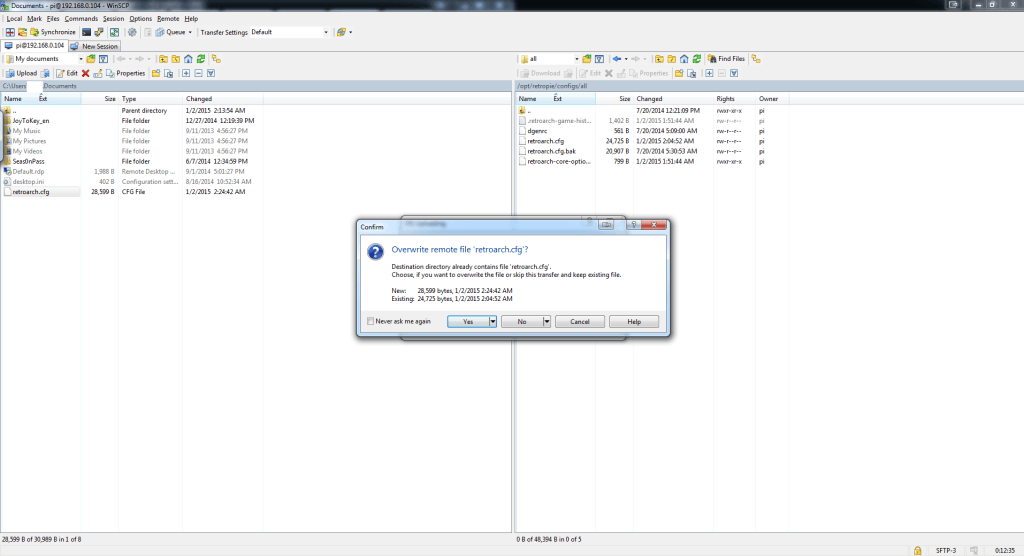
The last thing is to upload the modified retroarch.cfg file back to the raspberry pi. You should still have the windows open in WinSCP where you can press upload and overwrite the file on the raspberry pi.
After it is done, reboot the Pi and test your controls in the game including the new functionality in the bullet list above. Congrats that was the most difficult part of this whole process.
Game Information and Artwork
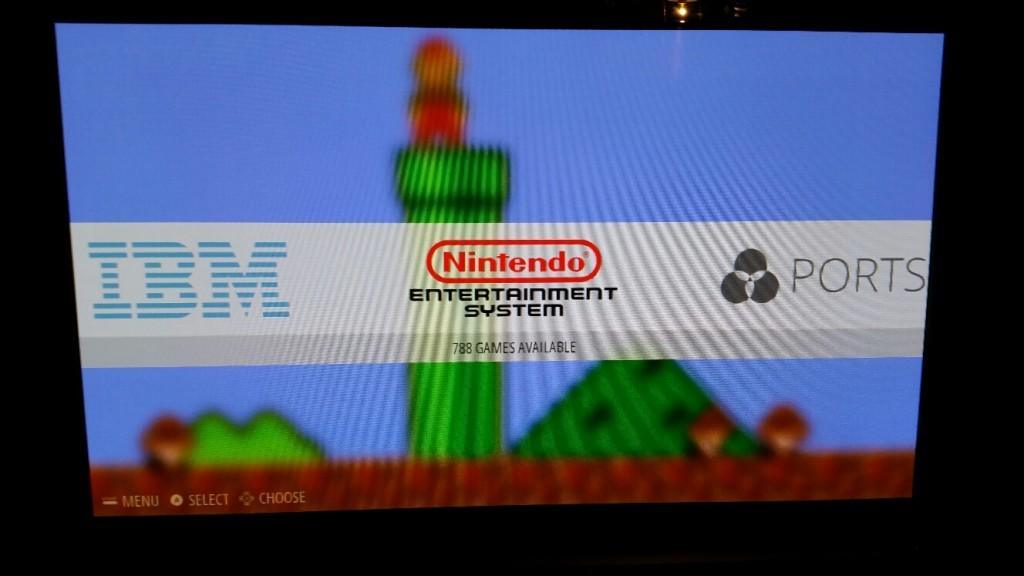
You should see all the systems in which you added rom files to the correct folder on your raspberry pi. You can see I have the Nintendo Entertainment System (nes) available in my example.
Let’s “scrape” the system game files so they get game information along with the box artwork. Keep in mind you still need to be connected to the internet on the raspberry pi for this to be able to work. Press the Start button on your controller to access the main menu.
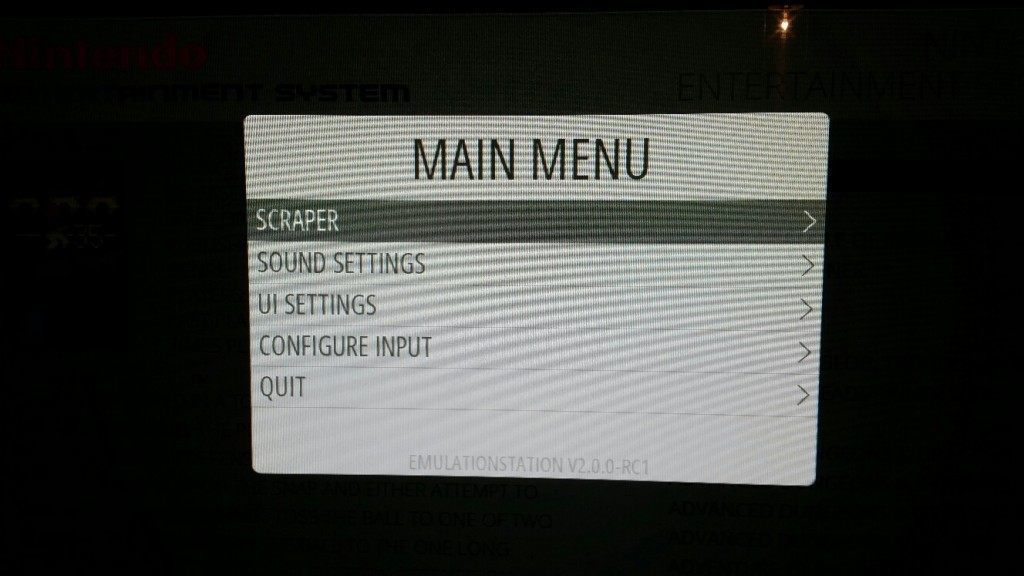
Press “a” on your controller for the Scraper
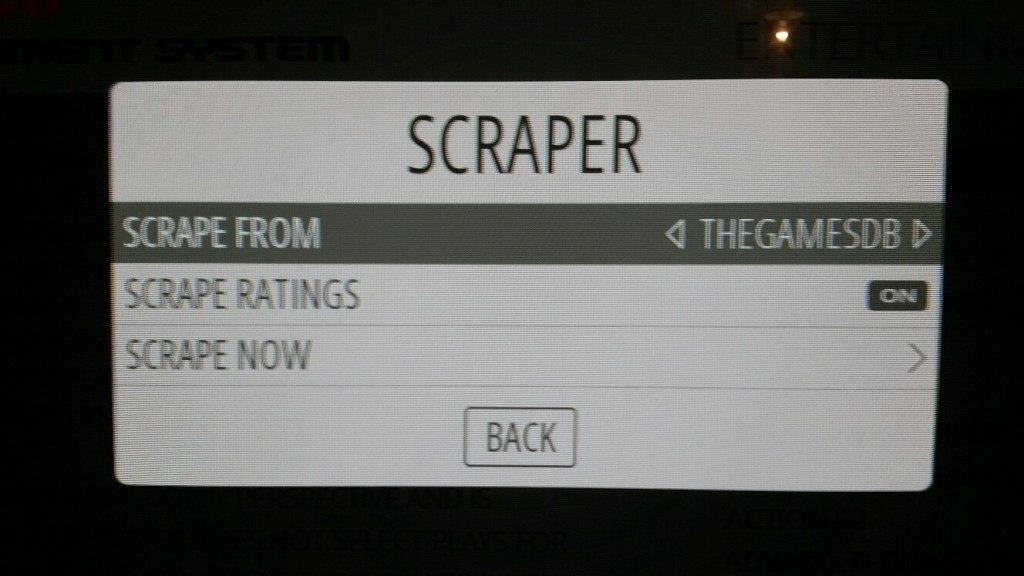
TheGamesDB is good for the Scrape from setting. Go to Scrape now and press “a” on your controller
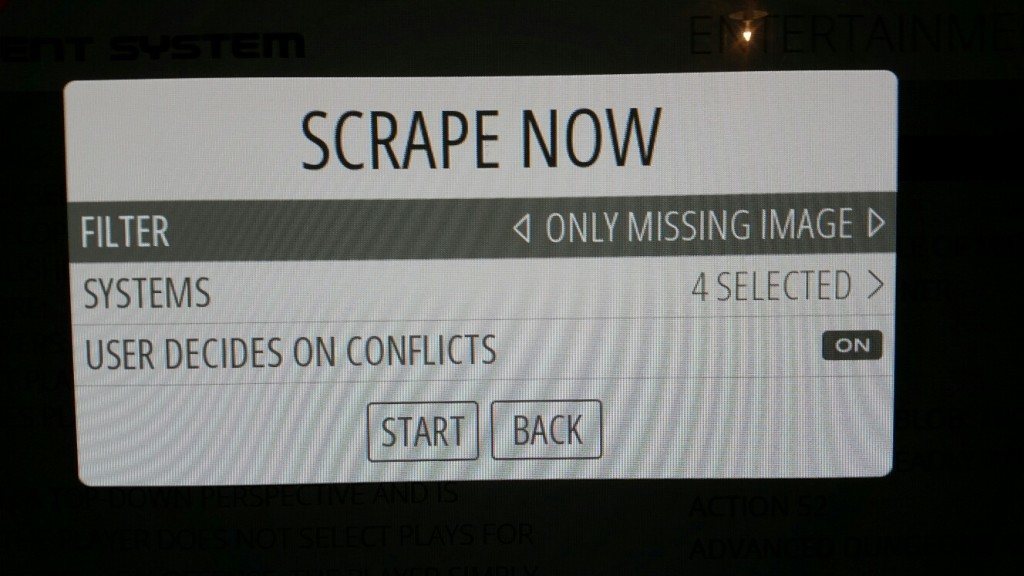
This is where you can tell Emulation Station what systems you want to scrape. I would leave the filter on “Only missing image” and select the systems option.

You can un-check any systems you do not want to pull game information and artwork for then go back.
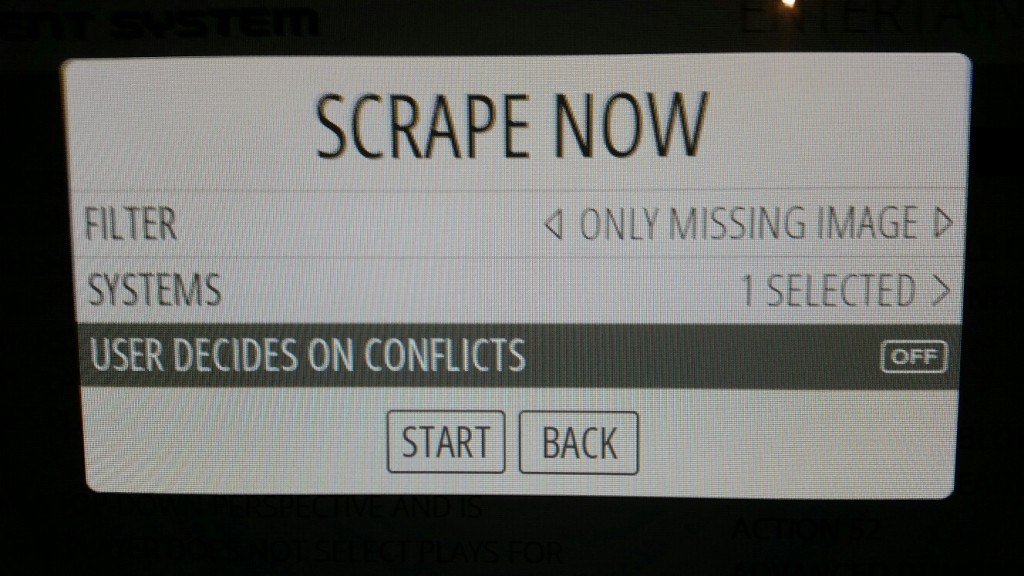
Before you start the scrape I would turn the “user decides on conflicts” off. If not then it will prompt you to babysit the entire process and verify all the information. If your games are named properly via how you got them then they should be good. Turn it off and hit start. It will begin to pull game information.
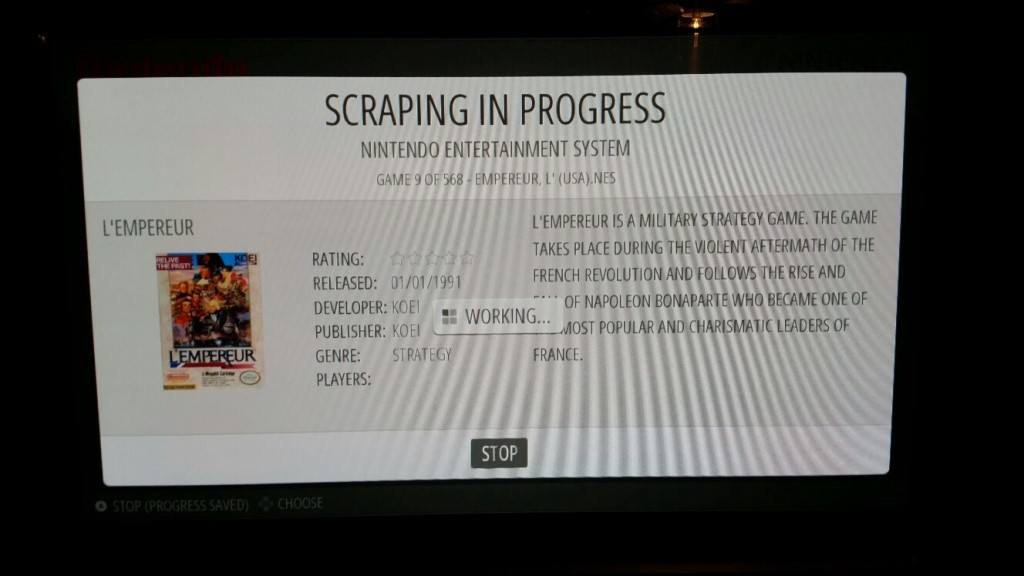
Sorry!!! This will take a while, like hours. I would just let it run and go do something else knowing you are very close to having something you never dreamed possible when you were a kid. Access to everything console all at once.
Conclusion
Well you did it! Now you have access to all the console game of your childhood (or your dad’s at least) at the press of a well organized button. Yes, this will make your friends jealous. Send them our way.
Please subscribe if you found this blog helpful and we are forever greatful if you take a min to share us out to the world.
Thanks,
Ryan


Thank you so much for this guide! I really don’t know if I could have got through setting up my Pi without your guide. I’m so happy I stumbled across it.
If I could please ask you to add to this guide an easy to read and understand guide to installing and getting shaders to work I and I think many others beginners like myself would never need to look anywhere else.
I will look into adding shaders. Thank you for the positive feedback
This is amazing. Awesome tutorial, thank you so much. I’ve been lost for about two weeks trying to get the controllers to work (using PS3 USB), this helped a lot!
You made me wet my panties (just so slightly) when you mentioned you were going to look into adding shaders… 🙂
I’m at CES this week. Hope to add shaders next when I get back home. Thanks for the comments!
384 is a bit high for memory split. You’ll be better off with 256 or 192.
It seems that the hot keys I entered at the end don’t work. Pressing the A button on my gamepad (USB Buffalo SNES) exits the roms to emulation station instead of holding select and start. Any idea how to fix this?
You should check the retroarch file located at /opt/retropie/configs/all/.
Double check your entries you put at the end of the file.
input_enable_hotkey_btn = “8”
input_exit_emulator_btn = “9”
input_save_state_btn = “5”
input_load_state_btn = “4”
input_volume_up_axis = “-1″
input_volume_down_axis = “+1″
Make sure the “8” and “9” correspond to the start and select buttons on your remote. Maybe they are “6” and 7, etc. Those numbers will fix you up as soon as they reflect your select and start buttons.
Huzzah! Everything seems to be functional now! The numerical values for the shortcuts under /opt/retropie/configs/all/ were not numbers, but rather a bunch of characters that I don’t even know how to type on a keyboard. You da man, Ryan!
Hi, Lovely guide. Iam awaiting my new PI 2 and I was wondering if PS3 controllers WIRED would work out of the box? Or if they have limitations like on a regular PC where you gotta use different programs to program them.
My plan is to run PSX emulator along with SNES ,Genesis(Megadrive) and NES 😉
It is not a pc limitation, but just different emulators that need to know what the controls are for those systems. Anyways, short answer is not want to you want to hear “no”. It will not work out of the box, you will have to follow the retroarch controller setup part of the guide. The nice thing, is you only have to do that 1 time and all emulators should be configured for your controls on the Pi. Good luck.
Thanks!
Hi. Thanks for this article. 🙂
I followed it and got everything working. I just reverted the overclocking part, because my Raspberry would make worrying “clicking” noises every few seconds. From my tests, the overclocking isn’t really necessary anyway. I tested a game that runs slowly (Land Maker on AdvanceMAME), and I can tell it runs a little bit slower without overclocking, but it’s not a big difference, so I think I’ll be fine without overclocking.
Glad you got it going.
Absolute noob here. I do not have an SD card reader on my PC and I don’t much care for the thought of buying one for a one time use (and my build is on an already tight budget). Is there a way to install RetroPie directly onto the SD card in the pie by maybe hooking the pie up to my PC through USB or some means like that?
It probably will not be worth the hassle. Amazon has a usb card reader for $6 Transcend Information USB 3.0 Card Reader (TS-RDF5K) . Worth the investment. It does standard SD (Rpi) and micro SD (Rpi2).
I didn’t even think to see if such a thing existed. Thanks.
Will this set controls for Mame as well? I am having issues with getting Mame to work.