
Setup Dual AimTrak Light Guns with PC House of the Dead
So you have taken the leap into making a home arcade machine or at least pulled down Mame or other emulators and relived some of your youth. Inevitably your ready for a new challenge as you want to add more cool to your project. Look no further than a set of AimTrak light guns. There are a few manufactures that take the AimTrak parts and make guns in different flavors, but as long as they are AimTrak underneath you should get the same results. My goal here is to fast track you to getting them working with both MAME games and House of the Dead PC games. It sounds like it would be straight forward. Plug in the USB cable, point and shoot. What really happens is you plug in the USB and then spend days or weeks scouring forums trying to get the damn things to work integrated into your system. It is a royal pain in the ass honestly. Luckily there are a few guys that take a min to give back so others can bypass some of that pain. Without further ramblings, lets get started. Here is the video overview. The blog post below goes step by step, but you can use this video as a reference.
Light Guns, Controllers, Trackballs, and USB
A quick background read that will explain a lot if you have problems later. I’m not going to go into great detail here, but you need to be aware that Windows is a nightmare on how it handles USB devices in regards to gamepads, etc. Essentially It will assign an “id” to each device you usb plug into your pc.
It does this in ways I don’t fully understand because it…
- does not do it by order that Windows was introduced to the device
- does not uniformly do it based on the order you plug things in after your boot that time
- does not do a great job of remembering the order everything was in last time
Why do you care?
Well let’s say you have a USB 2 player encoder plugged into your PC for your 2 player arcade controls. Maybe Windows gives them ID = “0” and ID = “1”. Now you plug in your light guns and they show up as device ID = “3” and “2” respectively. It is a little out of order, but that is fine right? For the most part if you keep it configured like this you would be good (maybe). So you open MAME and configure the controls using the “tab” key and all is good in the world. Now let’s say you decide to buy a USB Nintendo 64 controller or two. You plug them in and get device “4” and “5” right. Nope, Windows may decide these devices are now “0” and “1” changing your USB controller to “2” and “3” and light guns to “x”, “”x”. So everything you configured in MAME is now useless and has to be reconfigured. So you unplug the USB controllers and boot another day, guess what it all goes back making your MAME setting invalid again. Moral of the story is keep everything pluggd in at all times and you will still find times that it changes. Good thing you are now aware if this happens to you and have a place to start troubleshooting. Also if you do add future devices it doesn’t take but a few min to reconfigure the controls in MAME.
So why not just use a convert gamepad presses to keystrokes with programs like joy2key or Xpadder? Surely they know the device, not just by the Windows device id? Well they do a much better job and will really help with your other configured emulators. The problem is when you use light guns your MAME install has to run in “raw device” mode to work. That is not compatible with keycode programs. Yes, shit…. I just saved you a couple days mucking with that. That info is something on like page 11 of the last 20 forum posts you went through from 2007 to 2009.
What are my device ids?
So you have your usb encoder and light guns connected to your PC. The PC recognized and installed drivers as you pluged them in. In control panel under devices you can see some new “mice” from Ultimarc for the guns and your gamepads from your USB encoder.
Controllerremap
There is a program called controllerremap that was designed to essentially scan your devices, find out where everything is, and then create a custom controller file in the “ctrlr” folder of MAME. MAME uses this file to create custom mappings depending on what controllerremap told it where everything was. It is not simple. If you are not very familiar with .xml files and have a lot of patience for trial and error then it will eat you alive. In my opinion it isn’t worth the learning curve as I still found constant issues as people plugged and unplugged devices. It is a great utility and someone put a ton of work into it. I mention it, because it has a “list” feature in cmd line that will give you a sanity check on the location of all your devices and will take the guess work out of getting this thing setup up.
Trust me, the last few paragraphs might seem like I’m delaying the “here’s how your set this up”, but this background will hopefully keep the frustrations later to a min.
Using Controllerremap to take out the guesswork
First get the application from this post over at arcadecontrols. It is at the bottom of the first post. He puts it out as a .zip.txt file so it is not caught by virus detectors on download.
You might have to unhide folder extensions. So search on your pc for “folder options”. It is in control panel.
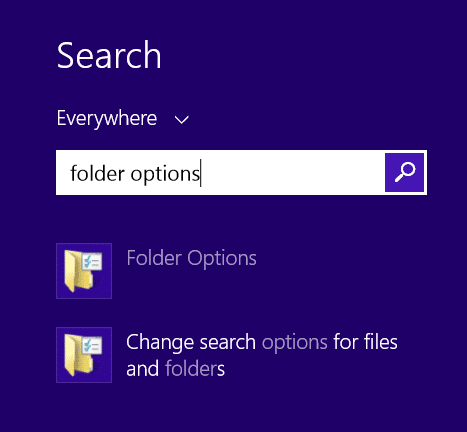
Under the view tab you will be able to unselect the box for “hide extension for known file types” then Apply and close.

Now you can simply delete of the .txt so it ends in .zip.
![]()
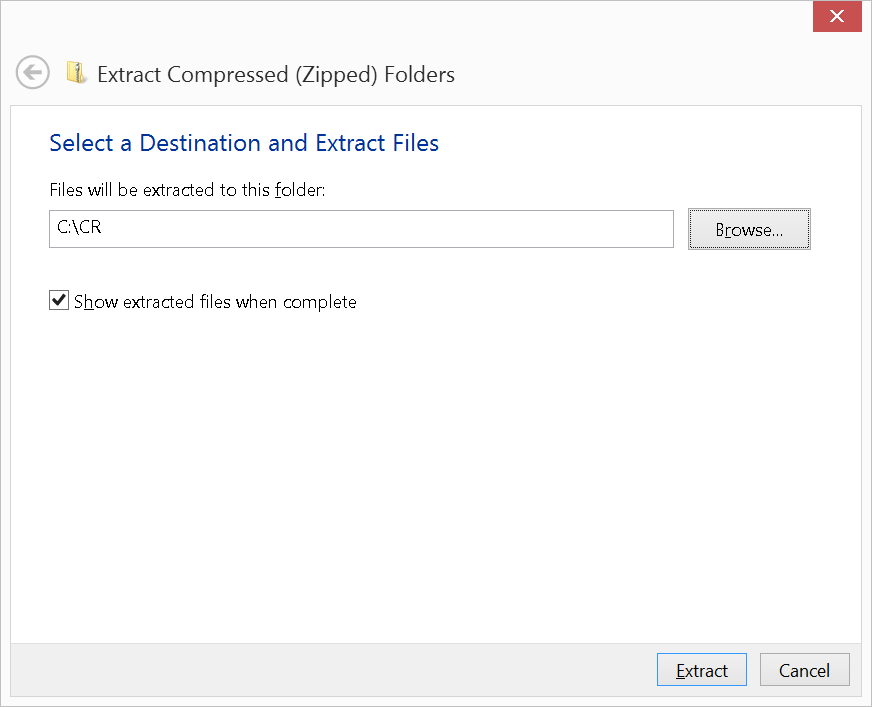
Now open and extract it to your computer. I suggest unzipping it in the root in a simple folder of c “C:\” as it will be easier to access via cmd line. I created a folder on C called CR and extracted there.
Once it is there we are ready. Do not get overwhelmed here if you are not familiar with cmd line as we will step by step. It is not hard.
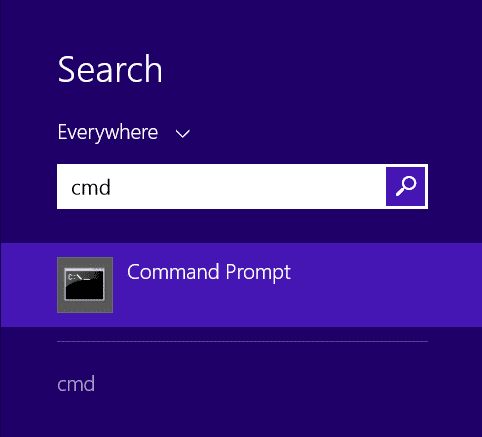
Click start on windows 7 or search on windows 8 and type in “cmd” without quotes and press enter.
It will open a CMD prompt under your user name. You will want to get to C:\ root by typing in “cd c:\” without quotes and with a space. Then type in “cd CR” and press enter. Then run the list function of controller remap by typing “controllerremap /list” and pressing enter.
 You will is a listing of your devices. I have a 2 player board here, with ids “0” and “1”. Your guns will probably show up after that with something like “ATRAK Light Guns ID = X” for example. take note of the ids for your guns.
Now we don’t have to guess when configuring up the guns as to what ID they are.
Calibrating and Configuring Your Guns
Alright, so you now have your windows Id’s of the guns so lets get them configured properly along with calibrating them so they actually shoot where you aim. AimTrak provides a utility to do this. Download it here. Once you open it you will see some tabs at the top for configuration, sensor view check, change device id, and show data. In the bottom left you will see where you can select the device dropdown. As you select different devices, you will notice the bottom right will turn green ad show the firmware version of the device. This means one of your guns is on this channel. You can switch to the sensor view and point the gun at the screen to determine which gun is working with that device channel selected.
Note… Once you figure out which device channels the software identifies you guns I would change them to device 1 and 2 if they are not already. Simply select the gun you want to change and go to the “Change Device ID” tab and press device 1 or 2 depending until you have your guns on those first couple channels. Make sure you do not assign them to the same channel.
Very important… For the House of the Dead PC game to work you have to have the guns configured like in the picture below.
- On Screen
- Trig = Mouse Left
- Left = GP Button 3
- Right = GP Button 1
- Off Screen
- Trig = Mouse Right
- Same
- Same
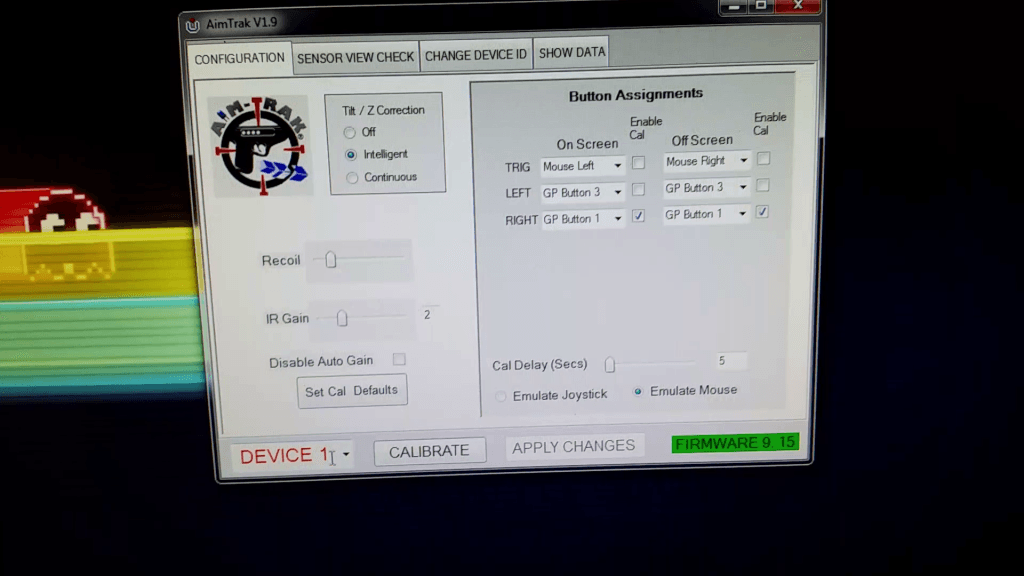
The “left” and “right” refer to the other buttons on the gun typically used to reload or duck/pedal like in time crisis.
Select the other device channel with the gun and configure the same way.
Once you have both guns configured simply press the “calibrate” button on the first device and pick up that gun. You will see the mouse cursor go to the top left of the screen. Stand where you plan to play from, aim, and shoot the mouse cursor. It will them move to the top right, then the bottom middle after each successful hit. If the cursor does not move then make sure you have the right gun for the device channel and also aim a little more on the screen (make sure you are not aiming off the screen). Do this for each device.
Hell yea… the guns should be ready to go at this point. You might want to run the controllerremap /list command again just to make sure the ID have not changed or you are aware of what they are if they did.
Configuring AimTrak in MAME
Mame.ini
You will need to make some modifications to your MAME.ini file in order for it to be enabled to support light guns. Find the location of your MAME executible and in that same folder you will find your MAME.ini file. Open it with notepad, and you will want to modify to make sure the following setting match these values.
mouse 1
joystick 1
lightgun 1
multimouse 1
offscreen_reload 1
lightgun_device lightgun
mouse_device mouse
dual_lightgun 0
joystick_deadzone 0
Save and close the MAME.ini file
Configuring the Guns in MAME
You will configure you guns the same way as your joystick controls. Essentially boot into any game and press the “tab” key on your keyboard. Select default for all games… Be careful as when you change these make sure you realize this will effect all games in MAME so you want to make sure that you do not accidentally modify your working joystick/button controls.
Click Player One then you will start with the gun buttons.
Highlight – P1 Button 1
- Press enter then push what you want button 1 to be on your joystick/arcade buttons.
- Press enter again and pull the trigger on the player 1 gun
- You will see it show up as something like “Gun X”
Repeat for – P2 Buttons 2 and 3 configuring both the control panel and the additional gun buttons. FYI: button 2 is usually reload so make sure and press the button you want to reload with for that one.
Now they buttons are configured for player one, we want to configure the gun aiming mechanism.
- Press the down arrow on the keyboard until you see the “AD Stick X Analog”
- You will want to aim the gun around the center of the screen
- Press enter then move the gun slow and steady from the middle of the screen off toward the right of the screen. Try not to go up and down at all, just horizontal. If successful you will see something like “Gun 2 X” with 2 being whatever windows device Id we discussed earlier in th is post. If it says “Gun 2 X or Gun 2 Y” then press delete and then do it again. That means it detected you went a bit up or down while trying to configure. Again you just want it to be GUN (Device ID number) and the value X.
- Now highlight the AD Stick Y analog
- Perform the same as above, but this time go verticle (up or down) and make sure it catches only Gun (Windows device ID) Y.
Not quite done yet. The AD Stick is for games like Terminator 2 and Jurassic Park that use a location technology. Now we need to do the same steps above for the LightGun X Analog and LighGun Y Analog.
Do not worry about the “DEC” and “INC” settings under the AD stick and light guns as we only need to configure the X and Y analog settings only.
Scroll down and hit save at the bottom then do the same thing for player 2.
Go ahead and test out a few games. If all goes well you are now setup for all games that utilize guns in MAME!!!
Configuring House the Dead 1, 2, 3 PC Games with Aimtrak Guns
The TroubleShooter
Alright, if you can stop playing your mame gun games long enough let’s setup the house of the dead PC games. For this you will need a program called the Troubleshooter which essentially patches windows to allow for light guns to function properly.
- Download the current version of the troubleshooter here
- Install the program
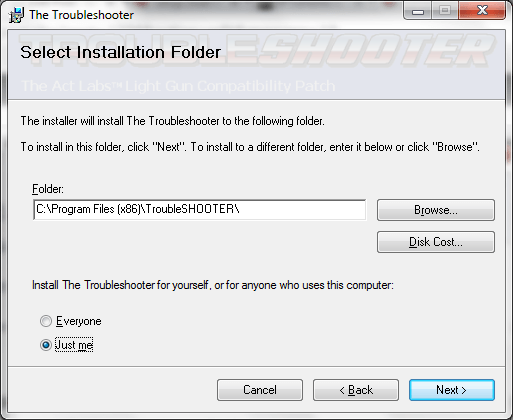
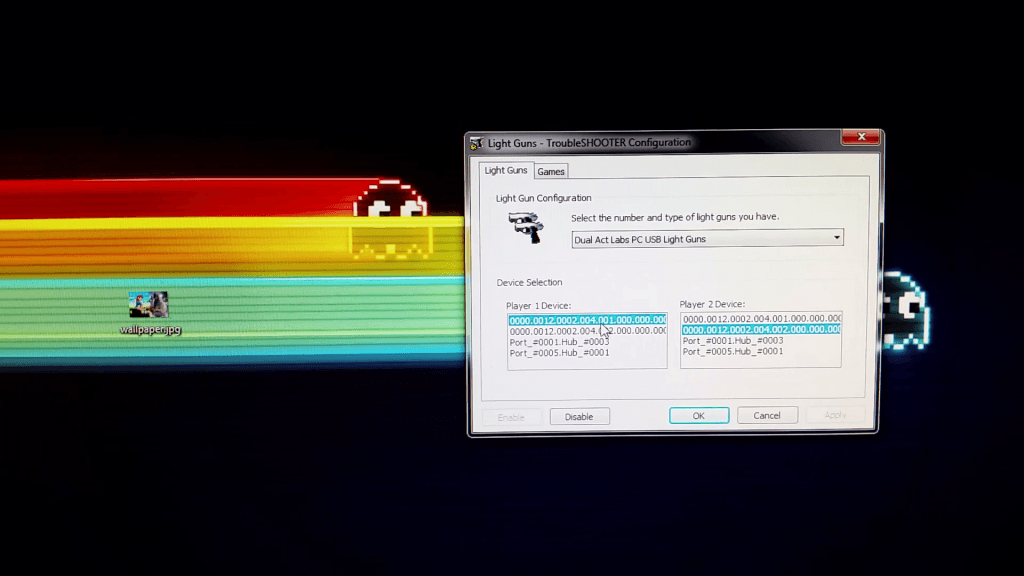
- Once the program opens you will want to select “Dual Act Labs PC USB Light Guns” NOT the “TV” version.
- Also select the two light guns making sure you select something different on Player 1 and Player 2 device. They will probably show up as very similar, but different USB device location codes like in the picture below.
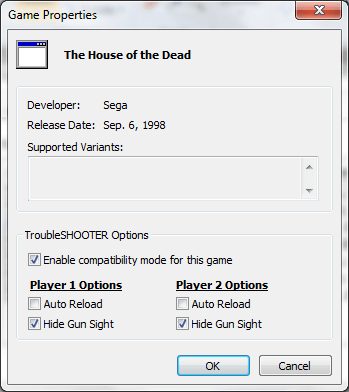
Next Click the Games Tab
- Click “The House of the Dead” and make sure the “Enabled” box in the bottom left it pressed

- Double Click the Game to open the setting and make sure they are configured how you would like
- I enable compatibility mode as well as hide the gun sight for both players
- Press OK
Do the same steps for House of the Dead 2 and 3 making sure they are enabled.
House of the Dead 1
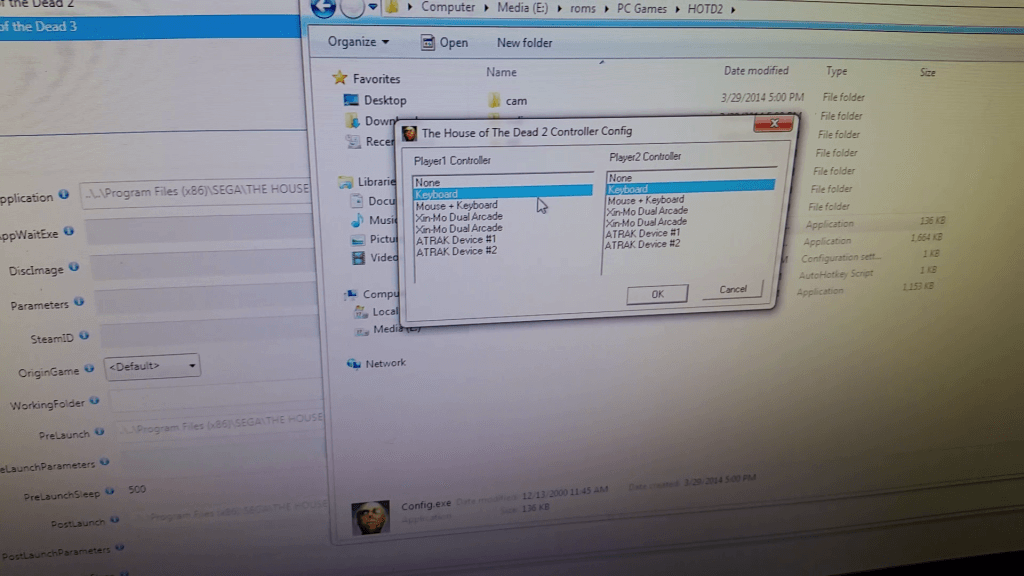
Go ahead and boot your House of the Dead 1 game standalone outside of any frontend software (like HyperSpin). When it boots up you will have to use you keyboard or joystick controls to move the mouse to options, then controller config. Here you will need to select different keyboards for each player as in the picture below.

Go ahead and back out and hit arcade mode. The 1 and 2 number buttons on your keyboard should start both players. Test it out and ensure your guns are working…. If not , hit ctrl/alt/delete and ensure Trblshtr.exe is a service process that is running. In other words open the troubleshooter program (it should be located in control panel or search for it) and run it then minimize it. Try again. You should be good.
House of the Dead 2
First we will want to make sure the game is going to see the light guns as keyboards. Open the config.exe for house of the dead 2 which is located in the same folder as the game itself. Make sure both players are set to keyboard.
Now Run the House the Dead 2 exe game file and test the guns work. Again, make sure you have an instance of the troubleshooter open and min prior to playing the game.
House of the Dead 3
For House of the Dead 3 you need to open the launcher which should be labeled hod3launch.exe. Go into controller settings and ensure both players are again set to keyboard. Save and then launch the game to test.

Again make sure the troubleshooter program is running and minimized.
So if you made it this far then you have succeeded and are able to play all of your MAME games along with the 3 House of the Dead PC titles! Now we are going to move on to configuring these PC games to launch in HyperSpin.
Launching House of the Dead Games in HyperSpin
Here is a guide to setup HyperSpin, Hyperlaunch, HyperSync, and MAME if you need to get the base setup.
Adding PC Games in HyperHQ
I will assume here you already have an install of HyperSpin working with an emulator or MAME.
First we will need to add PC Games to your HyperSpin configuration.
- Open HyperHQ in the HyperSpin main folder.
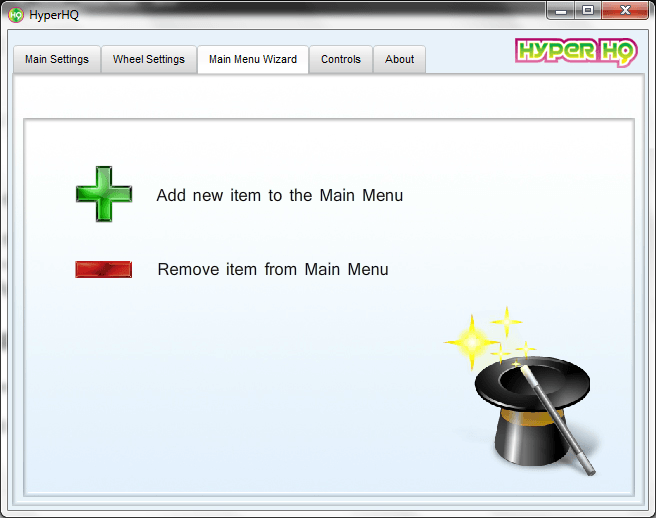
- Add the header “PC Games”

- Click this menu item has a sub wheel

- Add After whatever system where you want it to show up in your Hyperspin wheel
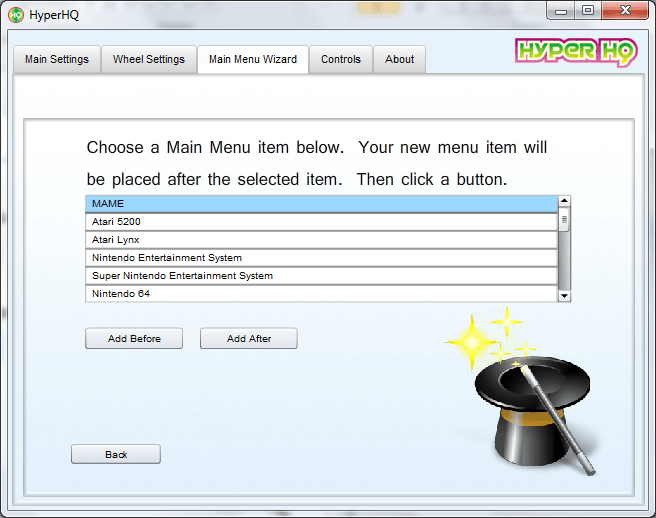
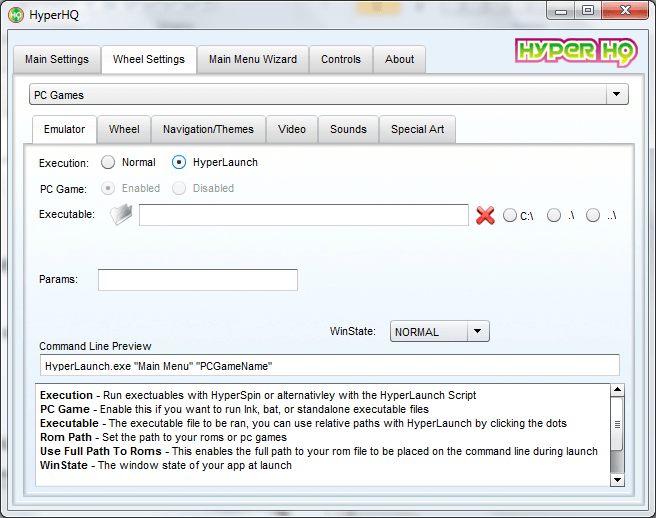
- It will have successfully added the wheel. Select the “Wheel Settings” tab at the top of the screen and select PC Games from the drop down. Ensure Hyperlaunch is selected.
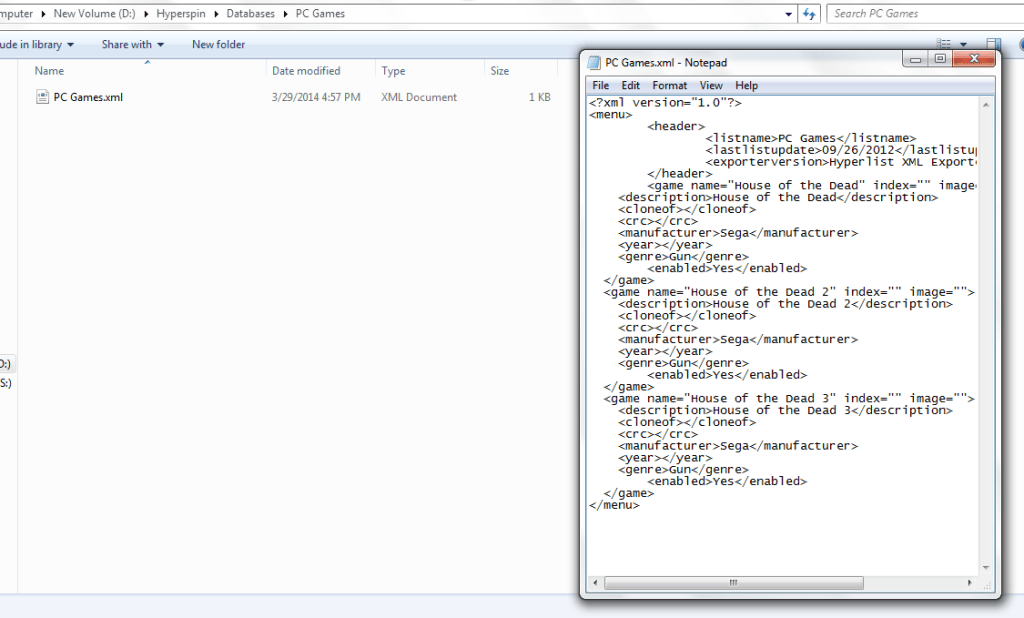
We need to add the games to the database XML so they can be seen by both HyperSpin and Hyperlaunch.
- Navigate to your databases folder Drive:\\Hyperspin\Databases\PC Games
- Open the PC Games.xml and add the following contents
<?xml version=”1.0″?>
<menu>
<header>
<listname>PC Games</listname>
<lastlistupdate>09/26/2012</lastlistupdate>
<exporterversion>Hyperlist XML Exporter</exporterversion>
</header>
<game name=”House of the Dead” index=”” image=””>
<description>House of the Dead</description>
<cloneof></cloneof>
<crc></crc>
<manufacturer>Sega</manufacturer>
<year></year>
<genre>Gun</genre>
<enabled>Yes</enabled>
</game>
<game name=”House of the Dead 2″ index=”” image=””>
<description>House of the Dead 2</description>
<cloneof></cloneof>
<crc></crc>
<manufacturer>Sega</manufacturer>
<year></year>
<genre>Gun</genre>
<enabled>Yes</enabled>
</game>
<game name=”House of the Dead 3″ index=”” image=””>
<description>House of the Dead 3</description>
<cloneof></cloneof>
<crc></crc>
<manufacturer>Sega</manufacturer>
<year></year>
<genre>Gun</genre>
<enabled>Yes</enabled>
</game>
</menu>
Example view
You can also add the House of the Dead themes so it looks good in HyperSpin
- Navigate to the Drive:\HyperSpin\Media folder\PC Games\Themes
- Here are the themes for the 3 games you need to paste the zip files in the folder

(PC Files for next three steps are located here)
You will also want to put the PC Games.png in the wheel folder location at
- Your Drive:\Hyperspin\Media\PC Games\Images\Wheel
Add the PC Games.zip Theme to the main menu located
- Your Drive:\Hyperspin\Media\Main Menu\Themes
Add the PC Games.png Theme to the main menu located
- Your Drive:\Hyperspin\Media\Main Menu\Images\Wheel
Now HyperSpin is configured for the visual for PC Games.
Adding House of the Dead Games in HyperLaunch HQ
Ok. Now PC Games have been added to hyperspin. Let’s go ahead and get the House if the Dead games configured in HyperLaunch HQ.
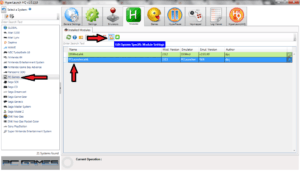
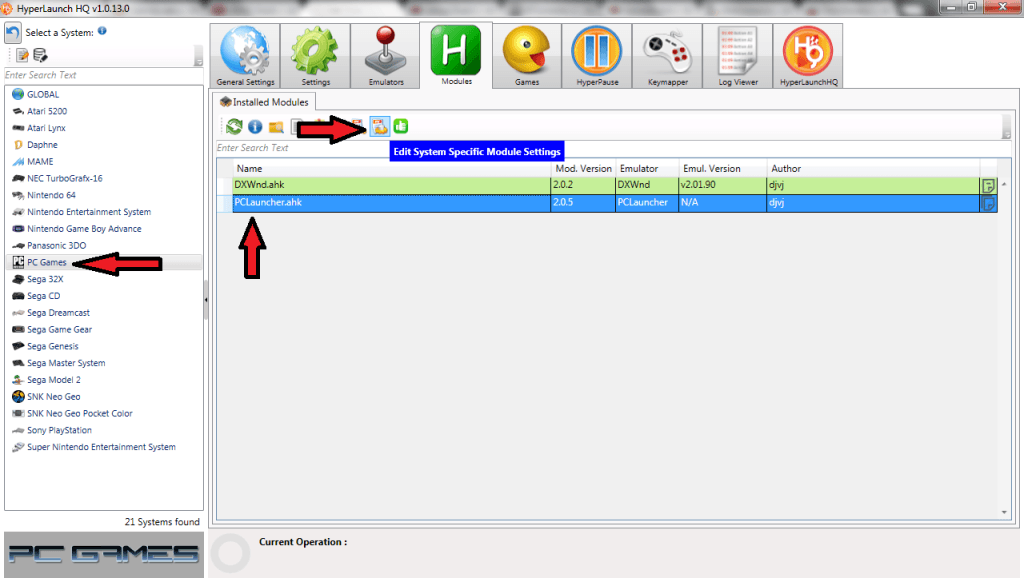
- Open HyperLaunch HQ
- Select PC Games on the left
- Select Emulator on the top
- Highlight PC Launcher
- Click “Edit System Specific Module Settings”
- See pic below
- See pic below
In the settings you may have to navigate your mouse over a faint gray line until you see the cursor point both up and down. This will allow you to drag the hidden section where you can configure the games. I think this may be a view bug, but be aware.

Here is what it should look like…

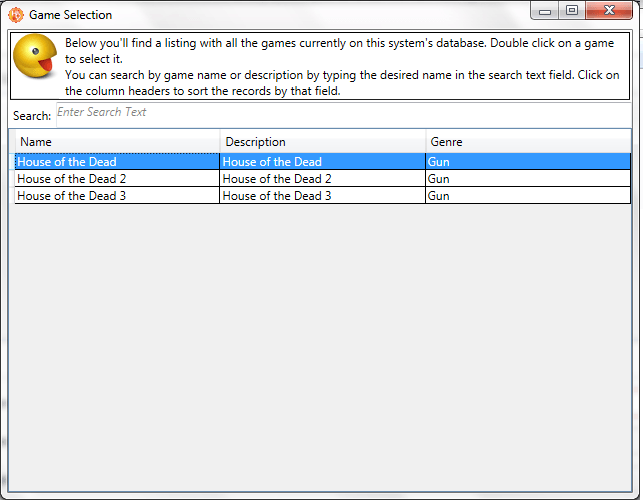
Let’s start adding games!
Adding HOTD 1 to HyperLaunch
- Click the green + symbol and you should see the 3 HOTD games there
- Pick House of the Dead 1
- Click the search by the application field and select the .bat field in the house of the dead 1 folder
- You will also want to make sure the troubleshooter program is open so you guns act as expected
- I created a simple autohotkey file that will ensure that program is running each time
Autohotkey Explained
We will stick to the highest level here as that is all that is needed. If you are not a programmer, do not worry this is easy since I give you all the code. If you can cut and paste you should be able to do this. Get and install autohotkey here. Now you can essentially make simple scripts in an exe format to perform some small tasks we need done.
The first script is to launch the troubleshooter app in a minimized mode again to ensure your guns are activated with the games.
- Open notepad and past in the following script
Run “C:\Program Files (x86)\TroubleSHOOTER\Trblshtr.exe”, Hide
exitApp
- Ensure the path above is correct by navigating through your folders manually to find the trbleshtr.exe file. If not, update the location above to match that location.
- Save the file in your hyperspin folder and name it something like troubleshooter
- It will be a txt file since we did it in notepad
- change the .txt to .ahk which obviously stands for autohotkey
- Now you can right click the troubleshooter.ahk or whatever you named it and select compile script
- It will create the .exe file
- Congrats your a coder now on a basic level

Exe file example
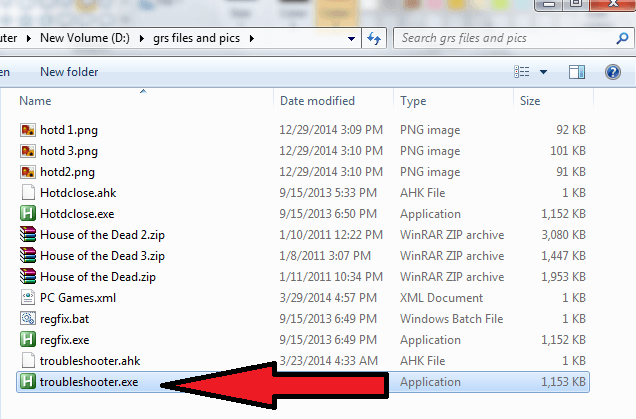
Back to Hyperlaunch HQ and the House of the dead 1 configuration. We will place our newly made troubleshooter.exe (or what ever you named it) in the “PreLaunch Section”.
You should have something like this…
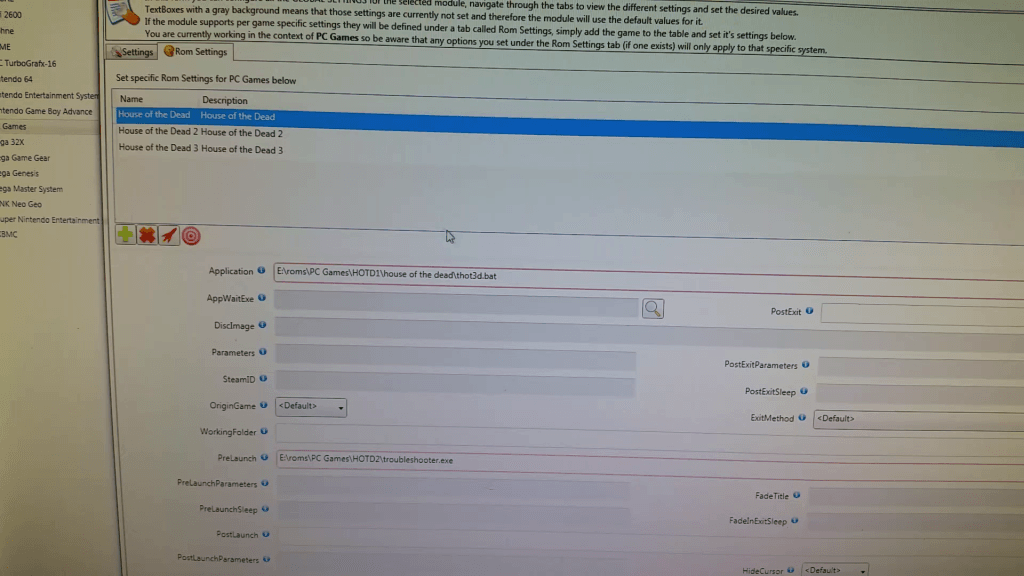
Click the red rocket ship looking button and it should launch HOTD 1 and you should be able to play it. If this game prompts a video card screen on boot so just hit your hyperspin enter key and the game will load.
Adding HOTD 2 to HyperLaunch
Again click the green + arrow then double click HOTD2 as we did in the HOTD 1 configuration above. The settings on this game will be very similar. You will select the “HOD2.exe” file for the application and again select the troubleshooter exe script you created above.
Example
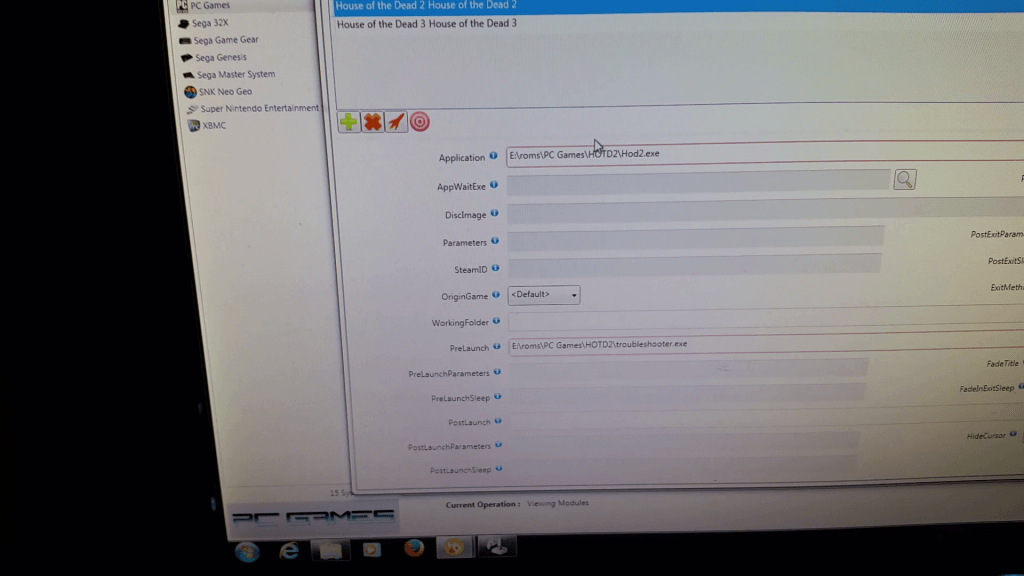
Click the red rocket ship and ensure everything launches and plays as expected.
Adding HOTD 3 to HyperLaunch
House of the Dead 3 takes a bit more of a challenge to setup since we have to bypass the launcher to get a smooth transition into the game. This will take another 2 scripts.
Script 1
Open notepad and past the following code
RegWrite, REG_DWORD, HKEY_LOCAL_MACHINE, SOFTWARE\Wow6432Node\SEGA\hod3\Settings, Played, 1
Run “C:\Program Files (x86)\TroubleSHOOTER\Trblshtr.exe”, Hide
exitApp
This will essentially tell the game that it has already been played in the regestry before it is loaded so it will allow you to bypass the required loader screen. Again make sure the second part is the correct location to your Trblshtr.exe if not update it.
- Save it as something like HOTD3Prelaunch.txt in your hyperspin folder
- Change the .txt to .ahk
- Right click and compile to get the exe file we will use
Script 2
Open notepad and paste
Process, Close, HOTD3launch.exe
- Save it as something like HOTD3PostLaunch.txt in your hyperspin folder
- Change the .txt to .ahk
- Right click and compile to get the exe file we will use
We are now ready to configure HOTD 3 in HyperLaunch HQ
Like before hit the green + sign and add HOTD 3.
- Application = Navigate and select the hod3pc.exe file
- PreLaunch = Location of script 1 exe file you created above
- PreLaunch Sleep = 500
- PostLaunch = Location of script 2 exe file you created above
- ExitMethod = Process Close Application (or Alt F4), the default Esc key will not close this game
Example
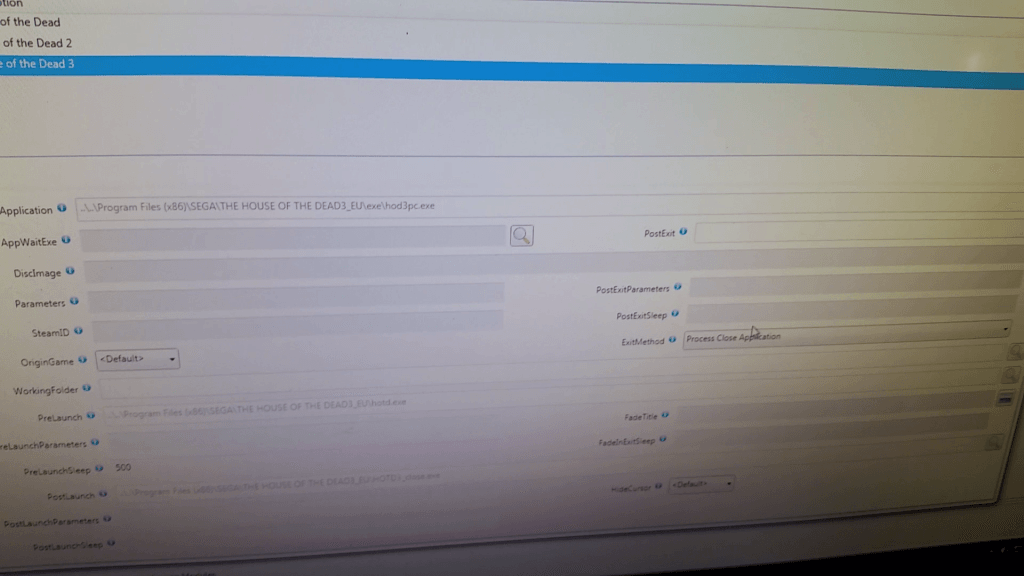
Click the Red Rocket Ship and you should be able to successfully test the HOTD 3 game!
All that is left now is to test in HyperSpin. Boot HyperSpin and make sure everything is working.
Conclusion
I really hope all or a portion of this post saved you some time and you got the desired outcomes. I found this process to be very complex and involved. It was many late nights pissing off my wife, scouring forums, and filled with many disappointments. But in the end I finally got the thing to work really well. Wanted to pass it on. If this post or any of my other posts help you please take a second and subscribe to our newsletter, share out our site in your forums, or purchase our high quality arcade parts.
Thanks,
Ryan


Hi Ryan,
we have had this discussion on another website on this matter.
If you use TroubleShootler from mindspring.com (which i’ll call “the original TS” as of now), the “Hide gunsight” option is actually mandatory since the original TS only updates gun position when a shot is made. (so if you keep the gunsight visible, you’ll just be confused, thinking it doesnt work while in fact it does). I know you selected this option in your tutorial but I just wanted to emphasize how it is actually mandatory with the original TS, even in its latest version (which is 2.3.2)
That being said, my advice is to forget the original TS (which is outdated and has not been supported for many years), and simply get a *different* program, by a *different* programmer, called “TS2” (which I know is very confusing), available from dragonking.arcadecontrols.com, as it does the exact same thing than “the original TS”, but much better (gun position is updated real time and not only when you click), and is comptabile with much more games. “TS2” latest version currently is 1.2 (yeah, the original TS is 2.3.2, and TS2 is in version 1.2, very confusing…).
For more details, I have made a guide too, available on http://www.hyperspin-fe.com/forum/showthread.php?26373-House-of-the-dead-3-pc-and-dual-aimtraks-via-quot-troubleshooter2-launcher-quot&p=359298&viewfull=1#post359298
In any case, thanks for putting up your guide, as setting up dual aimtrak indeed is a difficult issue and the more these solutions are shared, the better 🙂
ParkerLewis
Thanks heaps for the guide above!
Awesome!!
Just a quick question.. I am running into the device ID problem that you mentioned in your guide. In MAME the Device ID seems to change everytime I reboot the system – but I am not adding or taking away any USB devices.
It is really frustrating as I need to reconfigure MAME prety much everytime I start the computer up. Its not hard to do, just annoying and something that I don’t want to be doing if I can avoid it…
Do you have any idea of how to get around it? Is there any way to give the guns a permanant ID so that they boot up to the same ID everytime?
Really appreciate your help with this!!
Thanks heaps,
Tim
They best you can do it setup controller remap to find your devices and setup the config file in mame automated. It is a pain to setup. I would also try to reboot 5 or 6 times and see if you see any patterns that might need to be addressed such as some usb devices not being seen on a reboot.
There is a way, using the controllerremap program. im about to create my own controllerremap.cfg file for my setup later tonight, I noticed that there is also a .zip file for a walkthrough for creating a .cfg file as well called ControllerRemapGuide.zip (google-fu it)
Step 3 of Adding House of the Dead Games in HyperLaunch HQ is incorrect. It should say “MODULES” NOT EMULATORS.
=====================================================
Ok. Now PC Games have been added to hyperspin. Let’s go ahead and get the House if the Dead games configured in HyperLaunch HQ.
Open HyperLaunch HQ
Select PC Games on the left
Select Emulator on the top
Highlight PC Launcher
Click “Edit System Specific Module Settings”
Also, in this tutorial when you modify the pclauncher in HyperHQ you say to use the “Edit system specific module settings” but in your YouTube video you say to use “Edit Global Module settings”.
Which is the correct way?
Edit Global Setting.
Any idea how to solve the 16×9 problem. I cant get the guns to work right in mame on my widescreen monitor add a old 4×3 no problems.
Hey Ryan are the guns from arcadeguns.com better than the ones sold from ultimarc.com? I picked up 2 of them which are giving me hell getting dialed in.
Thanks,
I have only used the arcade guns and they worked fairly well for me. The only issues I had was when there were more usb controllers plugging in (NES, SNES, N64), etc. Windows would continually swap the joyid at boot up. If you just have that and your normal controls they should work well. FYI: The next blog I am working on is using wii controllers as guns for your arcade with only around $25 in accessories (bluetooth dongle and sensor).
Oh do tell what I need to get Ill run to bestbuy right now. I just spent $200 on these and less than happy and depending on what Andy says there about to go back. I have the bluetooth already as I just bought one to use my ps3 controller. Right now Im running a Ipac 4 for my cab with your buttons and then the Xbox360 wireless and the PS3 controller.
Hello, and thank you for this writeup. Informative and funny as hell. I had a question I was hoping you could help with. When assigning ID’s, I believe I have done it right. Device one, and device two both now show they are the guns, but I can Only calibrate one of them. Both guns work if I try them one at a time, but when I have both plugged in, I can only calibrate one. Thank you
Sounds like they may have the same id’s. Make sure they are on different channels.
Hey Ryan do you know where I can buy the house of the dead collection?
I would look on amazon http://amzn.to/1g347Iq
Hi there,
Thank you for the useful tutorials, but I’m running into an issue with getting the troubleshooter script to work. I copied your code, made it an .ahk file, then to a .exe file. However, each time i run a HotD game, it says it can’t find the specified file (troubleshooter).
I’ve triple checked the location and it all checks out. Any ideas where to look or go from here?
Thanks!
Hey Ryan,
Have you had any success using this technique to get Aimtrack working with a Raspberry pi? I’m considering giving it a go, or possibly using some wiimotes that I’ve got laying about as a substitute.
Thanks.
I have not tried it. Please let me know if you find any success with wii or aimtrack.