Setup Guide For HyperPie
This is a guide on how to configure any of the arcadepunks.com images (specifically HyperPie) with our GameRoomSolutions.com cabinets or control sets. With purchase of any of our cabinets or control sets we provide you with the configurations files so everything just works with this setup.
Video Walk through of what you will have after completing this guide
Check out our Arcade cabinets or control panels here as they are the best and most complete on the web! Go together quick like Ikea with provided cam locks and we offer full graphics package and controls kits.

Quick contents of this guide
- Download the HyperPie image file and prepare to flash in on your Raspberry Pi
- How to flash image on Raspberry Pi
- How to connect up our 2 player 20 button control kits
- How to get and add games
- Going into attract mode (the pretty version that looks like HyperSpin)
- Configuring controls for attract mode
- Copying our GRS conf files to pi so everything works out of the box with the game systems
- Configuring MAME
Basic Definitions
- Raspberry Pi – A small all-encompassing computer that can turn your project into an awesome home arcade. You don’t need to know how to program, just follow this guide. The Raspberry Pi costs around $35, you will need the $7 power supply, and a 64GB microsd card or larger to run the system. (more about all this later in the guide). Note: My rom folder is around 100gb and the hyperpie image will take up a 64gb card without roms. You can either get a 128 to 200 gb microsd to store everything or you could get a 64gb microsd card and we will show you how to run games from a usb drive.
This kit below has the pi and power supply.
Here is a 64gb micorsd I have tested; you may want to get a 128gb especially if you do not want use a usb drive for games
A 128gb usb drive for roms
- Image file or .img – A preconfigured version of retropie that you can flash on your pi and not have to manually setup things (someone else has already done that for you)
- RetroPie – The system we will be using
- Frontend – The software that displays systems, games, etc
- EmulationStation – Less flashy front end that works
- Attract Mode – Flashy frontend (will look like HyperSpin in our example)
- Emulator – software that makes the pi think it is a console system like Genesis, N64, etc
- Rom – Game file
- Frontend – The software that displays systems, games, etc

How to get HyperPie or any other image file
Let’s get the image (flashy system that looks like hyperspin) and games or “rom” files.
First thing first. Download megadownloader as it will make life easy. Megadownloader will allow you to simply past in a link of the download you want and it will pull all the files down for you in one fail swoop.
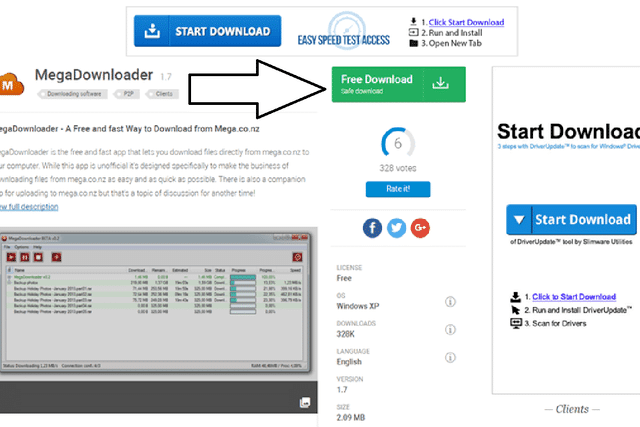
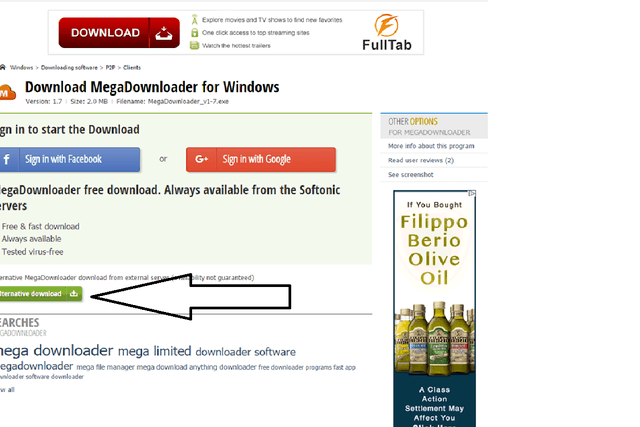
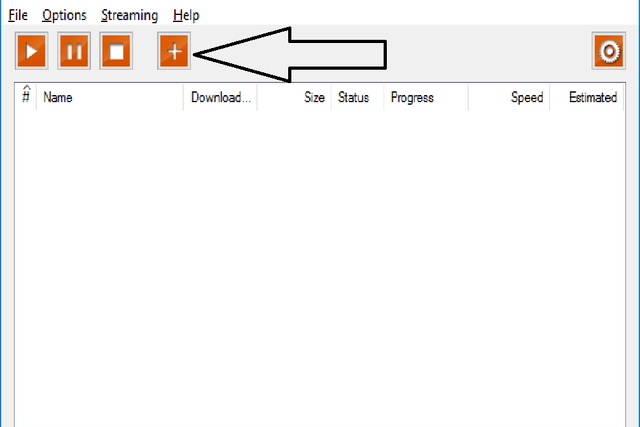
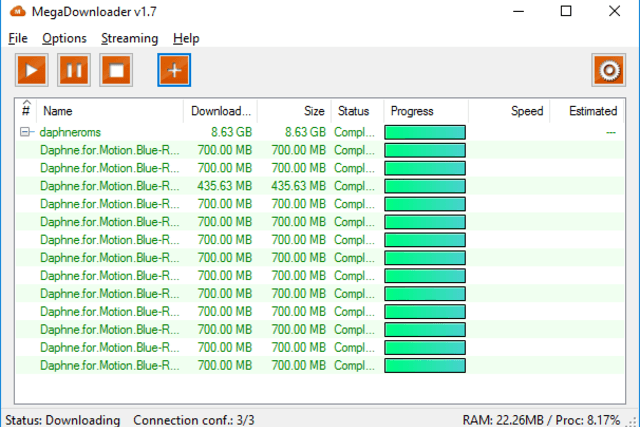
Install and run it. What it looks like
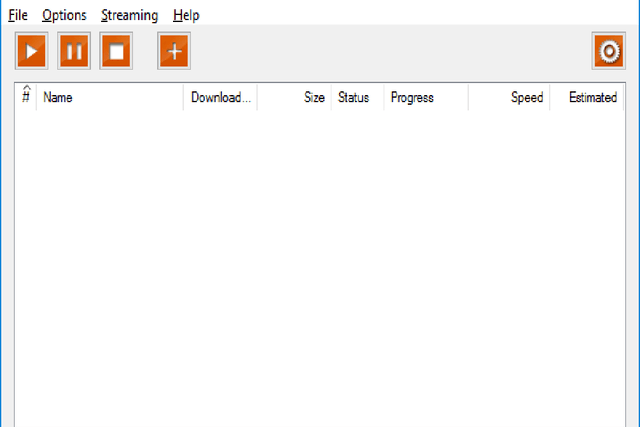
Once you open it, get a link to download utilizing it. We will start with hyperpie (you can do any image from their page you want to try) which is the image file we will flash on our Raspberry Pi that will give us all the frontend interface for systems, game preview videos, etc.
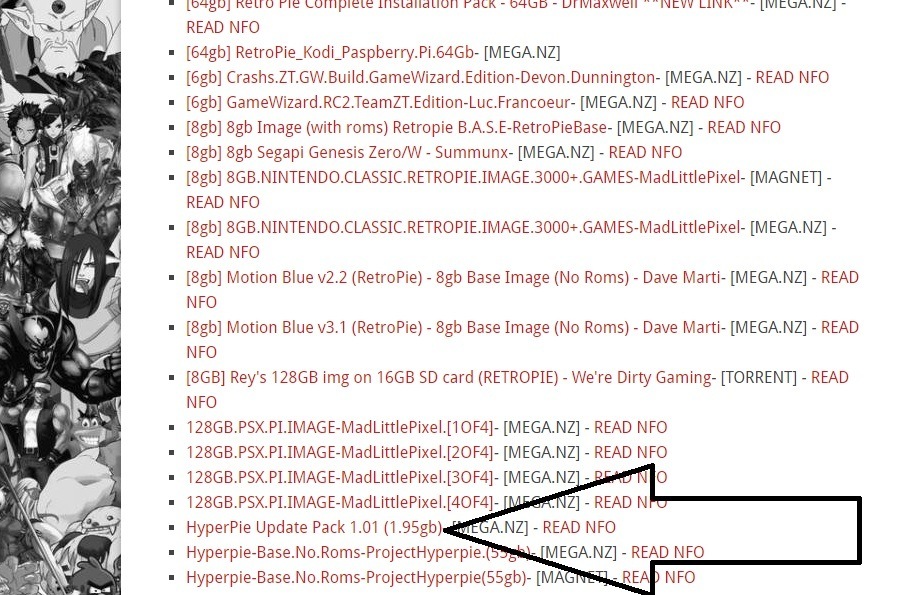
In this example we are going to use the newly released HyperPie.Base.No.Roms image from ArcadePunks Image Downloads. Get the 1.01 update pack as well.
This image does not contain games or “rom”/game files, we will address that and how to get them a bit further down in the guide.
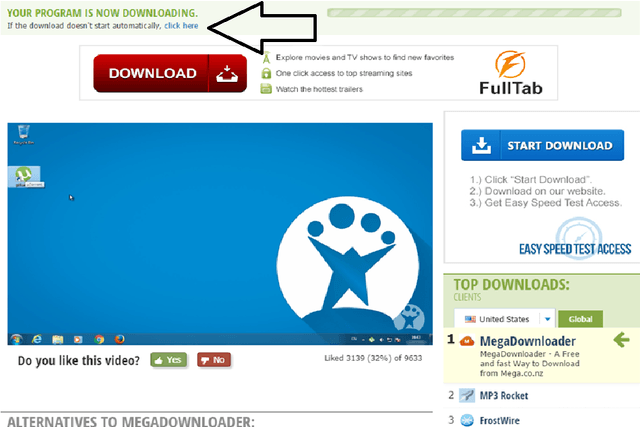
Download the hyperpie image via torrent file or MEGA.

Click the link, then on the adfly page wait 5 sec and click the Skip Ad button in the top right when it comes up.
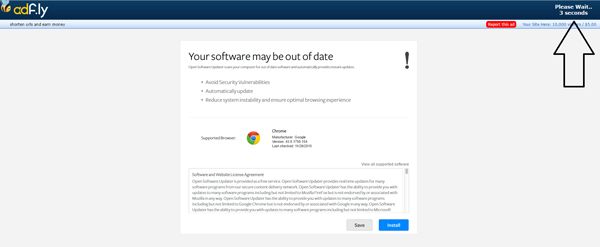
![]()
You will see there are a ton of files in here, but megadownloader makes it easy. Copy the download link in your browser bar.
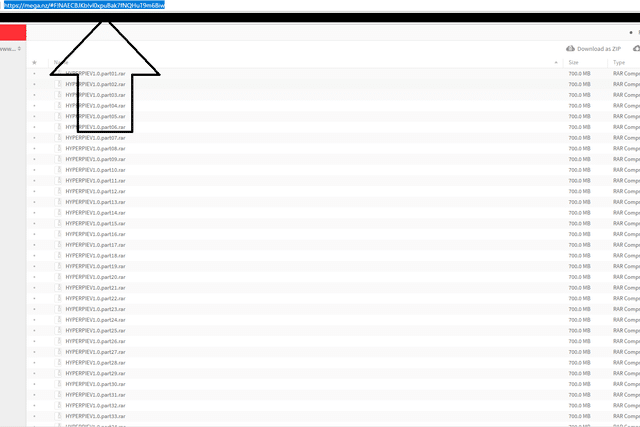
Now in Megadownloader click the plus sign
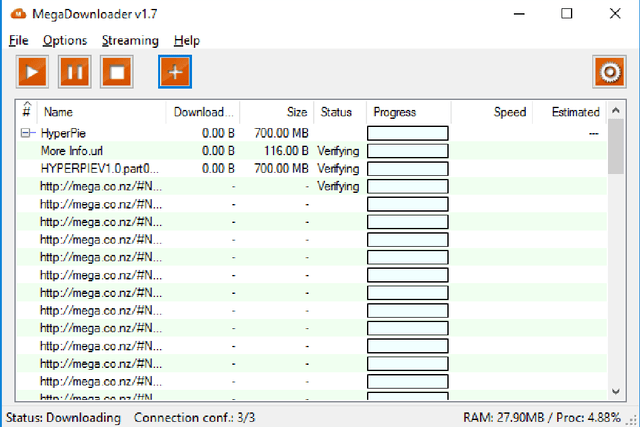
Past the link in the big empty box, name the file, ensure your path is a place on your computer that has room to download the file (this one is 56GB or so). Then Click “Add links” to start the download. You will see it will automatically start a download with all the files.

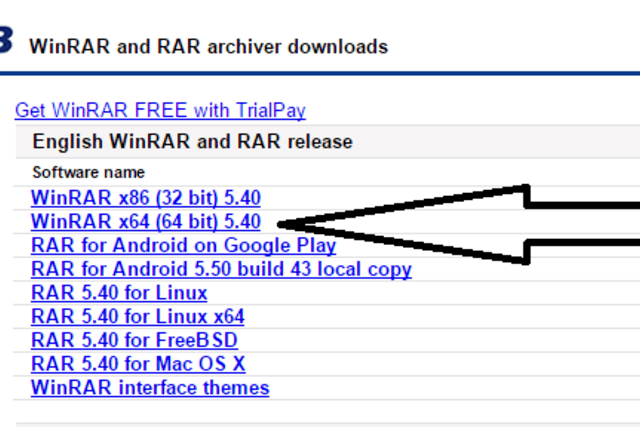
Once you have the files downloaded use the free program winrar to open the image http://www.rarlab.com/download.htm
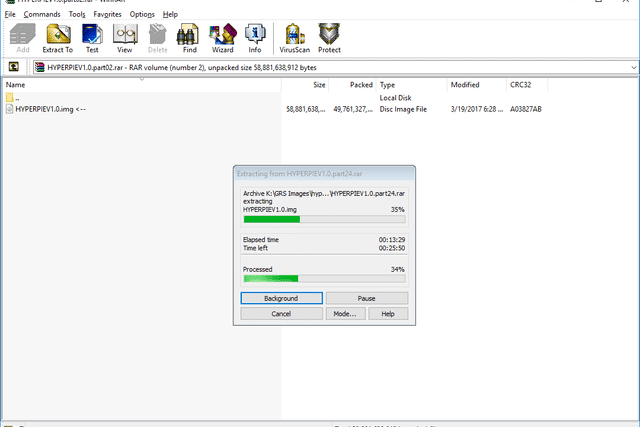
Click on any of the .rar files that come in the download and winrar will re-assemble the image. Simply click extract to and pick a spot on your computer (that has room) then extract the .img file
Once extracted we need to write the file onto our microsd card that is going to run our raspberry pi. Again suggestions on what microsd card are at top of post.
If your computer doesn’t have a microsd card slot, then I suggest you get a usb converter. They are cheap and you can use it with many different media types on any computer.
Insert the microsd into your computer and it will show up as any usb drive you normally attach and give you a drive letter. We are now ready to flash the image file onto our usb drive. We can do this using a free program called win32diskimager.
Get it here https://sourceforge.net/projects/win32diskimager/

Once installed
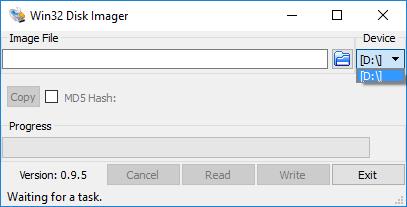
- Open win32diskimager
- Click the blue folder and select the extracted .img file you downloaded
- Select the microsd card (whatever drive letter it was assigned) under the “Device” drop down (Make sure you are selecting the correct one or you will wipe the wrong drive)
- Click Write and let it do it’s thing

How to connect up our control kits.
Make sure your controls are connected up and working before you boot your pi for the first time. We have this video guide on setting up your controls
Video walk through
Also these diagrams (is the same for any pi version you have).
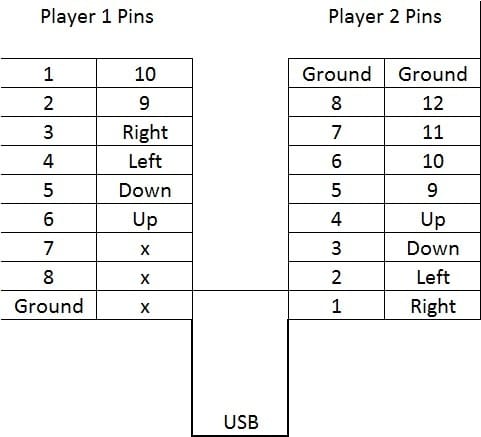

When you know you have working controls, plug them into your Pi via USB. Put the microsd into your pi and boot.
It will prompt you to configure your controls…
- Go ahead so you have basic controls over the frontend you see called EmulationStation (it is the stripped down version, but don’t worry all the goodness is on there). We will also modify these controls later when we switch over to the flashy attract mode.
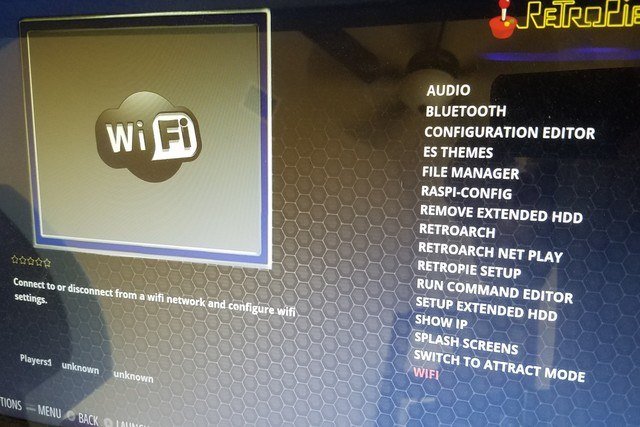
Before we get crazy we need to do a couple things. Connect to the wifi or hardwire so your box is online.
Go into the retropie settings to do this, use a keyboard to put in your wifi password or just connect to your router with a network cable if possible just to copy and configure everything (wired will be faster and you can use wifi or no internet after it is configured up).

Updating Hyperpie Base Image
IMPORTANT NOTE: You must do the update pack or your MAME “arcade” roms/games will not work correctly. More to follow later in post, but for now know that if you did the base image then you need to do the following couple steps.
If you use the hyperpie base image (56GB), then you need to copy over the update pack 1.01. Get the update pack as you did the image
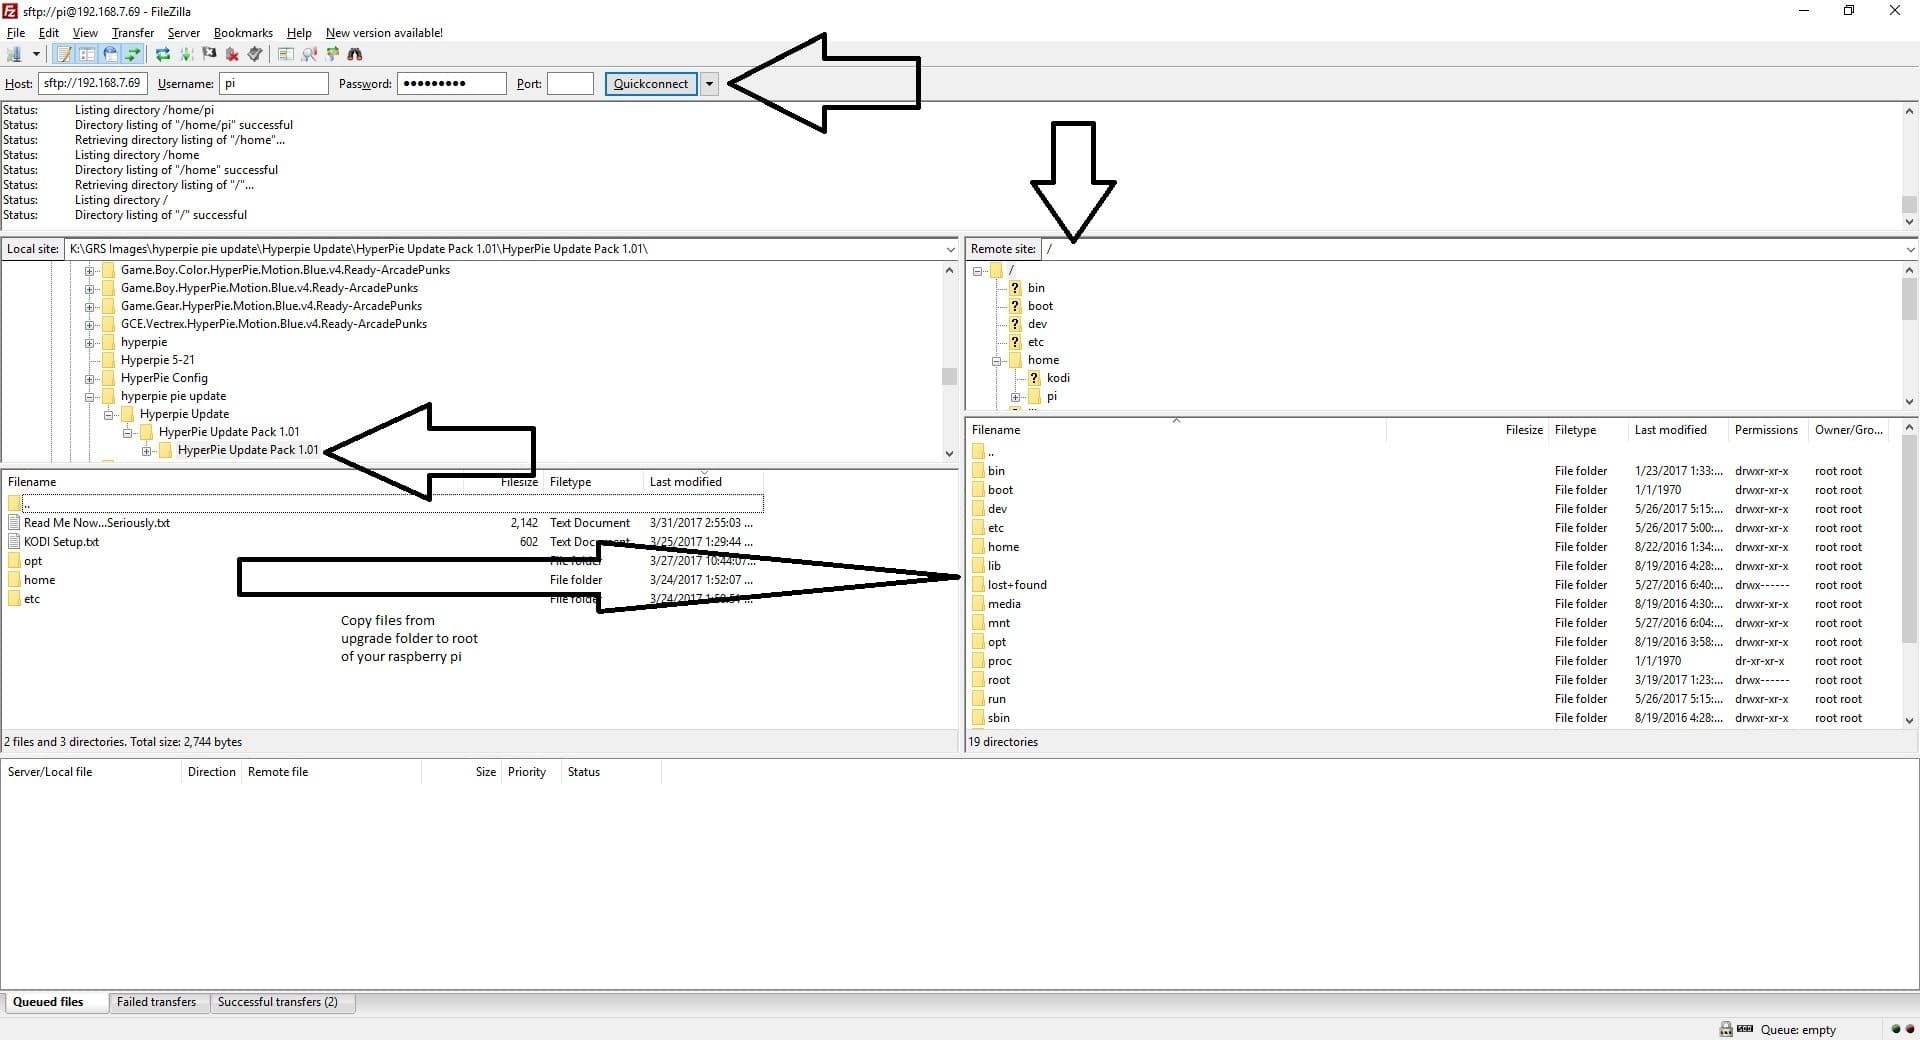
To do this use an FTP file transfer program like FileZilla. Get your ip address from the retropie settings menu (show ip address). Open FileZilla, put in the ipaddress .
- Enter your ip address in the host box, example sftp://192.168.7.69
- Your numbers will be different
- Username: pi
- Password: raspberry
- Port: 22
Once it connects find your update pack folder on the left and the / on the right. Simply drag the folders in the update folder over and tell it to overwrite everything.
Adding Games So Systems Show Up
Get systems to show up by adding games. Some images already have all the games on it, but this build does not have games on it by default so systems will not show up until you put that systems games or “roms” on the pi. It is easy to do.
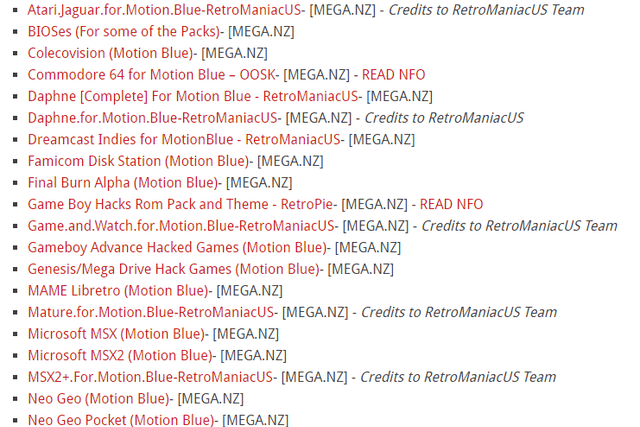
- We can download the ROMs directly using megadownloader as we did for the image going through each system individually Arcade Punks Rom Downloads. Note: for MAME games you will download the “arcade” roms and place in arcade folder further down.
Example list
Example downloading a ROM pack
You will extract the rom pack as we did before, but leave the individual game files zipped.
Adding Games to Our Raspberry PI
Time out! To add games you can either
- Format an external usb drive like the 128gb we mentioned toward the top of the post and use it for roms
- Use your larger microsd card, again, my rom folders are around 100gb and that doesn’t include larger games like for play station
If using an external usb drive perform the following steps.
- Plug your usb drive into your computer
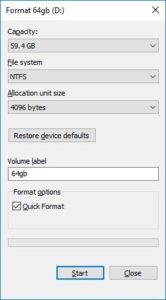
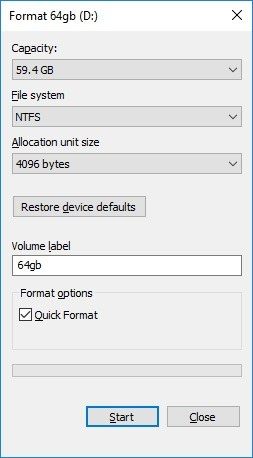
- Right click it and choose format
- IMPORTANT: select NTFS format (it will not work with any other file system)
- When format is done, plug your usb drive into the raspberry pi
- Go to retropie settings page as you did to configure wifi and select “Setup Extended HDD”
- It will run through some prompts and claim success
- You can now plug in the drive and you will see a folder on it called “piroms”, within that folder you will see all the systems
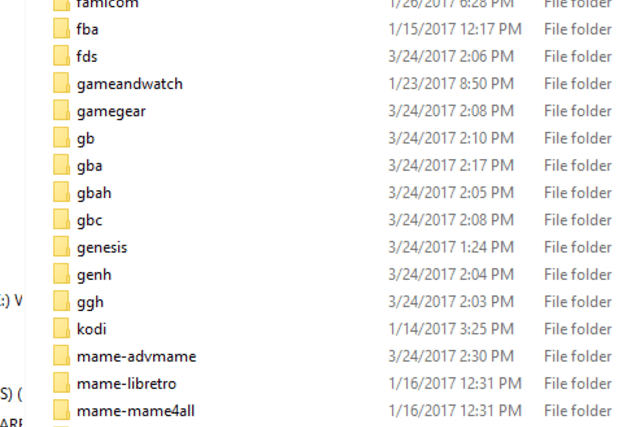
- You can now take any system packs you downloaded from Arcade Punks Rom Downloads and place in appropriate folders
- IMPORTANT: Again you will place the “arcade” roms in the arcade folder. You will not do anything with the “MAME” folders… In short the arcade folder is a short cut folder where you can place roms from multiple mame system types and they will all show up in one place.
If you want to use your microsd card to store the roms follow the steps below
Note: you can use FileZilla as we did above with the update pack. Just navigate the right window to /home/pi/RetroPie/roms or you can use the the process below using a simple explorer folder.
Go to your pc on the same network as your Raspberry PI, open a folder (not a browser), and put in \\retropie
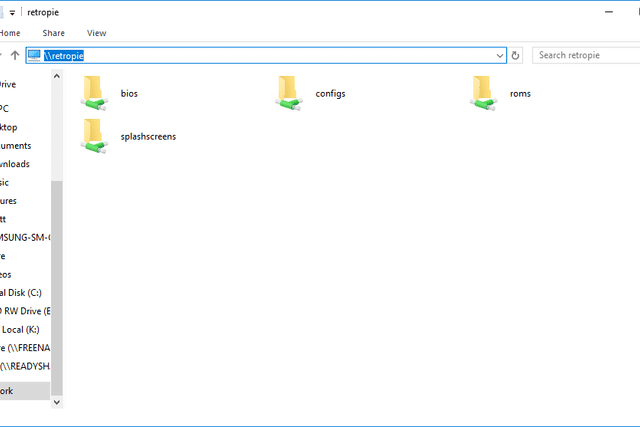
It will connect to your RPI and show you the bios, configs, roms, and splashscreens folders. Simply copy the roms over to the correct system folder in the \\retropie\roms from your computer.
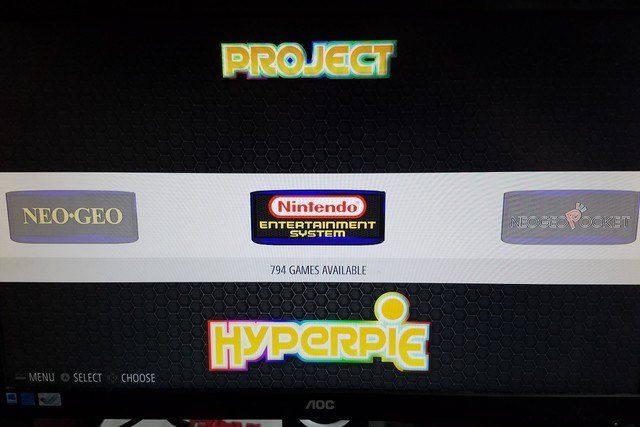
Once you have copied over your roms reboot the system. When it comes up you will notice the systems now show up! Getting closer. See Nintendo is now on there
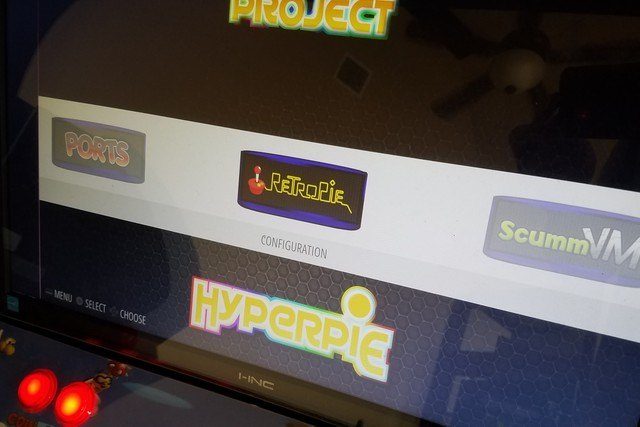
Going into the “HyperSpin” like flash Attract Mode HyperPie
Now let’s go ahead and boot the flashy attract mode which will make our setup look like HyperSpin. Go into Retropie configuration menu.

Select “Switch to Attract Mode”. It will boot into attract mode and you will see the super flashy interface. It will boot into attract mode from here on unless you go back to emulationstation in the settings.
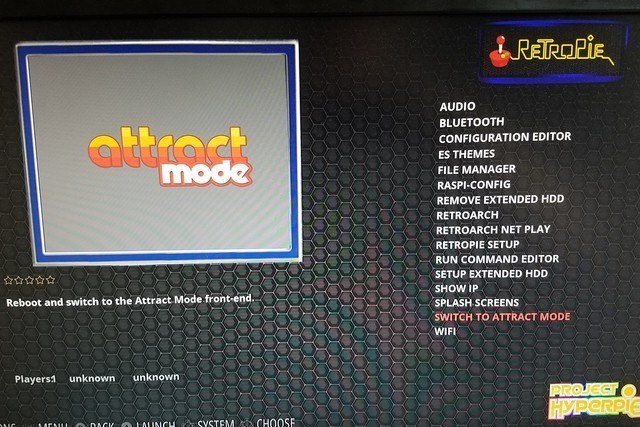
Attract mode interface

Using GRS Configuration Files to Get Systems Working in One Step

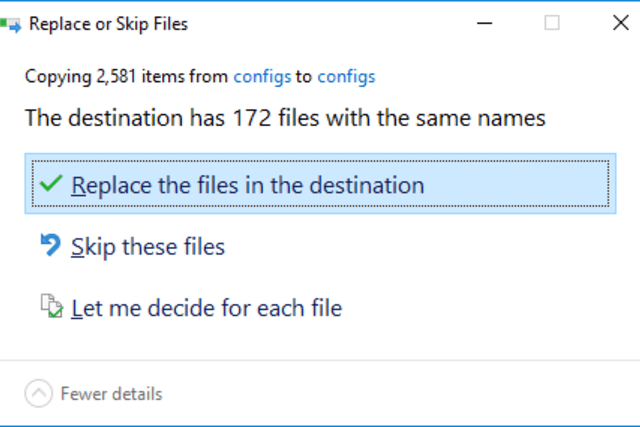
With purchase of any of our kits you get our configuration files at no charge. Simply navigate to \\retropie and you will see the configs folder (just like how we did the roms). Copy our supplied config folder over to the \\retropie configs and allow it to overwrite.
That should get you playing on the systems, yep it’s that easy. Notes: To exit out of console games you have to utilize the hotkey combo. What that means is hold button 10 and press button 9 in the picture below to exit out of games. Button 8 is coin/select and button 7 are start.
Configuring MAME
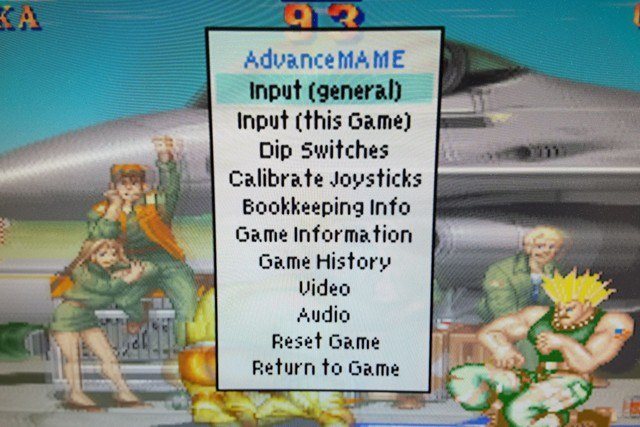
MAME will be configured with our config files (this should not be necessary), but if you are not familiar I will show you here how to change controls in case you want to for a specific game or all games. Boot into a game. We will do Street Fighter 2. Plug in a keyboard. When the game is running, press tab on your keyboard and bring up the menu.
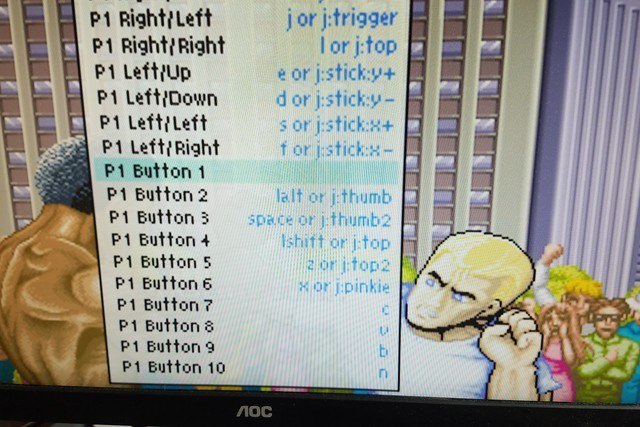
“Input General” will take your changes across to all games while “Input this game” will only modify the controls for the game you have running in the background. You will configure your 1 and 2 player controls by selecting the action, then pressing the button you want for that action (very similar to how we did attract mode controls). Don’t forget your coin and start buttons in the other controls options along with UI cancel to exit mame.
Configuring Controls for Attract Mode
Attract mode should already be configured if you copied over our provided config files, but if you want to change how they work… Press TAB on a keyboard.
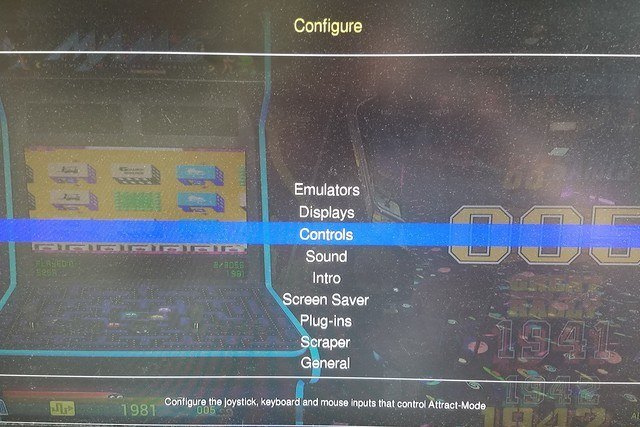
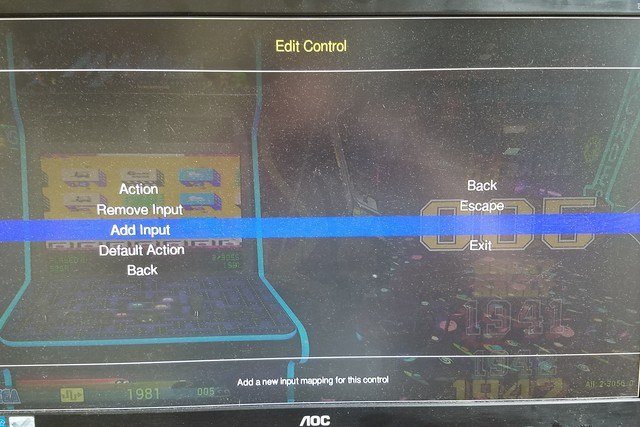
Select controls and configure them by selecting something like “Back”, hit enter or select on add input (it will wait for you to press the button you want to be back), press your back button, then go to next function until you are happy with setup. I would definitely utilize page up, page down, fav, etc.
Now we have only configured how to navigate attract mode not the actual game systems when we go into a game.
OMG… One the cheap $35 Raspberry PI who would have ever thought you could have something like this. Make sure and check out our cabinets and control kits.
Thanks!

For HyperPie ready dompacks go to this link instead http://www.arcadepunks.com/hyperpie-and-motion-blue-v4-rom-pack-downloads/
Thanks Peter. I will update in the post.
Hi Ryan,
I’ve followed your directions very carefully but I’m having trouble getting this to work flawlessly. Would it be possible for you to post your image for me to use. It would be greatly appreciated.
Best Regards,
Mark
Our config files only work with our encoders and come with purchase of our controls sets or cabinets.
I just finished my build of your Deluxe Kit this past weekend and love it. The image you provide is great, but I wanted to have a more flashy front end like HyperPie. So I do own the Xin Mo controller and your kit. If you could post this HyperPie image with the other two you provide that would be unbelievable!!!! I have tried a few times to get certain images posted on arcade punks to work (including these instructions) with your kit but always run into issues. Thanks
It is too big and arcadepunks stays up on that. I am sending out the config files, but not maintain the images. Contact through web form and I can hook you up.
So just so I’m sure – these images dont work for just anyone that wants it? You have to buy something? I’ve tried to download a few times and keep getting an error.
Incorrect. The image will work for anyone. If you purchase a cabinet or control kit from us we provide config files so it works with our system out of the box. Otherwise you will have to manually configure the controls to whatever encoder you choose to use. There are tons of guides out there to configure controls. It can be time consuming.
Thanks for your speedy reply and sorry for jumping to conclusions about the image. Any idea why I keep getting an error when downloading and trying to unzip? I’ve tried 3 different times on 2 different computers.
do you have enough room to extract it?
yes.
the first 2 times when i tried to extract it i got checksum error. It may be my internet connection – might not be stable throughout the download.
did you use megadownloader? Maybe try to download the torrent.
First of all thanks!! This made setting up almost a no-brainer. Got one question though, can you point me in the right direction on how to hook up a hardrive and play roms off of it?
I was finally able to get this to work. I did it using a Mac and ran into trouble replacing the config files. It wouldn’t just overwrite/replace them. I had to manually delete the config files one by one on the image and replace them with the files you provided. In any case, I got it to work and it rocks. Thanks Ryan
the Raspberry Pi must be installed operating system to make it work?
Raspberry Pi is the computer. RetroPie (with underlying Linux) is the operating system.