OK… So hopefully you were able to successfully setup XBMC along with some of the tweaks shown in the Media Center section. Now we want to take that knowledge and actually apply it to a device that can run on any TV in the house. Easy enough for the wife and kids, but yet still jaw dropping when you have people over.
So from this point on we want to turn XBMC into an appliance much like your cable box. Meaning that when you press power the device boots straight into XBMC for all to enjoy. The goal is for others to not even realize there is a computer connected to the TV, but the HDMI 2 input on the TV is bad ass.
There are tons of choices when selecting a piece of hardware. The most important components to consider is dual core processor, hdmi output, 2 to 4 gig of DDR3 RAM, and a 8 to 16 gig flash drive. If you want me to comment on a particular piece of hardware you are considering then please reply to this post. I will say that you should not spend over $150 for the entire setup.
So now that we have selected hardware that is capable of connecting to the TV and/or surround sound system then the TV we are ready to load it up. There are tons of options to get XBMC loaded for use on a TV. By far the best/easiest IMO is Openelec. Essentially Openelec is custom Linux distro built with XBMC that can be ran from a flash drive. Do not let “Linux” throw you. As far as you or anyone that uses your setup will know… I press power and XBMC comes up on the TV.
Here is an example video of my Acer Revo AR1600 booting up into XBMC via Openelec.
What you need:
- The computer you want to run xbmc on that will connect to your TV via HDMI
- A computer to create the installation flash drive
- Two flash drives
- A small one (256mb) or larger to create an installation stick
- A larger one (8 to 16 gig) that will run XBMC
- Download the proper version of Openelecbased on your hardware
- You will need to get the correct version based on your hardware
- If you have issues reply to this post with your hardware configuration and I will let you know the correct one to get.
- Insert the installation smaller flash media device (USB or SD) that you are not going to run XBMC on into your computer
- Again, it can be a small stick as most Openelec builds are under 100mb
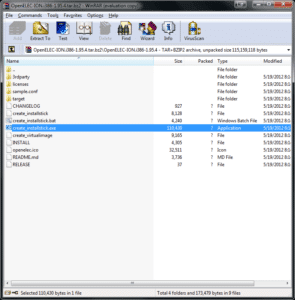
- Open the Openelec zip file you downloaded
- You can use a program called WINRAR to open it if needs be
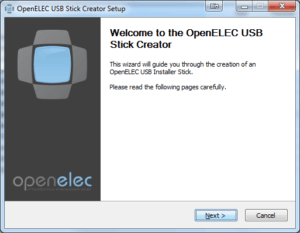
- Double click a file called “create_installstick.exe”
- Start the installation process
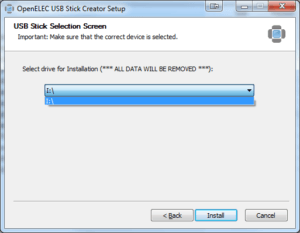
- Select the flash drive you inserted from the drop down
- Again, this is the drive you are only using for installation, not the one that will run XBMC
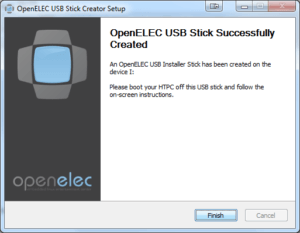
- Excellent! Hit finish and you know have the “installation flash drive” ready to go
So let’s load up our XBMC computer connected to the TV.
- Insert both the “installation flash drive” and the flash/hard drive you are going to run XBMC off of into the XBMC PC
- Start the computer and boot it from the “installation flash drive” usb key – you may need to change a setting in the BIOS to boot from USB drive. Press F8 or F11 on boot, but that depends on your computer.
- Also, make sure you select the smaller “installation flash drive” so it starts the install process. If you select the incorrect drive it will probably say “no files found” or something like that
- The installation will begin and just OK through
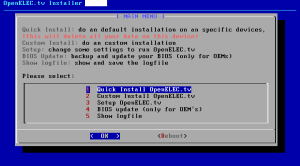
- Select Option 1 to perform a quick installation
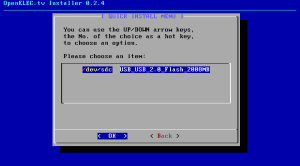
- Select the flash drive you want to install and run XBMC from
- After it completes you will be back at the main menu
- Simply reboot and remove the “installation flash drive” not the drive that will actually run XBMC
Boot from the USB and it should take you right into XBMC! From here use the Media Center section to start setting up the ultimate media center.

