The first question I know you are thinking. Where the hell did he get that cabinet? I lucked out on craigslist, but GameRoomSolutions is working on a CNC cabinet kit and lighting package to create a similar project?
Original post picture
Here are the hardware guts that cost around $450 from Newegg including the 21.5″ touchscreen.
- 1 x AMD Sempron 145 Sargas 2.8GHz Socket AM3 45W Single-Core Desktop Processor SDX145HBGMBOX (unlocked to a dual core)
- 1 x RAIDMAX RX-380K 380W ATX12V Power Supply
- 1 x Rosewill RKM-1600RF Slim Wireless Multimedia Keyboard and Laser Mouse Combo
- 1 x Corsair Nova Series 2 CSSD-V30GB2A 2.5″ 30GB SATA II Internal Solid State Drive (SSD)
- 1 x BIOSTAR A880G+ AM3 AMD 880G HDMI Micro ATX AMD Motherboard
- 1 x G.SKILL Value 4GB 240-Pin DDR3 SDRAM DDR3 1333 (PC3 10666) Desktop Memory Model F3-10666CL9S-4GBNT
- 1 x PLANAR PX2230MW(997-5983-00) 21.5″ USB Optical FHD WideScreen Multi-Touch LCD Monitor w/Speakers
- 1 x Cisco Valet AM10 IEEE 802.11b/g/n USB 2.0 Wireless Adapter 64/128-Bit WEP, WPA, WPA2 (Self-installs directly from …
I picked up the lower monitor for $25 and the stereo receiver to drive the speakers for $10 off Craigslist. Replaced the lights with our LED music kit which you can learn more about here LED Lighting. I had an extra set of JBL book shelf speakers.
Software
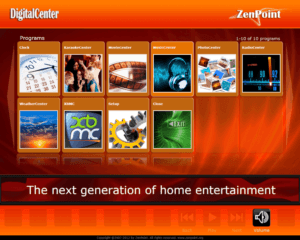
I tried multiple software programs, but ultimately chose ZenPoint Digitial Center. The interface is intuitive and gives a true jukebox feel. It also can do dual monitors and allow you to launch other programs. It did cost $35, but overall it is a good value compared to the other programs I evaluated.
So let’s get Zenpoint Digital Center set up.
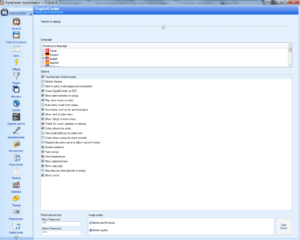
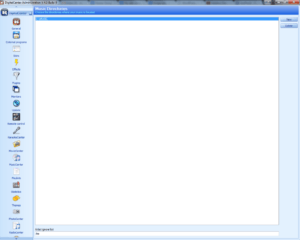
Once you download you will see two main programs.
- Administration
- Digital Center
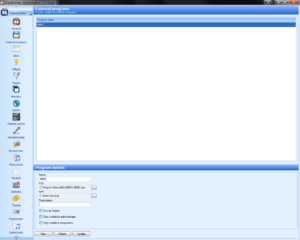
The External Programs tab is how I got Digital Center to have an XBMC button to launch into XBMC for music videos, movies, and TV shows.
- Click the “New” button at the bottom left
- Enter a name that you will understand
- Click the …box for the “File” field and navigate to the program you want to launch
- In this case I found the XBMC executable here C:\Program Files (x86)\XBMC\XBMC.exe
- Google XBMC icons under images and download the one you like
- Click the …box for the Icon field and navigate to the icon you downloaded
Now you are configured to launch XBMC directly from Digital Center. When you exit XBMC it will go back to digital center automatically.
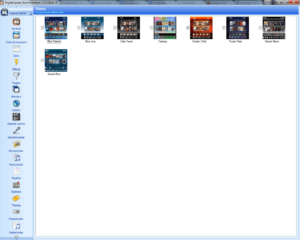
The Skins Tab will allow you to change the look of Digital Center.
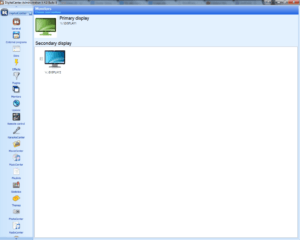
The Monitors Tab is where you simply tick the check box for another monitor if you have one on your setup. Digital center will automatically put the now playing on the second monitor. Note: When I did not have a second monitor in my cabinet, I ran to my TV via HDMI as a second monitor. This is so the now playing showed up on one of the HDMI inputs on the TV.
The Music and Movie Center Tabs are where you add the locations to your files. Simply press the “New” button on the right hand side and navigate to your folder.
Now that we have done some basic configuration and let Digital Center know where to find our files let’s go in and make sure everything is working.
Click Digital Center in the ZenPoint folder in Windows start menu. You will notice our XBMC launch on the main menu.
Click the Music Center icon and it will begin the import of your music.
Note: Once imported if you notice some of your artwork is fuzzy, then you need to get higher resolution artwork in your music files. 500×500 is perfect. If you have a large library and do not want to mess with it I suggest using a program called BLISS HQ. It is around $50 for unlimited fixes, but you can set rules like “Download artwork that is atleast 500×500 resolution” and forget about it.
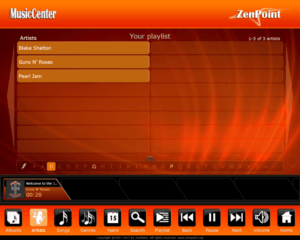
Here is a shot of the Artist category
Finally hit the home button in the bottom right corner to return to the main menu and test that the XBMC launch button works. It should launch in full screen. If not simply hit the back slash “\” key on your keyboard one time and you will be good.
Go to the Media Center Section in the learning center to get XBMC setup information including using the re.touched touchscreen skin I use for my jukebox.


