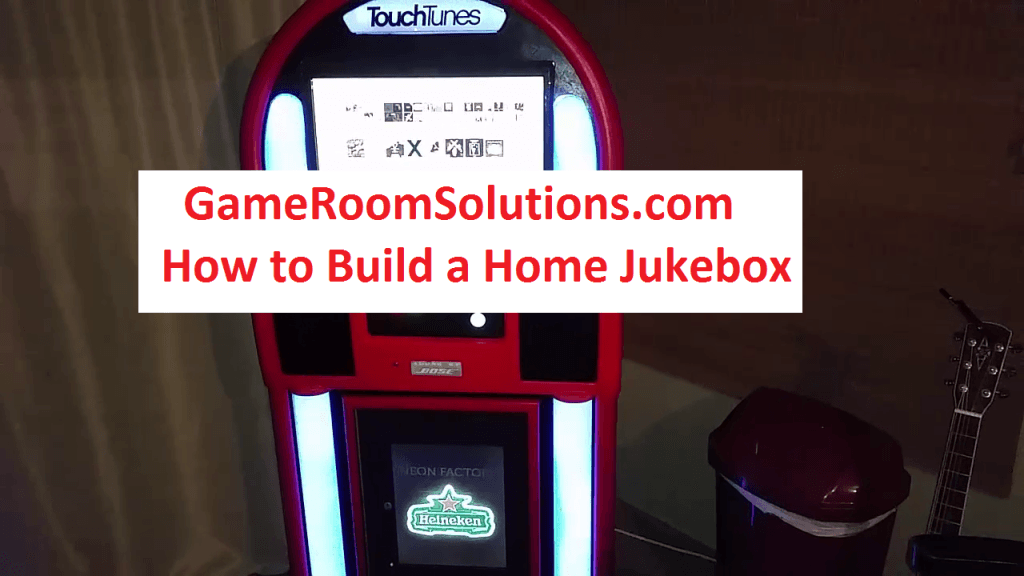
Build a Home Jukebox
A guide to build a home jukebox. In this post I want to demonstrate some mechanics that will allow you to be creative, have an awesome unit, and keep maintenance to a minimum.
Video Overview
Music/Video Content
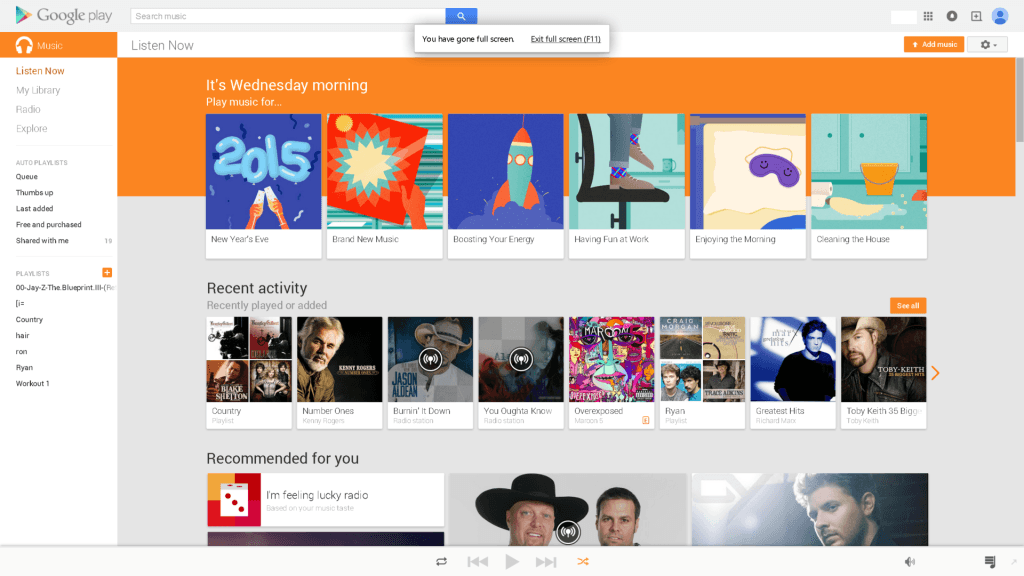
So we all know there are tons of ways to get music. Rip your CD’s, Spotify, download, bit-torrent, ZenPoint Music Center, iTunes, etc. What I am shooting for here is a self contained music box that is easy to navigate and you spend your time enjoying it instead of worrying about keeping it updated. For this look no further than Google Music. It is only $10 per month and Google does the hard part of updating music continually. As a bonus you can connect up to 10 devices to the service so all your phones etc can access it on the go.
Some features that translate really well for a touch screen jukebox.
Kiosk mode
Simply press F11 and Google chrome will go full screen so people will not see the underlying operating system or be able to access your PC.
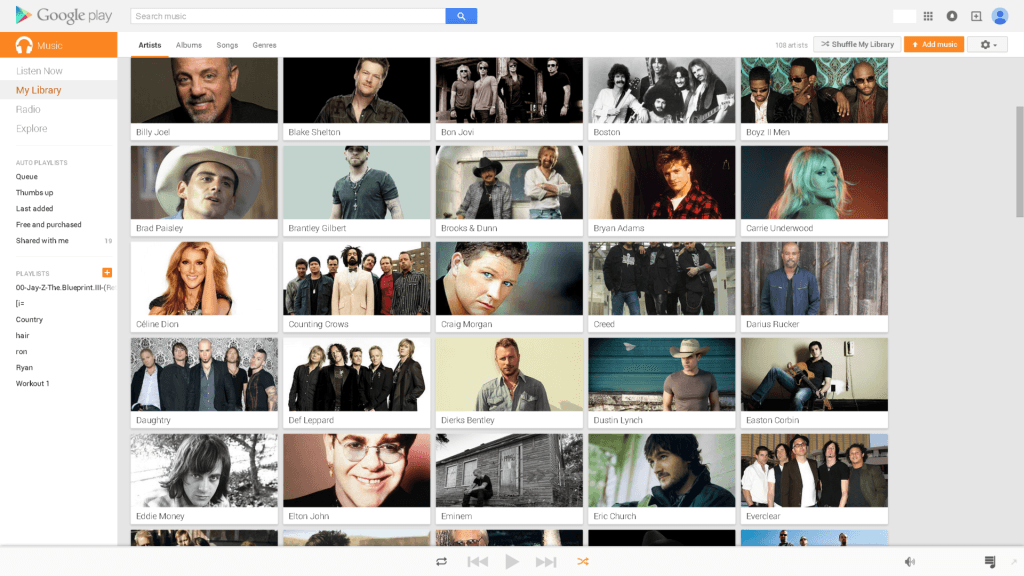
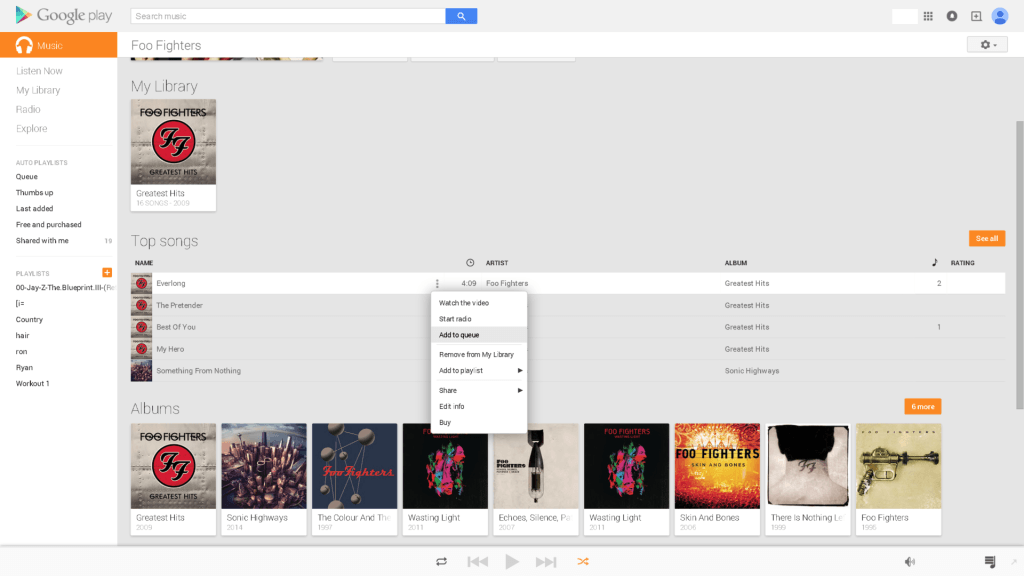
My Library
As you explore music you can virtually add albums or artist to your library. It does not physically download anything, but essentially organizes all your favorites in one place.
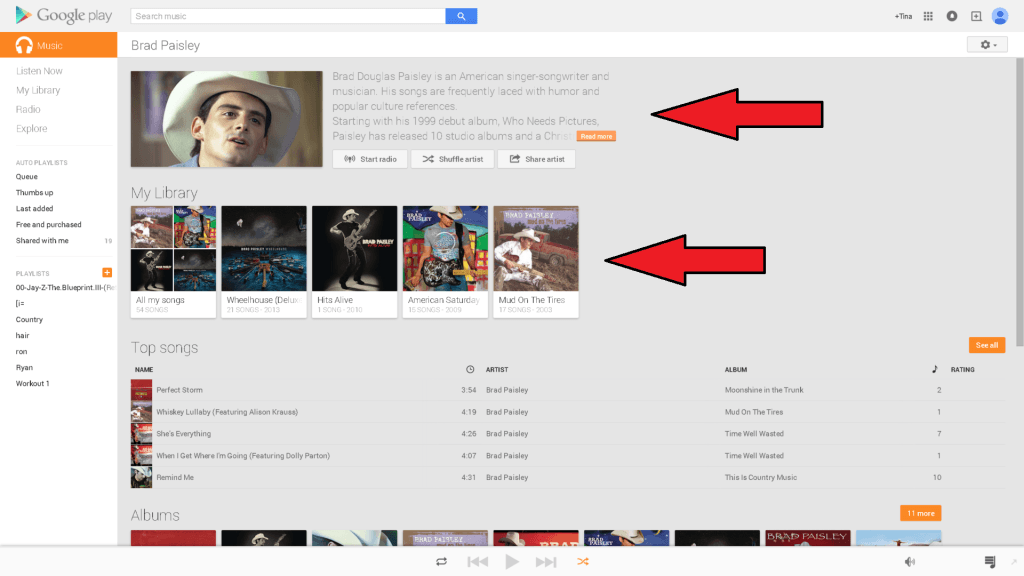
Artist
When you select an Artist you get the bio, any songs/albums you have added to your library (favorites), top songs, all albums, videos, and like artists.
Videos
A great feature that will separate your party from the rest is the ability to play music videos. The quality is 1080p for newer videos and pure awesome. Most artists have their entire music video library posted up there. When you select the video it will immediately suspend any audio and play the video in a small screen. A simple double tap will take the video in and out of full screen. This is what separates Google from other services or trying to stay on top of downloading yourself. When you tap off the video it immediately continues play the audio song that was playing before so the party does not stop.
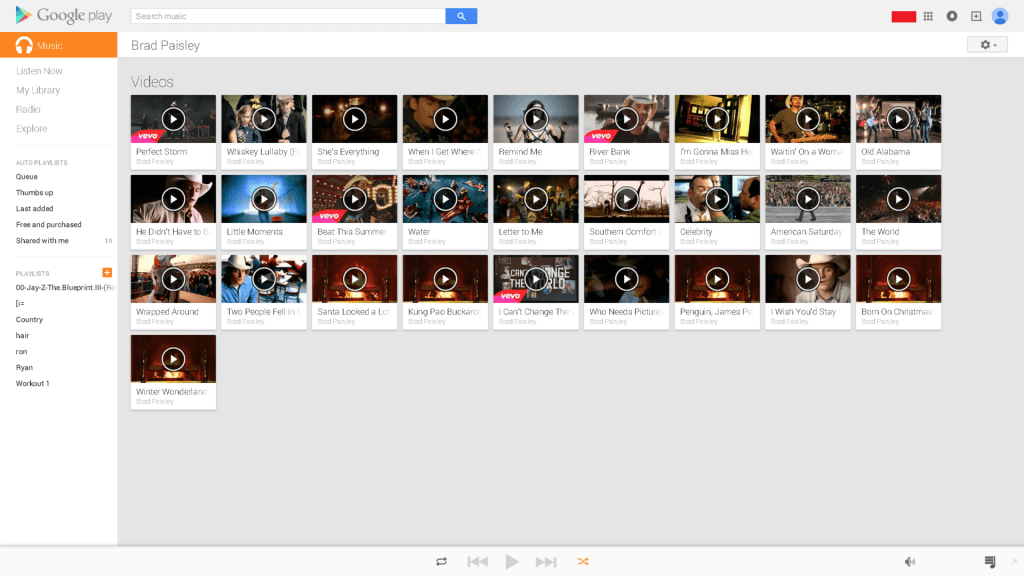
The videos play from YouTube so you will want to get the Auto HD for YouTube chrome extension. This way videos automatically play at their highest resolution. You can get it here.
Playlists
An obvious feature, but super powerful. You can create different mixes for different moods. Then click the list and shuffle or not.

Queue
The ability to queue is huge so people can select songs and add them to keep the party going. This cannot be done with music videos yet, but with audio files it works great and really keeps the jukebox feel.
Cabinet and Electronics
I was lucky enough to score an old TouchTunes box off of Craigslist for under $100. These are rare finds, but I definately suggest checking Craigslist periodically if you want to try and modify an actual cabinet. In my opinion you would have to have mad carpentry skills to attempt to build one since they are often oddly shaped (not a box) and have metal/plastic molds to get the desired look. If you are not able to find or build a cabinet here are some options I would suggest.
PC and Mounted Touch Screen with Soundbar/Wireless Subwoofer
Mount a touch screen to the wall with an existing PC or build a solid AM1 box. You will probably be around $400ish.
Touch Screen that has VESA mount and good reviews (great price).
The AM1 processors are very reasonable and a lot of power for the price. Here is a simple quad core build for around $150.
$36 quad core processor.
$37 motherboard with both DVI/HDMI along with plenty of USB
$38 4GB of compatible Memory
$39 for Case and Power Supply
Those are the bare bone parts you will need. Like I mentioned before you will not need very much hard drive space since you are really only running the operating system and the web browser for this setup.
So for a Windows build I would suggest
Or if you are comfortable you could run a Linux OS like Ubuntu on a flash drive (or the drive above) for around $10 USB 3.0 Drives
I would try and run a wired connection, but here is a very good Wireless USB dongle for $20
For audio you might want to shop Sound Bar Options with Wireless Subwoofer unless you have an audio solution already.
Buy an All in One Unit
A simple way to go if you are not familiar with building a PC is to buy an all in one unit. They come in both Windows and Android flavors. Keep in mind the ability to Vesa Mount if you want to mount it to the wall or in a cabinet.
Windows versions would allow you to do more advanced functionality and pack more power.
Here is one with VESA mounting capability
They also have Android versions where you could simply use the Google Play Music App.
Search for more Android Options Here
Tablet
You could also simply use your current tablet/phone with the Google Music app and maybe Bluetooth to your audio system. You could also buy a dedicated tablet to mount for this purpose.
Example 10 inch tablets
Tablet Wall Mounts
Lighting
LED light strips are fairly standard and cheap at this point. You can get around 16ft with a controller and remote for between $15 and $30. The big difference is if the strips are waterproof and how many color settings are on the remote. For the price they really can add a lot to any project and typically come with 3M tack on the back so you can stick them wherever you wish.
Buttons and Software
As you see in the video a nice addition is some physical buttons that will extend functionality of your unit. You can pick up lighted buttons and usb encoders from our store, but I also want to talk about how to use a free keyboard emulation program joy2key to convert button presses to keyboard strokes.
So the goal is to setup some physical buttons that perform the following tasks
- Go back = Backspace
- Pause/Play = Space
- Full Screen Toggle = F11
- Volume Up = Your keyboard Vol up button
- Volume Down = Your keyboard Vol down button
Download joy2key and install
It will open the application where you will see the different gampads connected. Simply do a few button presses while changing the joystick tabs at the top to figure out the location of the buttons. They will highlight in yellow as you press the buttons.

Once you have figured that out get your keyboard ready and double click the first button you want to program. If you only want the button to do one thing simply press that key on the keyboard. In the picture below you should see where I pressed the “space bar”. Hit OK and now each time you press that button the program you are focused on will interpret it as a space key press.
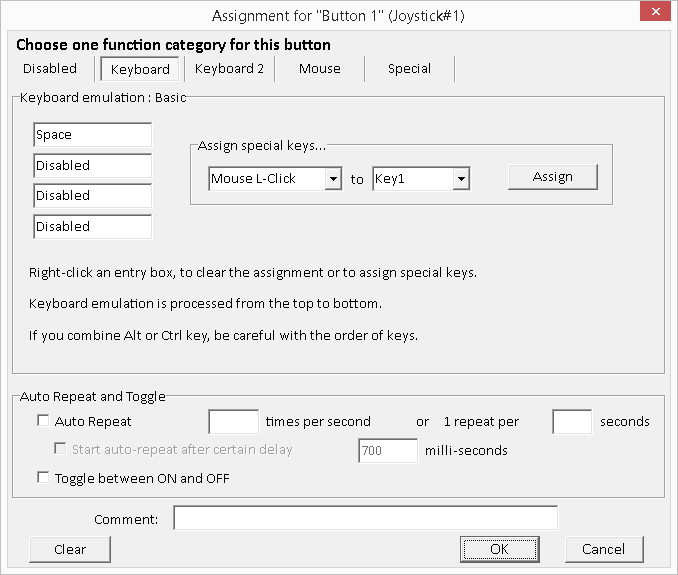
If you want a button to do multiple key presses you can set that by how long you hold the button. In the example below, when I press and release button 2 it will send the backspace keystroke, but when I hold the button for longer than half a sec and release it will send the F11 keystroke.

Here is an example of what you will see once those are inputted.

You can get creative on how many buttons you would like and what functionality you would want in those buttons. Also for volume up and down use a keyboard that has those button on it as most do and simply press that button when you are telling joy2key which ones to do. Adding LED buttons can really make you project pop and more user friendly.
Conclusion
This quick post again was to talk about a great low maintenance way to get music accessible to your house and parties. Also hopefully inspires you to get creative using some of the type of gear listed above to build something great. I cannot tell you the enjoyment I get from my unit both hanging out alone and watching old hair metal videos or watching others enjoy it in social settings. And again $10 a month is a small price to pay to not have to management your music and get music video integration! Good luck.

Great write up thanks for sharing, i have been searching for a modern interface for a jukebox i am going to build and this works perfect 🙂
Glad to point this out to you. Thanks!
Hi Ryan I like your jbox am wanting to build one. why is a quadcore and not duo(have one) needed. Thanks Ra
Dual core would work fine for this application.
Ryan I have the same allegro cabinet how did you mount the pc touchscreen monitor?
Wood and tv mount behind.