
This Raspberry Pi RPI RetroPie Setup Guide will take you through everything you need to know step by step with pictures to get you playing fast!
Basic glossary of terms needed for RetroPie Setup
- Raspberry Pi 3 – The latest version of a $35 micro computer with built in wifi. You will only need to add a $8 power supply and a microsd card. Get one at Amazon. We suggest a 32gb Class 10 speed micro sd card
- RetroPie – an image file that you can flash on your sd card that has all the necessary software components to create a retro gaming machine. The current version is RetroPie 3.6
- EmulationStation – The frontend software included with RetoPie. Essentailly the pretty, organizational face of how you select your systems and games
- RetroArch – The underlying workhorse software that contains the emulators and configuration files necessary to play games
- Emulator – A piece of software that acts like the computer is a console system such as NES or Genesis
- Roms – Simply a game file
- Image – A copy of a retropie installation that you can put on your microsd card so you do not have to manually configure many options on your own.
- SSH – Secure Shell; just a way for you to access your RPI3 with a computer to change settings or add games for example
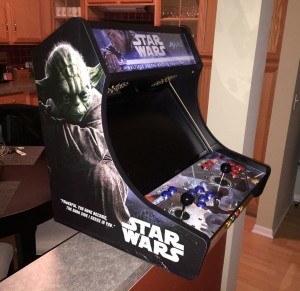
Here is an example of one of our Bartop Arcade Deluxe DIY Machines running RetroPie
Quick commercial (sorry)…. We offer a free GRS RetroPie Image if you purchase our bartop arcade deluxe machine or our control kits for your cabinet. So you can skip this entire guide except for flashing our image as it is plug and play with our control kits!!! (Sorry again, but huge advantage if you need controls or a cabinet).
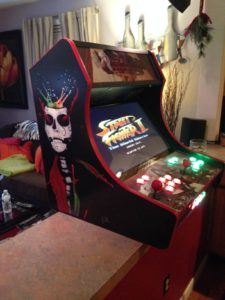
Recent Customer Cabinets
Flash the RetroPie Setup Image
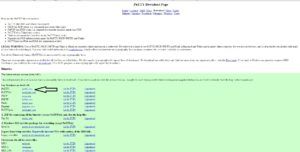
Let’s start by getting the RPI3 image from the Retropie website. You can get it here

There are two versions. The standard version will boot directly into EmulationStation for your arcade which we will select. The Berryboot version will allow you to boot multiple operating systems if you want to use your pi for more than just the arcade.
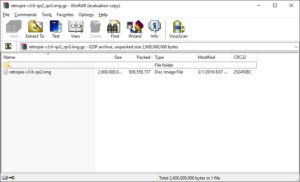
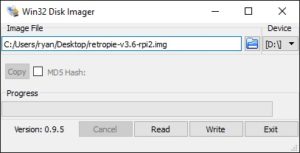
Let’s flash the RetroPie setup image on our MicroSd card. We are going to use a 32gb microsd because we plan to add some of the newer system emulators more specifically Daphane for Dragon’s Lair and Space Ace. You can pick up a microsd usb card read/write cheap on Amazon if you do not have one for your computer. Insert the microsd into your computer and it will show up as a drive like any other flash media. We need to extract the image file on our computer. We use winrar, but windows should do it as well. We will use the free Win32 Disk Imager application to flash the image on our microsd card. Simply open the program, select the location of your extracted image (.img file), the drive letter for your microsd card and press “write”. It will put the stock retropie image on the microsd and say write completed.
Winrar
Win32 Disk Imager
Make sure your arcade controls are plugged into your RPI3 RetroPie setup. You can get a full kit from us here or better yet check out our new Bartop Arcade Deluxe! Now lets put the microsd card in the RPI3 and boot it up. The system will boot and automatically re-size the hard drive partition to use all of your microsd card. After an automatic reboot if you connected your controls it will ask you to configure your game pad. Hold down a button on your game pad and go through the prompts. There will probably more options than you care to map to your controls. Just hold down a button and it will skip that input. The “A” and “B” are important as they go forward and back in EmulationStation. Once you complete press whatever button you designated as “A” on the OK and you will go into EmulationStation. Note: You have only mapped controls to navigate emulationstation. We will map the controls for the emulators at a later step.
Connect to Wifi
Let’s get the system on our Wifi first by going into the RetroPie setup menu and “configure wifi”. Go ahead and plug in a usb keyboard so you can type in your wifi password after selecting your network. You should connect as with any other device. Make sure and write down your ip address. Press Escape on your keyboard and you will go back to EmulationStation.
Access Your RetroPie Setup Easily From A Computer
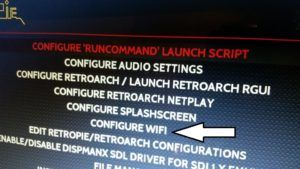
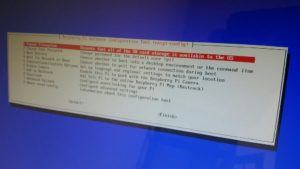
From here let’s make it so we can access our pi from another computer and also give it max memory for graphics. In the RetroPie Menu go to the Raspberry Pi Configuration Tool Raspi-config.

Option 1 should already be done, but using your keyboard you can press enter to ensure you are using all of your microsd car space.
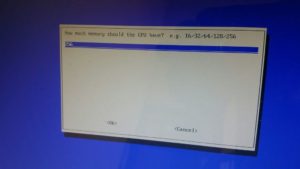
Next go to option 9 or Advanced Options. Under A3 press enter and put 256 in the memory split and press OK.
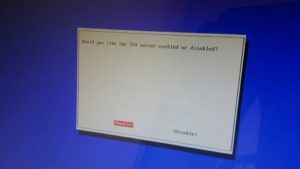
Next enable SSH under option A4. SSH will simply allow us to access the pi to put our games on and modify our controls for the emulators.
After enabling SSH pres escape and go back to your emulationstation interface. Now that your RPI3 is on your network and SSH is enabled let’s go to a computer on your network and access it.
Let RetroPie Setup know there is Two Controllers
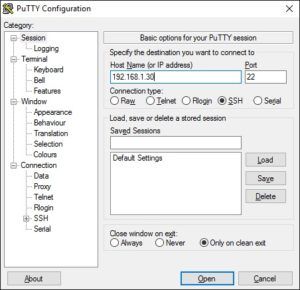
Don’t get overwhelmed if you are not used to command line. In short we are simply pasting some text to the end of a file and saving it. We need to start by modifying the boot/cmdline.txt file so the system recognizes the two players using the xinmo usb encoder which is a very popular arcade control board. Download the free program called putty so we can access the file. Open putty, type in your ip address of the RPI3 and port 22 then connect.
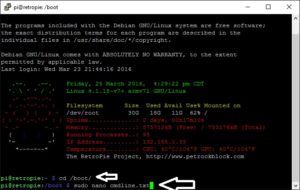
user: pi
password: raspberry
NOTE: All commands have “” do not type the “” but the contents in between then
- Once in let’s get to the right folder by typing “cd /boot/”
- Then we can modify the file via a notepad type program called nano; to open the file in nano simply type “sudo nano cmdline.txt”
- Press enter and you will see a long line of text
- Press the right key to the end of the text and hit the space key as we want to add a simple line of text to that current line…
- Note: do not press enter and add it to a second line, we want one long string with a simple space in between the last entry.
- Type or paste usbhid.quirks=0x16c0:0x05e1:0x040
![]()
- Press ctrl x to escape
- Press Y to save it
Configuring Controls for the Emulators
Now we are going to configure all the emulators in our RetroPie Setup to work with our controls because as yet we have only configured them for the frontend emulationstation and we are going to change that too now that we have 2 players recognized.
Use your favorite FTP program or something free like FileZilla or WINSCP. Type in your RPI3 ip address you wrote down earlier with the username pi and password raspberry and port 22.
FTP is simply a way to access your RetroPie Setup RPI3 files in an explorer type folder format to make changes.
Once you enter the information above to connect, this will open a folder directory where you can navigate to add roms and configure controls. Let’s start by configuring controls. For this blog we will be configuring the xin-mo usb encoder that we sell in our shop. BONUS – if you purchase a bartop or control kit from us we will supply you with the raspberry 2 or 3 image that is plug and play with our control sets! Back in your FTP navigate to /opt/retropie/configs/all and open the retroarch.cfg file. To make this easy you will want to cut and paste the content below starting on line 490. You may want to open the file with a free program like notepad++ so it is formatted easy to read.

This is the configuration that works with our control kits, again paste on line 490 in the cfg file, then save it back to the pi. Essentially you are mapping buttons like player 1 “b” button to button 3 on the control board. That would be the bottom left on the standard 6 button setup as they start with zero….
So joystick u,d,l,r and buttons 0 1 2 across the top and 3 4 5 along the bottom 3 buttons for examples
input_player1_b_btn = 3
input_player1_y_btn = 0
input_player1_select_btn = 7
input_player1_start_btn = 6
input_player1_up_axis = -1
input_player1_down_axis = +1
input_player1_left_axis = -0
input_player1_right_axis = +0
input_player1_a_btn = 4
input_player1_x_btn = 1
input_player1_l_btn = 2
input_player1_r_btn = 5
input_player2_b_btn = 3
input_player2_y_btn = 0
input_player2_select_btn = 7
input_player2_start_btn = 6
input_player2_up_axis = -1
input_player2_down_axis = +1
input_player2_left_axis = -0
input_player2_right_axis = +0
input_player2_a_btn = 4
input_player2_x_btn = 1
input_player2_l_btn = 2
input_player2_r_btn = 5
input_enable_hotkey_btn = 9
input_exit_emulator_btn = 8
input_menu_toggle_btn = 1
input_load_state_btn = 2
input_save_state_btn = 5
input_reset_btn = 3
input_state_slot_increase_axis = +0
input_state_slot_decrease_axis = -0
input_volume_up_axis = -1
input_volume_down_axis = +1
How we suggest you wire your controls for your RetroPie Setup
Button Layout
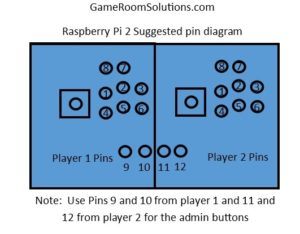
Now your controls will work with all the console emulators. Note to exit console (not mame) emulators you will hold down the “mode” button or player 1 button 9 then press button 8.
Now let’s reconfigure emulationstation controls now that we have two players. In FileZilla go to /opt/retropie/configs/all/emulationstation and open es_input.cfg
put in the following and replace what is in there
<?xml version="1.0"?>

<inputList>

<inputConfig type="joystick" deviceName="Xin-Mo Xin-Mo Dual Arcade" deviceGUID="03000000c0160000e105000001010000">
<input name="a" type="button" id="11" value="1" />
<input name="b" type="button" id="8" value="1" />
<input name="down" type="axis" id="1" value="1" />
<input name="left" type="axis" id="0" value="-1" />
<input name="leftbottom" type="button" id="2" value="1" />
<input name="right" type="axis" id="0" value="1" />
<input name="rightbottom" type="button" id="5" value="1" />
<input name="select" type="button" id="9" value="1" />
<input name="start" type="button" id="10" value="1" />
<input name="up" type="axis" id="1" value="-1" />
<input name="x" type="button" id="1" value="1" />
<input name="y" type="button" id="0" value="1" />
</inputConfig>
</inputList>
Save it back and your controls are now configured with everything except MAME…
Adding Games
In short, now we need to add some games or “roms” to our roms folder. This will get the systems and games to show up whenever you add games for that system. In short, navigate to /home/pi/RetroPie/roms and drop your rom files in the correct system folders. Also for console systems like NES make sure your roms are not zipped or .zip. They should end in .nes for this example. Your MAME roms are fine to be zipped. Once you put at least one game in a folder, that system will show up on boot. Also delete any contents that was in system folders by default that you do not want for example msdos and it will be removed from the main menu. So FTP in again and go to
After you have added your games to all the correct system folders reboot your RPI3.
In depth, Copying Games to your RetroPie Setup
Let’s get your games “rom files” transferred over to your raspberry pi. We will use WinSCP to transfer the game files but you could use FileZilla or whatever FTP program you want. You can use CyberDuck for Mac.
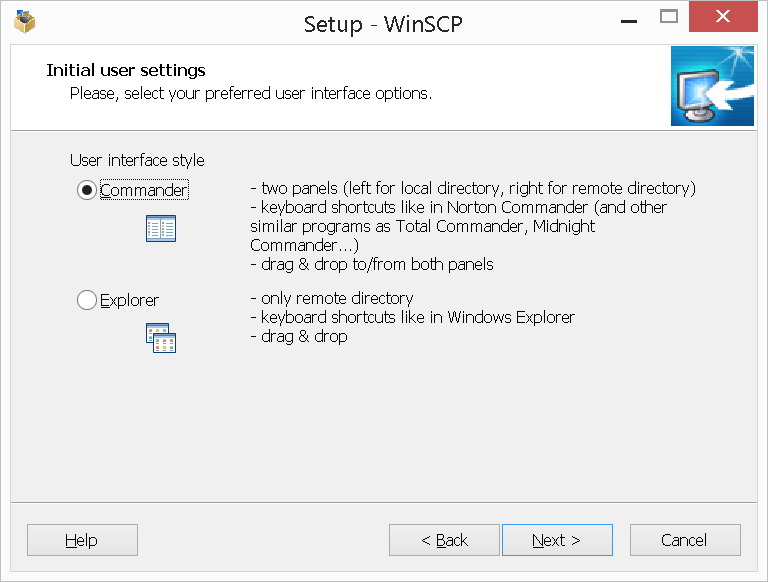
Just do the basic installation. I would do the Commander view when it asks you for that in the installation.
Go ahead and launch upon installation finish or after it installs.
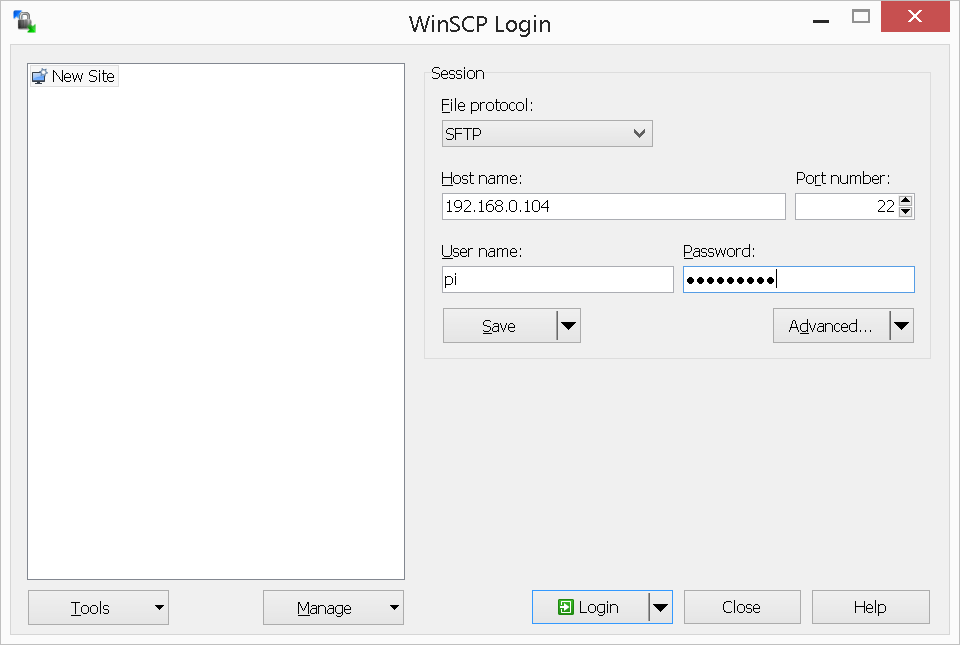
- Enter the ip address of your raspberry pi (press “F4” on the raspberry pi and the cmdline welcome screen will give the ip address to you)
- Username is “pi” without quotes
- Password is “raspberry” without quotes
- SFTP for connection type is fine
- Click log in and yes to any prompts
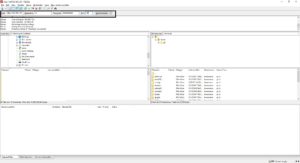
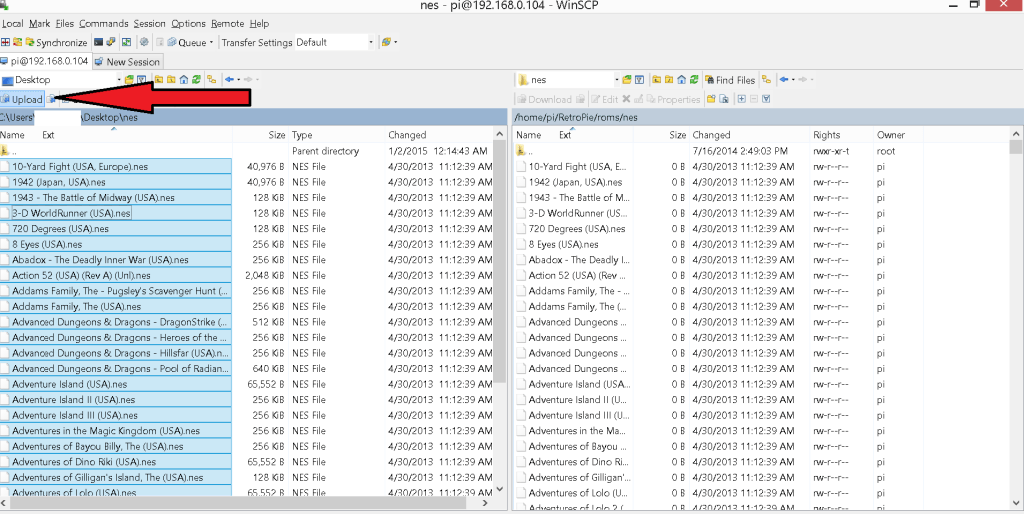
Now you are ready to transfer or upload game files to the raspberry pi. On the right is your raspberry pi setup. Navigate by clicking on the folders RetroPie -> roms. You will see the available systems.

Choose the folder of the system you want to transfer the games to.
NOTE: THE SYSTEM WILL NOT SHOW UP IN EMULATION STATION UNLESS THERE IS AT LEAST 1 ROM IN THE SYSTEM’S ROM FOLDER
For this example we will do nes games, but the process is the same.
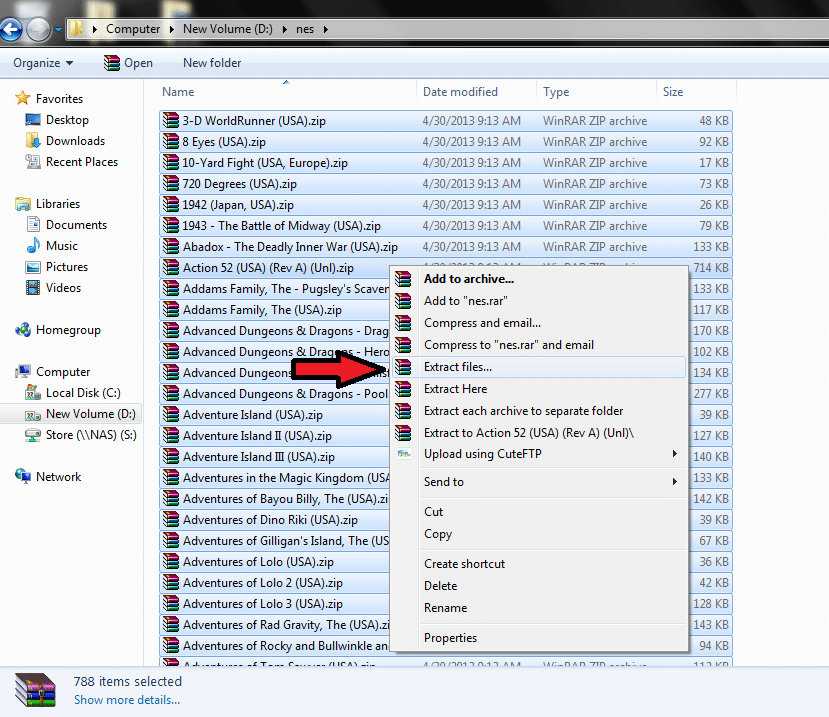
Find you local folder that contains the nes “game” rom files. NOTE: THE ROM FILES CANNOT BE ZIPPED. Other frontends are fine with zip files, but they will not be recognized in emulation station. If you want to unzip all in 1 action. Ctrl A to select all of them and right click. With Winrar installed you can press “Extract Files”. All will extract in one folder.
Here is the output of .nes rom files.

Select that folder on the left side of WinSCP and press upload making sure you are in the nes folder (in this example) to transfer the games.
You will repeat this process for all the system you want to add to emulation station.
Get Game Artwork and Data
Let’s get the artwork and data for our games. Retropie has a built in scraper, but one has been developed by ssleph that works faster and more accurately.
To install we need to exit emulationstation and go to terminal (cmd prompt)
To do this press ALT F4, wait 5 seconds and then ALT F4 again.
user: pi
password: raspberry
This will get you to command prompt where you will paste the following commands pressing enter after each one
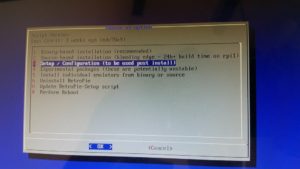
cd RetroPie-Setup
sudo ./retropie_setup.sh
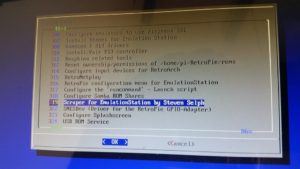
Select Option 3 then options 319 or Scraper for EmulationStation by Stephen Selph
It will install and then get you to a simple gui interface to scrape.
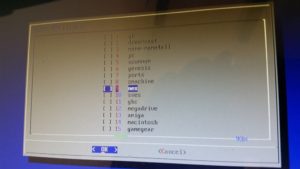
We will scrape one system by selecting option 2
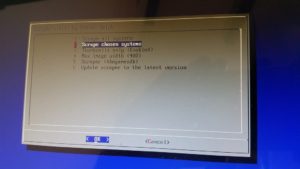
Select the system you want to scrape and press enter. Make sure you are connected to the web via lan or wifi and it will scrape all the games data and artwork.
Cancel out and it will take you back to terminal where you can type
sudo reboot
When the system comes up you will notice all the artwork is there for you systems that you ran the scraper on!!!
Sega Genesis 6 Button Setup
Reboot your RetroPie Setup and when it comes back you should notice your controls are working and your systems with games should be in the menu.
Most consoles should be good; however the Sega Genesis by default only uses the 3 button controller layout and we want the 6 button. We need to make a change to the picodrive emulator so that the Sega Genesis uses 6 buttons instead of 3. To do that navigate to the /opt/retropie/configs/all and make sure the picodrive entries looks like the following below in the retroarch-core-options.cfg file.

cap32_autorun = "enabled"
cap32_Model = "6128"
cap32_Ram = "128"
fmsx_mode = "MSX2+"
fuse_machine = "Spectrum 128K"
gambatte_gb_colorization = "custom"
mame2003-skip_disclaimer = "enabled"
mame2003-dcs-speedhack = "enabled"
mupen64-gfxplugin = "rice"
mupen64-gfxplugin-accuracy = "low"
mupen64-screensize = "640x480"
tgbdual_gblink_enable = "enabled"
nes_palette = "asqrealc"
nes_nospritelimit = "disabled"
picodrive_input1 = "6 button pad"
picodrive_input2 = "6 button pad"
picodrive_sprlim = "disabled"
picodrive_ramcart = "disabled"
picodrive_region = "Auto"
picodrive_drc = "enabled"
Configuring MAME Controls
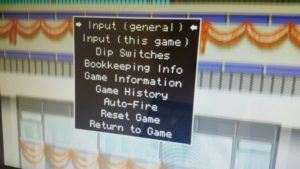
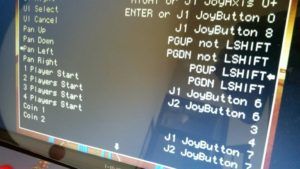
We need to now configure MAME controls as you would any other MAME system. Boot a game in MAME and press TAB on your keyboard. Then go to input general. You will want to configure your start/coin keys for each player along with the player buttons. To do this highlight 1 Player Start and press enter on the keyboard. It is waiting for you to input or press the button you want to be 1 player start. In our case it is J1 JoyButton 6. That should show up as soon as you press that button. Continuing configuring all the buttons and make sure to configure both pause and exit to the appropriate buttons.
If you want to change controls for a specific game like Mortal Kombat, do the same thing but boot the game you want to change and after hitting the tab key select Input (this game).
Touch UP your RetroPie Setup
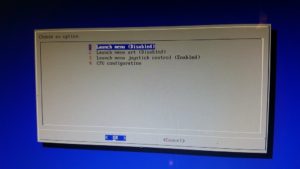
You will notice when you launch a game it throws a message up each time. To eliminate it simply go to the retopie settings and select the first option Configure ‘RUNCOMMAND’ Launch Script
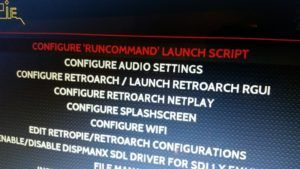
Simply disable the launch menu and you can also enable/disable if you want the artwork to show prior to launch. Cancel out when done.
Thats it!!!! Your RPI3 should be fully configured and ready to play.
Again check out our shop if you need a cabinet or parts! Also stay tuned as we will be posting how to add Kodi Home Theater to your Arcade along with Daphne for some Dragon’s Lair and Space Ace!